Showing posts with label Cook's Illustrated. Show all posts

Sunday, June 9, 2013

Different than the day before


Costco had raspberries for about $4 for 12 ounces the last time I was there.  I bought 3 packages, with the intent of making Jeni's raspberry sauce with a lot of them.  I made a double batch of the sauce, and ended up with about 2 pints.  Some will almost certainly end up inside or on top of ice cream, and I'll probably eat some with yogurt, but I've been looking for other things to make as well.  I was in a brownie mood today, and decided to try swirling some sauce on top of the batter before it went into the oven. The brownies are the Classic Brownies from Cook's Illustrated--I made half the recipe (in an 8" pan), throwing in some chocolate chips instead of adding nuts.  I dolloped about 50 grams of raspberry sauce on top of the batter and swirled it in with a chopstick.  I baked the brownies for 30 minutes.  

The verdict?  Quite tasty!  Raspberry and chocolate is one of my very favorite flavor combinations.  The girls thought they were good but weren't totally thrilled.  That's okay, since that means more for me! =)


Monday, January 28, 2013

The darkest hour


Do any of the rest of you get up early to bake?  I've always been more of a morning person than a night owl.  Plus, there's something so nice about being up before the sun, when the day is still so quiet and undisturbed.  I get so much more done then than if I stay up late to finish something.

Today, it was getting up to make a batch of Swiss meringue buttercream.  (Dorie's recipe from BFMHTY.)  I've made it so many times now, I could practically do it in my sleep. =)  It helps that I had leftover egg whites in my fridge.  I made the cupcakes last night--the Ultimate Chocolate Cupcakes from Cook's Illustrated, minus the ganache filling--and this way they had plenty of time to cool completely.  B surprised me by saying that if she had to pick just one frosting flavor, it would be vanilla.  (She originally wanted me to do a chocolate/vanilla swirl.)  She picked the wrappers, and we decided pink edible glitter would coordinate nicely.

It's so fluffy!!!

Sunday, January 20, 2013

Currently...


I'm still trying to get back in a blogging mood, so I thought I'd borrow something from my friend Anandi.  Back at the beginning of last week, she posted a list of things currently going on in her life.  The idea originally comes from Kristin, who decided to do this as a series on her blog this year.  I figured it would be worth a try, to give me prompts to write about.  So here goes...


Watching:  HOCKEY!!!  I'm so happy that hockey is finally back.  We really need to make plans to attend another live Texas Stars game, too.  We got a bit of "divorce hockey" today.  My husband's Flyers played my Sabres.  I need to get more familiar with the players again--I kind of wish I was playing fantasy hockey this year, since that forces me to pay more attention.

Reading:  Assorted things, including the new cookbooks I got for Christmas.  Today it was the one pictured up top, Cook Illustrated's The Science of Good Cooking.  Many of the recipes are familiar from the other CI volumes that I own as well as the website.  One of the things that I love most about CI is their explanation of their testing methods and the science behind the recipes they come up with, so this book is right up my alley.

Listening:  Another Christmas gift, Maroon 5's Overexposed.  Yes, it's been out for months, but I didn't buy it because I've been trying to leave stuff on my wish-list for J to buy. =)  He said he would have gotten it for me sooner but he had to order the non-explicit version since he knew the girls would want to listen to it in the car with me.


Making:  Lots of stuff, the past couple of days!  Which is a refreshing change, since I've been feeling kind of stuck with baking as well as blogging lately.  Today's dessert was chocolate mousse, again pictured up top.  I also made an impulse buy at Central Market this morning and picked up a carton of blood orange juice.  I've already made David Lebovitz's orange caramel sauce with it, and will have to see what else I can use it in.  I've also mixed up the starter to make these Asiago Bagels from KAF tomorrow.

Feeling:  Pretty good.  The main thing that I'm focused on right now is the Cultivating Courage course that started last week.  When I took it back in October, it was every day for 30 days, including weekends, and I liked the continuity of that.  This time, it appears to be just Monday through Friday.  I was initially disappointed by that, but having a break from new activities over the weekend allowed me to catch up on reading what others in the class have been up to.  And I can still do new brave moves on my own if I want.

Planning:  Cake, cupcakes and the meal for Brianna's birthday on Friday.  She's going to be 10--how is that possible?!  I'm glad that we have the day off tomorrow (me from work and the girls from school).  That will give me some more time to prep things so the end of the week won't be quite so crazy.  For school, she's requested chocolate cupcakes topped with swirled chocolate and vanilla Swiss meringue buttercream.  For the cake at home, she wants chocolate mousse cake.  I made one for Christmas that was chocolate sponge cake layered with chocolate mousse and coated with poured ganache.  She liked it so much that she asked me to make another one.  I wasn't thrilled with the mousse I made last time, so today's dessert was due to me test-driving an different recipe.


Loving:  This great necklace that I ordered from Anandi with my One Little Word for this year.  There's still a post coming with my reasons for picking that word and how I hope it will shape my year.  After last year's focus cake, I want to make another baked good to feature this word.  I'm still trying to decide what to make.

Okay, that's my list for right now.  I'm not sure if this will become a weekly activity or if it will be less often, but I think it will be a good way to help me work through some of my blogger's block. =)


Thursday, December 13, 2012

Let it snow?


Good morning!  It's relatively rare lately that I managed to work on a post any time other than late at night, but I have the morning off.  We've finally been getting a taste of winter weather (overnight temps below freezing) down here in central Texas, and I'm really enjoying it.  There's just something so nice about a hot cup of tea and a warm muffin on a chilly morning.  No chance of snow, though, so I'm having to find my own snowflakes. =)  

I could have sworn that I'd already done a blog post on these muffins.  I've certainly made them plenty of times.  But I've found that there are a number of favorite recipes that for whatever reason haven't made it onto the blog.  It's time to do something about that.  These Coffeecake Muffins are from Cook's Illustrated, January 2007.  The recipe uses the food processor to mix everything up.  That alone should tell you how much I love them, because I am not often willing to pull out my food processor, since I hate washing it.  The batter is done in several steps, but after you've made the recipe a time or two, it becomes pretty easy to throw together.  One of the options in the recipe is to top the finished muffins with a powdered sugar glaze.  We always do that, since we love glaze.  Plus it helps keep the streusel on top from falling off. 

This batch of muffins also gave me a chance to try out the new snowflake papers that I got from KAF.  I don't like the design quite as much as the ones I ordered last year, but they're still nice.  I've said it before, but it is so worth it to spend the money on quality supplies.  The papers come off easily, without destroying whatever is inside, and the colors show up well, too.  


The verdict?  Of course, these were a hit with the whole family, as always.  We love coffeecake, and it's so handy to have it already portioned out.  Brianna and Gillian don't like nuts in baked goods, but they don't seem to have figured out that there are pecans in the streusel--they eat these up.  The muffins keep pretty well, and provided the girls with breakfast for several days.  I recommend microwaving the leftover muffins for about 10 seconds before eating them.  I think these would make a holiday breakfast treat.

If you'd like to give these a try for yourself, you can find the recipe here at Cook's Illustrated.  If you have a copy of Baking Illustrated, they're in there, too.


Thursday, November 8, 2012

Let sleeping monkeys lie


I don't have a whole lot to write about today.  As my husband said when I asked him how he was doing, "It's Thursday."  That day when we're all exhausted but it isn't quite Friday yet.  And I do mean exhausted.  I went upstairs to check on Gillian, because she was taking forever to come downstairs after taking her shower.  I found her lying on the bathmat, wrapped up in her hooded monkey towel, sound asleep.  I admit, I thought about taking a picture. =)  But instead, I manage to rouse her enough to get the towel off and her pajamas on.  She pretty much sleepwalked to her room--I'm not sure she was actually awake.  

In other news, I took cake to work today for one of my employees, since it was her last day with us.  She loves yellow cake with chocolate frosting.  Since that's a favorite of mine as well, I was happy to make it for her.  I actually tried two new recipes for this one.  The cake is the Golden Vanilla Cake from King Arthur Flour.  I made the full recipe and ended up with two 8" rounds and half a dozen cupcakes.  For the frosting I wanted something that wouldn't overpower the cake.  I went with the Foolproof Chocolate Frosting from Cook's Illustrated.  It uses milk chocolate, which seemed like a good match for the vanilla cake, and also cocoa powder, so it's still really chocolatey.  (I was actually a little short on milk chocolate, so I made up the difference with a bit of bittersweet.)  The final combination of cake and frosting was really good, and well-received by everyone at work.  I'll be making this one again. =)

Forgot to add--the stars are edible glitter, which you can find here.
  

Sunday, September 9, 2012

Weekend wind-down 9.9.2012


Okay, I have to admit that I'm totally stealing this idea from my friend Kayte, who often posts a Sunday Snippets on her blog as a summary of what's been going on during her week.  I have a whole bunch of odds and ends that I can talk about, but nothing that I want to write an entire post about.  I thought about doing a Wordless Wednesday-ish sort of thing, since I have some pictures, but I realized that I do have some words to share as well.  So here we are. =)  If I like the way this works out, it might even become a weekly thing.

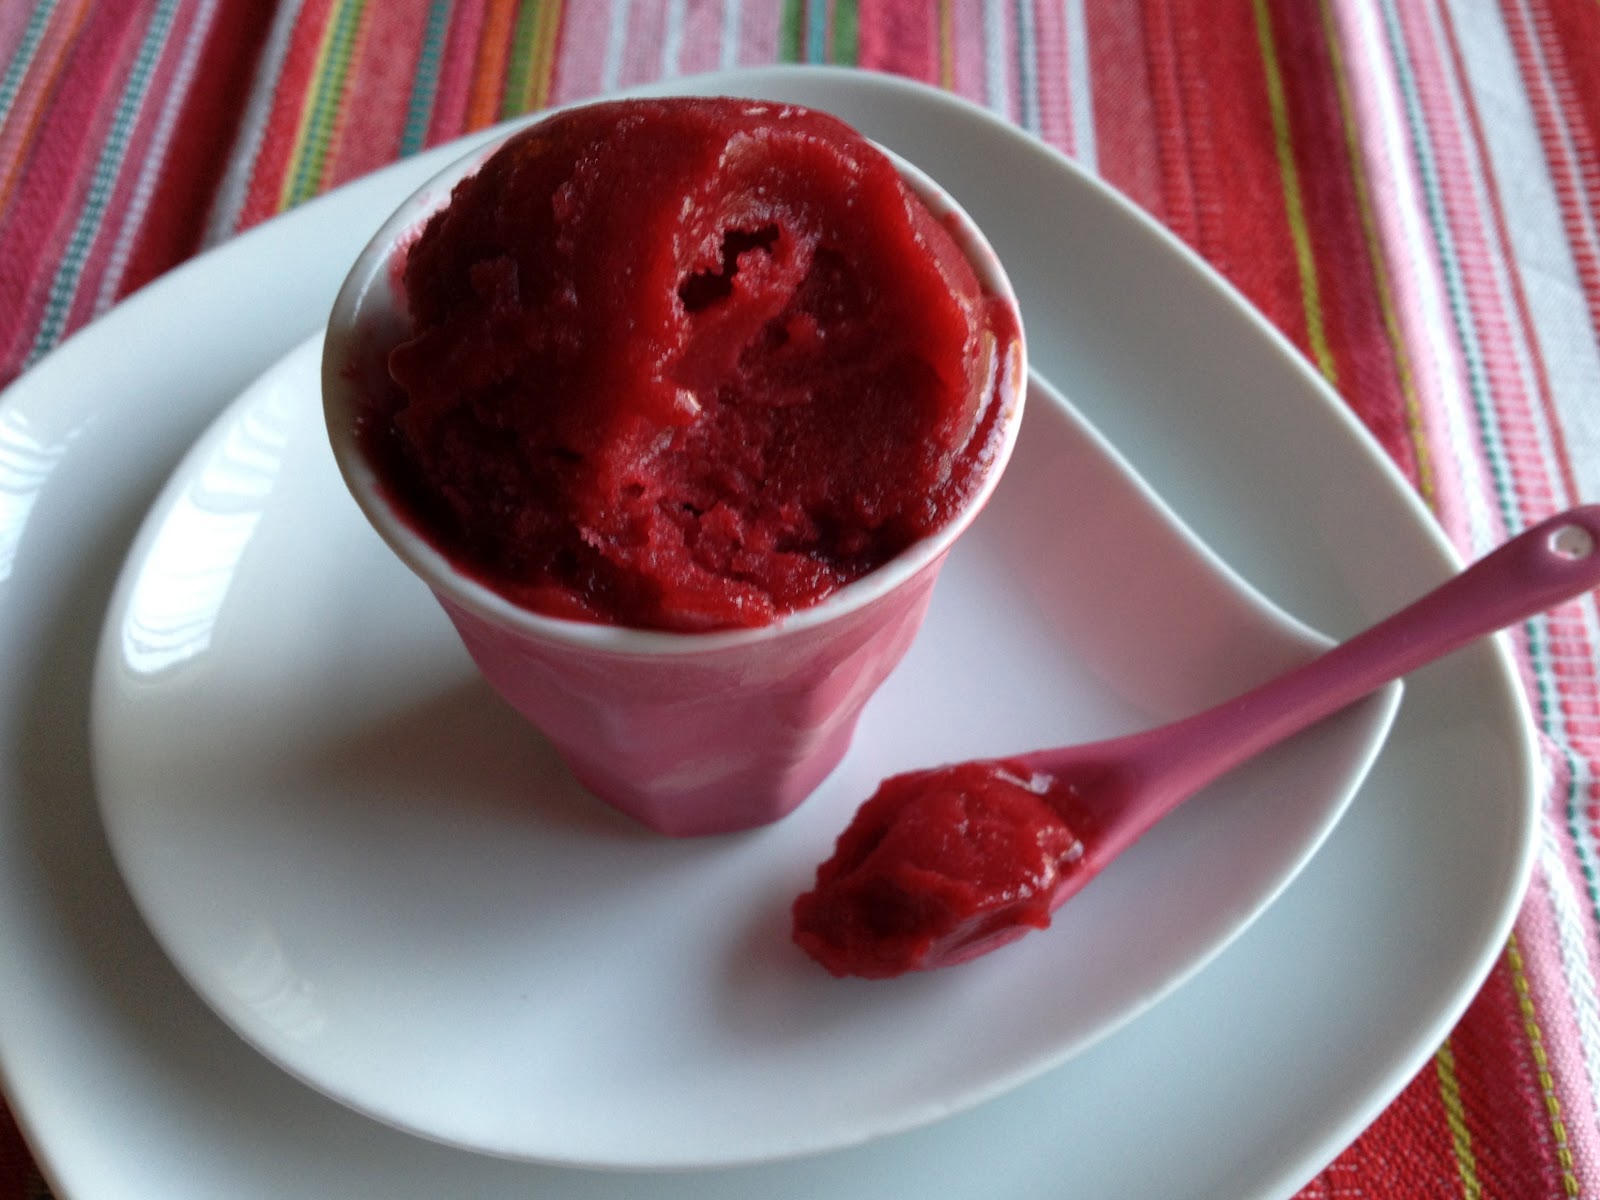
Above is my dessert from tonight.  I'm trying to will autumn to come to Central Texas sooner rather than later.  Summer is my least favorite season.  I dislike the heat, I don't really grill, and summer meals aren't the ones I really enjoy making.  We had a brief taste of fall weather this weekend--the highs were still around 90 (I can hear my northern friends thinking, how can she say that's fall weather?), but the low this morning was about 60, which we haven't felt in months.  We might get one more run of temperatures around 100, but maybe we'll get lucky and avoid it.


I've been craving fall flavors big time, things like apples and pumpkin and warm spices.  I had a short day on Friday, and spent part of my time at home making spice cupcakes.  I tried a recipe that I hadn't made before.  (It's from the Cook's Illustrated Cookbook.)  It was originally for a 13"x9" pan, and I made it as cupcakes.  It was a mixed success.  The flavors were great, but the batter spread too much and the cake's crumb was too delicate in cupcake form.  It did give me a chance to use my new cupcake papers from my recent KAF order, though.  I took a bunch of the cupcakes to work, where they got rave reviews.  The rest got crumbled up and layered with some homemade applesauce (I found some enormous Paula Red apples at Central Market the other night) and whipped cream.  Yum!


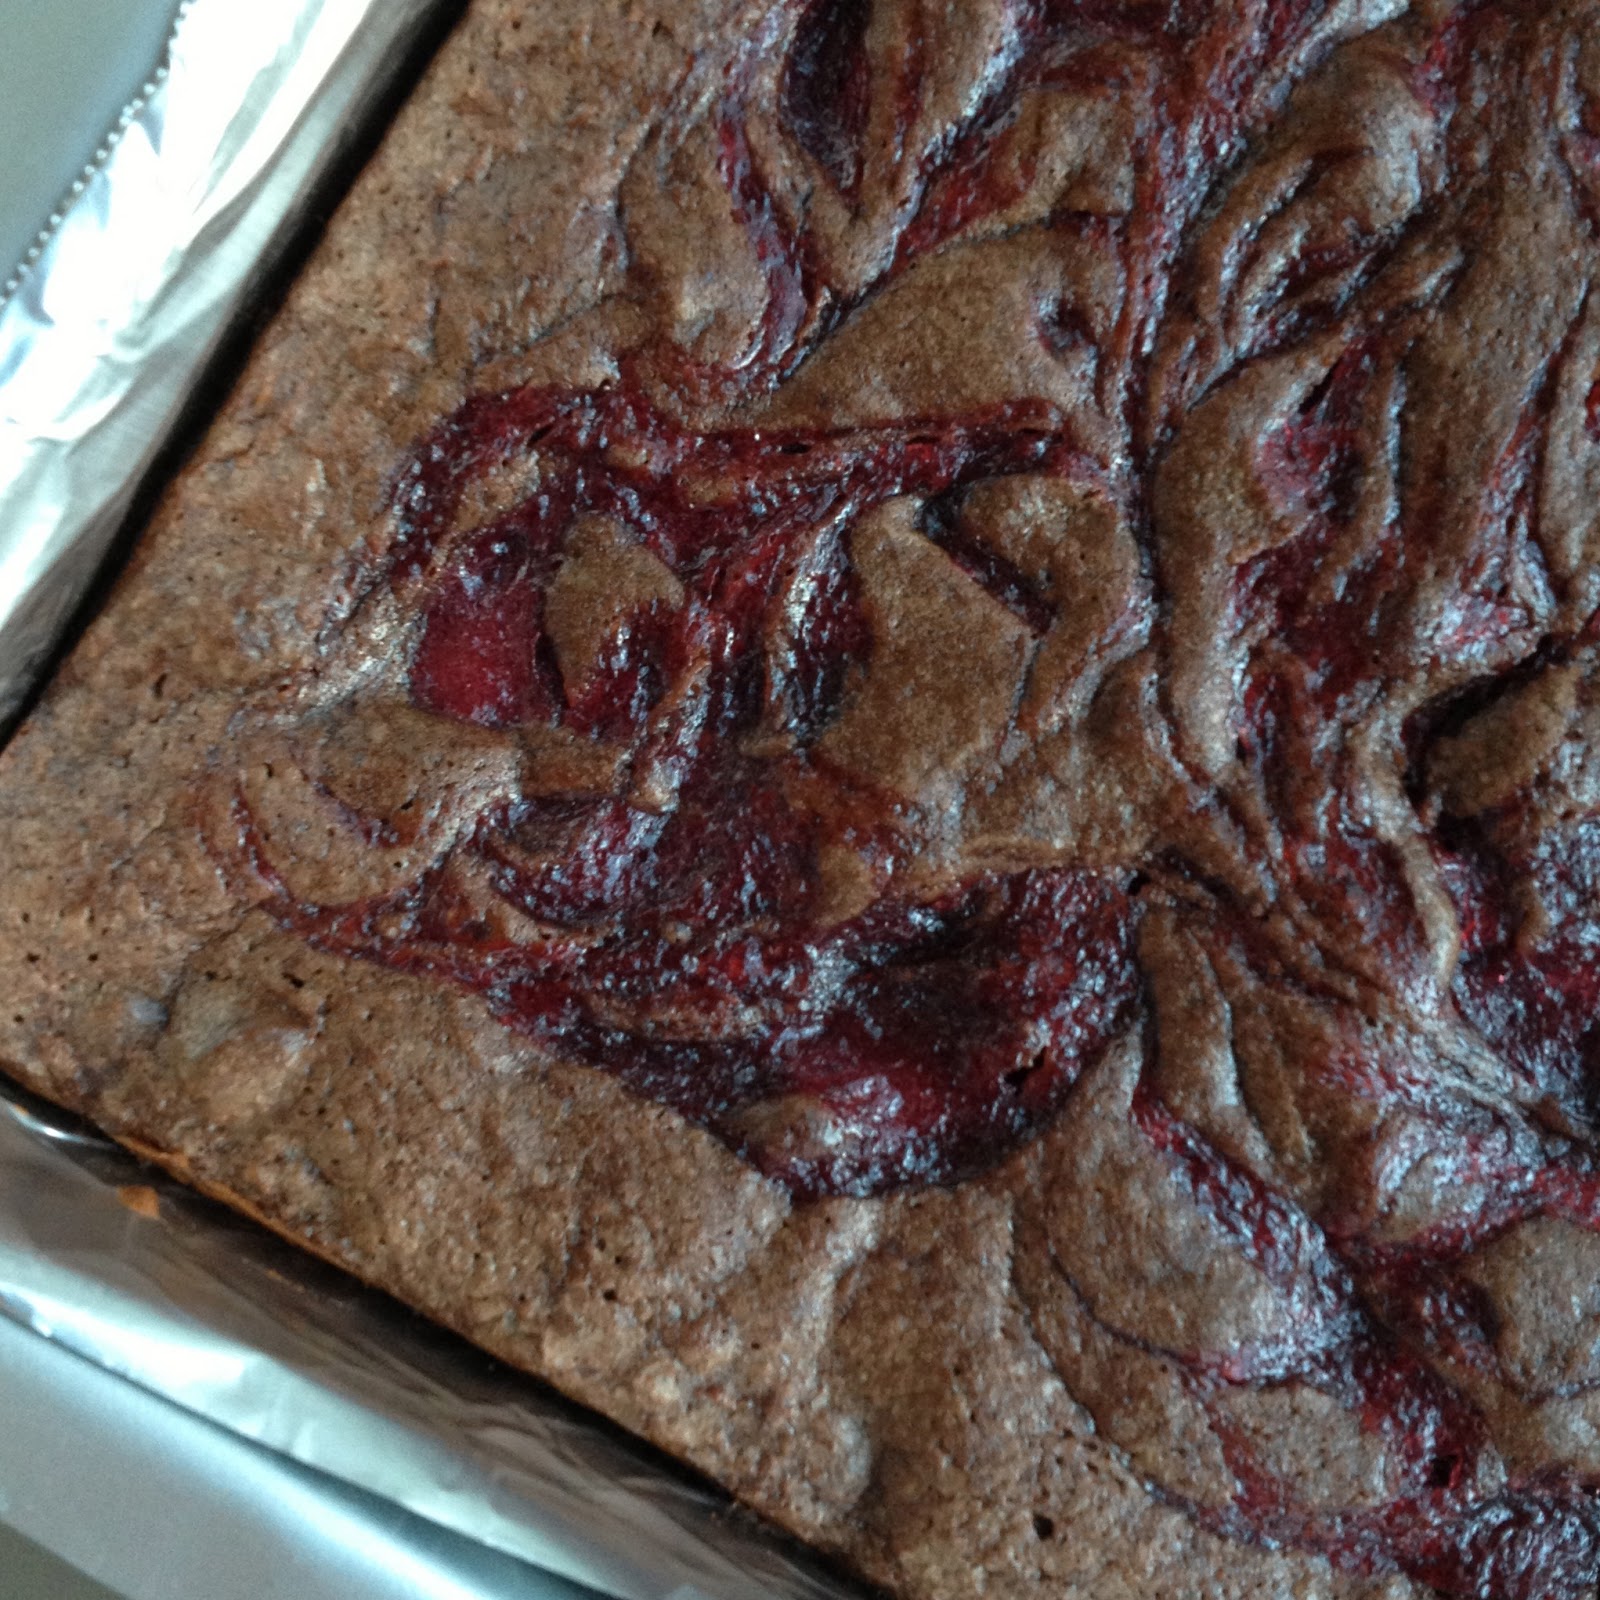
My other major baking activity for the week was the Nectarine Upside-Down Chiffon Cake for Tuesdays with Dorie.  I actually made it on Tuesday, but ran out of energy to post about it.  The verdict?  I like the cake, but I'd make a few changes next time.  The main thing would be to use a tarter fruit, either regular nectarines (I used white ones) or maybe plums.  The cake was also at its best the first day; it got soggy after that.  Thanks to Marlise and Susan for hosting this week.  And everyone else's results can be found on the Links page.


Getting back to fall flavors...  Gillian was quite concerned that Central Market had Halloween stuff out this week.  At least they waited this long.  Most of the candy I can take or leave, but I do have one notable weakness.  I can resist the regular candy corn--I don't buy it, because if I do, I'll eat it without really thinking about it and then wonder, "why did I do that?" when I end up with a queasy stomach.  But a few years ago I discovered caramel candy corn.  This stuff is awesome.  Tooth-achingly sweet, which isn't usually my thing, but so tasty.  


I'll leave you with some kid news.  This picture is actually from last weekend.  Gillian was pretty happy to lose the second of her top front teeth, since it had been pretty loose and annoying.  This way she still can't bite into a lot of stuff, but she doesn't have a wiggly tooth in the way, either.  Both girls were a bit under the weather this weekend.  Both were in daycare from a very early age, so we dealt with a lot of germs and built up their immune systems early.  But G is at a new school this year for kindergarten, with lots of new people and their different germs.  Plus she's been really tired from the adjustment to a new schedule.  So I'm not terribly surprised that she got a cold already (and shared it with her sister).  Here's hoping things improve as we all get into the new routine.  

Well, that's all I have for now.  My goals for the next week include figuring out some new ideas for school lunches as well as some new easy dinner ideas.  (I'm open to suggestions if you have them!)  I'm also reacquainting myself with Pinterest.  A bunch of my blogging/tweeting friends use it, and I'm starting to see why.  I've had an account for quite a while, but haven't spent any time with it.  We'll see how it goes.

Wednesday, August 8, 2012

The most important meal of the day


Amazingly enough, here it is.  My second post in three days.  Thanks again to Phyl for getting me motivated.  Part of my blogging slump has been due to lack of time.  Work has been kicking my butt.  I get up a bit before 5:00 and spend the next 60 to 70 minutes getting myself ready for work, packing my lunch, getting breakfast/snacks together for the girls.  Then I attempt to pry my daughters out of bed (so they can start getting dressed, etc.) before I run out the door with my travel mug of tea in hand.  This morning was no exception.  I got to work just before 6:30 and spent the next half an hour getting things ready for the work day.  At about 7:15, it occurred to me that I was hungry and that I should get my breakfast out of my bag.  There was only one problem--my bagel was still sitting at home in the toaster, waiting to be toasted.  D'oh!

Maybe I should have had a whole serving of this sorbet at 5:30 this morning, instead of the single spoonful that I snuck as I was checking on it to see if it had firmed up overnight.  I made the base last night as I was feeding the girls dinner, and churned it as I was making mine & Jamie's.  Then it went into the freezer for the night.  I was intrigued by this recipe when I first got my July/August issue of Cook's Illustrated.  I've made sorbet recipes before, but this one promised to tackle a number of problems that you can encounter with sorbet--grainy or crumbly texture, being too hard to scoop, and melting too fast.  The ingredient list is pretty straightforward--raspberries (I used frozen ones that I thawed), sugar, corn syrup, salt, water and one slightly unusual ingredient, pectin.  I definitely encourage you to read the article that explains how they came up with the final method (here online, or better yet, in the magazine (check your local library)).  


The verdict?  Very, very tasty.  The tartness of the raspberries is one of my favorite things about them, and there's just enough sugar to sweeten without making the sorbet taste very sweet.  I'm not sure the texture is quite right, but it just occurred to me that I think I goofed.  The recipe calls for 20 ounces of raspberries.  I had two bags of frozen raspberries, and I was thinking that they were 10 ounces each.  However, I'm pretty sure that they were actually 12 ounces, so I had about 20 percent more puree than I should have.  I'm sure that would be enough to throw the texture off a bit.  I definitely want to make this one again, so I'll see if there's a difference once I correct that.  Just from my limited experience with the sorbet so far, it does seem like it doesn't melt as quickly as some I've tried, so the pectin is doing its job.  I have a whole bunch of the pectin left, so I'd like to try it in other sorbet recipes, like this chocolate one.  

If you'd like to try the sorbet for yourself, you can find the recipe here.  Phyl has a perfect-for-summer frozen wine slushy on his blog today, and will have links to other non-dairy frozen treats.  Check them out! =)


Wednesday, June 6, 2012

Be good to yourself


So, do any of you totally beat yourselves up after making a mistake?  I just can't seem to stop.  Logically, I know that I just need to learn from it and move on, since I can't change what's already happened.  But emotionally, I can't let it go.  I go over and over things in my head, finding all of the things that I think I should have noticed at the time.   Of course, hindsight is 20/20, and the more I think about it, the more stupid I feel. (And of course none of this is helped by the fact that I've been really, really tired due to my crazy work schedule the past couple of weeks.)

I really need to stop being such a perfectionist.  Yes, it's important to do a good job.  But the world won't end if things aren't totally perfect.  I'm that way about way too many things in my life, including baking.  I can't seem to help apologizing for everything, including things that other people wouldn't have any clue about if I didn't say anything.  I'm starting to realize that it keeps me from blogging more, too.  I worry that my pictures don't look good enough.  I worry that what I write about isn't interesting enough.

So how do you deal with this sort of stuff?  How do you get yourselves out of a funk and back to being more productive?


I debated whether to share these cookies.  After all, I've already blogged about the base recipe, the Cook's Illustrated Perfect Chocolate Chip Cookies.  Why would anyone be interested a relatively small change that I made?  But what the heck--I like the way they turned out, and maybe you wouldn't think to do it on your own, or wouldn't know how to go about it.  It may have seemed to me like an obvious thing to try, but not everyone thinks like me.  (Thank goodness, or we'd all be too busy worrying to ever get anything done!)

I've altered cookie doughs in the past by substituting cocoa powder for some of the flour in the recipe.  You don't want to just add cocoa, or you'll end up with dry cookies.  Cocoa has a starchy quality to it, so it can fill in for part of the flour.  I decided to swap out about half a cup.  I prefer the flavor of natural cocoa, so that's what I used.  I wanted to bring out as much of the chocolate flavor as possible, so I took a tip from some of the chocolate cake recipes I make--a number of them mix cocoa with boiling water so the flavor can "bloom."  I didn't have water in this recipe, so I whisked it into the warm browned butter before adding the sugars.  Other than that, I followed the recipe as written.  For the mix-ins, I wanted a couple different types, so I split the dough in half.  Both portions got chocolate chips, but one half also got peanut butter chips while the other got white chips.  I like chocolate and peanut butter, but Gillian recently informed me that she does NOT like the PB chips.  Plus I wanted to be able to pack some of the cookies in Brianna's school lunch (this was about a month ago), and she really shouldn't take things with peanut butter.


The verdict?  Well, happily, I'm doing a lot better than when I started writing this post this morning.  I got past the sick feeling in my stomach and got mad at the situation, instead of just at myself.  And the cookies?  They were much appreciated both at home and at work.  I'll definitely be making this chocolate version again.  If you'd like to give it a try for yourself, here's the ingredient list I used.

Chocolate Chocolate Chip Cookies
(adapted from Cook's Illustrated)

200 grams all-purpose flour
45 grams natural cocoa powder
1/2 teaspoon baking soda
14 tablespoons unsalted butter, divided
100 grams granulated sugar
150 grams dark brown sugar
1 teaspoon table salt
2 teaspoons vanilla
1 large egg
1 large egg yolk
340 grams mix-ins of your choice

For the recipe instructions, head over to Cook's Illustrated.  The recipe is also in the new Cook's Illustrated Cookbook.


Sunday, April 8, 2012

Easter eggs


I don't like hard-boiled eggs, but I'm still the one who makes them. =)  Jamie & Brianna eat them; G is like me and won't touch them.  So I don't usually make very many to dye at Easter, since I don't want to have a bunch of eggs that don't get eaten.  Plus G is still young enough to need help, and my patience with egg-dying wears thin pretty quickly.  Maybe we'll do more next year.

The recipe I use is from Cook's Illustrated; it works great.  You put the eggs in a pot filled with cold water and bring it to a boil over high heat.  Once the water boils, you turn off the heat, cover the pot, and let the eggs sit in the hot water for 10 minutes.  At that point, I move the pot to the sink and run cold water in it until the water is all cool, then add a whole bunch of ice to the pot.  I usually leave the eggs in there until most of the ice has melted, then dry them off and put them in a carton in the fridge.

You can find the actual recipe here at Cook's Illustrated.

Sunday, March 11, 2012

Citrus Sunday - Triple Citrus Bars


I've mentioned before that I love cooking magazines.  It was such a revelation the first time I ever read one (thanks to my wonderful husband who thought it would give me something to do while I was wiped out by the flu 13 years ago).  There are so many enticing new recipes in every issue!  Lots are seasonally appropriate, so sometimes I'm inspired to drop what I'm doing and make a new recipe right away.  That happened with the July/August 2006 issue of Cook's Illustrated.  Amazing that I remember that almost 6 years ago, isn't it?  The recipe that grabbed my attention was for Key Lime Bars.  I immediately made a double batch to take to a 4th of July potluck.  They were a huge hit and several people asked for the recipe.  I made the bars several times shortly after that, but as often happens, I got sidetracked by new recipes after that and have only made them maybe once or twice since then.

When I was trying to come up with a good citrus recipe for my blog event, I considered several ideas.  I even made an orange & vanilla bundt cake that turned out pretty good, but just wasn't quite what I was looking for.  I'm always short on time and frequently indecisive as well, so it really isn't surprising that I was sitting here yesterday (yay for a Saturday off!) still trying to decide what to make.  I turned to Eat Your Books to see what I could find on my bookshelves.  I bought some limes when we were shopping Friday night (to add to the lemons, tangerines & tangelos already in the fridge), so I started off searching that.  Nothing jumped out and grabbed me, so I thought to try searching for "citrus" instead.  Bingo!


Triple Citrus Bars came up a couple times in the list--they're a variation on the Key Lime Bars, and can be found in the magazine (online) as well as in the new Cook's Illustrated Cookbook.  Instead of just lime juice and zest (you can use either key limes or regular Persian limes), you use lemon and orange juice and zest as well.  The zests are used in equal amounts (1 1/2 teaspoons of each), but most of the juice is lime, with just a tablespoon each of lemon and orange.  I actually used tangelo zest and juice instead of orange, since that's what I had.

Rather than graham crackers, the crust is made with animal crackers.  They are pulsed in the food processor along with some brown sugar and a bit of salt and then melted butter is added to bind everything together.  This recipe gave me a change to use a new baking pan that I bought myself for my birthday--a Fat Daddio's 8" square baking pan.  (I love my Pyrex baking pans, but they don't work well for everything.)  The crust is baked for 18-20 minutes, which allows enough time to mix up the filling.  The filling consists of cream cheese, the zests, a bit of salt, sweetened condensed milk, an egg yolk, and the citrus juices.  Once the crust is baked and cooled for a few minutes, the filling is added and the bars are baked for another 15-20 minutes.  The bars are allowed to cool to room temperature, then are refrigerated for at least a couple hours.


The verdict?  These aren't quite as tart as the straight lime ones, but I like the flavor that the mix of fruits brings to the bars.  As the test kitchen cooks determined, the addition of the cream cheese and egg yolk helps firm up the filling so that it can be cut into neat bars.  I'm definitely not going to let so much time pass before I make these bars again.

If you'd like to try the recipe, you can find it here on the Cook's Illustrated website, or in the Cook's Illustrated Cookbook.  And be sure to check out all the other yummy citrus recipes that my blogging friends have made!  If you'd like to join us in the future, leave a comment or email me at diskitchennotebook at gmail dot com, and I'll add you to my email list.


Wednesday, January 18, 2012

Tuesday, January 17, 2012

P is for perfect, they're close enough for me


Monday was a mostly lazy day around here.  I was lucky enough to have the day off due to the holiday.  It was just me and Brianna at home; I sent Gillian to daycare so I didn't have to listen to the two of them arguing. =)  Actually, it was just as much because I knew I needed to take Brianna shoe shopping, and you couldn't pay me enough to do that with both of them in tow.  (I like to think I've learned my lesson--the hard way--with that one.)  I was pleasantly surprised that the shopping went pretty quickly.  I was just plain old surprised at how much B's feet had grown--the salesperson said that the new shoes she picked run a bit small, but we still had to buy a size 4 (!) to make sure she had a bit of growing room.  Crazy.


Other than the shopping, we were pretty lazy--we sat around and watched cartoons.  I napped; Brianna read.  I did summon up the energy to bake some cookies, though.  This is yet another one of those recipes that I've made a whole bunch but never blogged.  Everybody needs a good chocolate chip cookie recipe in their repertoire.  For the longest time, mine was the one in my Betty Crocker cookbook, and I do still make that one sometimes.  But a couple years ago, Cook's Illustrated published a recipe for what they claimed to be the Perfect Chocolate Chip Cookie.  

Their definition of perfect is cookies that are chewy in the middle but crisp on the edges, with lots of buttery, toffee-like flavor.  Sounds pretty good to me!  The keys to achieving that flavor are browned butter--melted butter makes for a chewier cookie, and browning it adds flavor--and dark brown sugar.  For the texture, besides melting the butter they went with a somewhat unique mixing method to dissolve some of the sugar (helps with the crisp edges) and also removed an egg white for more chewiness.  The recipe says it makes 16 cookies.  Those must be some huge cookies!  I made mine smaller (still about 3" across) and got twice as many.  I baked them for 12 minutes.  For this batch, I skipped the nuts (which I'd like but my girls wouldn't eat) in favor of a mix of semisweet and bittersweet chocolate chips.  


The verdict?  Well, the dough itself is extremely dangerous--to the point where I'm not usually very interested in eating the cookies once they're baked because I've eaten too much dough. =)  I'm a sucker for anything with browned butter.  The baked cookies are really good, too.  I've made quite a few variations over time--the most popular (with people outside my house) was probably the batch I made with pecans and white chocolate chips.  This recipe is my pantry focus for this month--I always have the dough ingredients on hand, and the mix-ins can be whatever I have in the pantry that sounds good.

If you'd like to make these for yourself, you can find the recipe here at Cook's Illustrated.  My friend Tracey also has it on her blog.  


Wednesday, January 11, 2012

Warm and toasty


So I said that more information would be coming on how I want to focus on my blog this year.  It took me a few days to come up with a plan that I think will work well.  My initial problem was that there are so many things I'd like to do.  I have a ton of cookbooks, and I don't use them nearly enough.  Ditto with the cooking magazines that I read regularly.  I have lots of baking pans these days, and don't use them enough either.  I have lots of great cooking tools, and interesting ingredients.  When I started to think about all the possibilities, I didn't know where to begin.  That's where the focus idea comes in.  I started to make a list of ideas, and here's what I came up with:

Cookbooks
Magazines
Friends (featuring a recipe from a friend's blog)
Kids (cooking with, or stuff they would like)
Ingredients (maybe seasonal?)
Pantry (using what I routinely have on hand)
Bread (I want to make at least one new one a month)
Pans (I have lots of interesting ones, and lots of different sizes)
Tools

I stopped there--nine is my favorite number, and nine seemed like a reasonable number to fit into a month's time.  Some recipes may fit into more than one category, but I'll post at least one for each separate category each month.  I'm not going to do them in any particular order, since I don't need that much pressure.  This idea appeals to me because it's sort of like a puzzle.  Some categories may be easy to cover in a given month.  Then I'll have to see what I can come up with to fill in the blanks.  For January, I've already done Tools (my balloon whisk) and Magazines (the fudge cake was from Fine Cooking, one of my favorites).  I've got ideas for all but Kids and Pantry, but it's fun to try to figure out what to make for those categories.  This post is going to take care of Cookbooks.


I thought I'd go with one of the new cookbooks I got for Christmas.  The Cook's Illustrated Cookbook is quite the tome, and contains all the best recipes from 20 years worth of magazine issues.  I love my website subscription to CI when I'm searching for something, but I really enjoy browsing through a physical cookbook--that way things can jump out at me that I might never think to search for.  In this case, I knew I wanted to make scones for breakfast because when I ask the girls what I should make, the answer is always "Scones! With chocolate chips, please!"  I wanted something a bit more interesting than a plain scone.  As for the chocolate chips, I'm not always in the mood the way they are, but it's pretty easy to divide the dough (usually two-thirds for them, one-third for me) and add in different things.  I settled on the Oatmeal Scones--never hurts to sneak in some fiber when the girls aren't paying attention. =)

The thing that intrigued me about this recipe is that you toast the oats before you start mixing things together.  I never would have thought to do that, but it makes sense that, like with nuts, it would add to the flavor.  There are several variations at the end of the basic oatmeal scone recipe.  I love maple scones, so I went with that option.  In place of the granulated sugar, you use maple syrup (I used grade B).  I also toasted some pecans to add to my part of the dough and I put a mix of semisweet and bittersweet chocolate chips in the rest so I wouldn't have to listen to B&G complain. =)  I think the substitution of the maple syrup made the dough stickier than usual, and I didn't think I could pat it out without having to use a lot of flour.  So I made drop scones instead.  I used my #16 disher and got an even dozen.  I baked them for 12 minutes, but could probably have left them in a minute or two longer to get a bit more browning on top.  Once the scones had cooled for a few minutes, I drizzled them with maple glaze (just some maple syrup & powdered sugar, with a bit of water to thin it out).

The verdict?  Who would have thought that toasting oats would make such a bit difference in the taste? These are my new go-to scone.  Brianna and Gillian loved them with the chocolate chips; I thought they were terrific with the pecans.  They weren't at all dry; I'm sure the maple syrup helped with that, as did the high baking temp and shorter baking time.  

If you'd like to give these a try, you can, of course, find the recipe in the new Cook's Illustrated Cookbook.  It's also in Baking Illustrated, and can be found online here if you have a membership to the CI website.  

I'm excited about blogging again, so I think my focus idea is going in the right direction.  I've added a tab at the top of the blog where I can keep track of the different categories each month.  I'm also tagging the individual posts (e.g. this one is labeled with "cookbook focus" among other things) so they can be searched that way.  Next up, another new acquisition--my 6-cup Bundt pan!


Tuesday, December 20, 2011

Rolling into the holiday season


Yay!  I'm finally on vacation and getting caught up on some of the things I haven't done for the past few weeks.  Blogging is high on that list.  So are Christmas shopping and baking.  I should actually be baking right now, since tomorrow is the last day of school before break, and there are teacher treats to be made.  However, when I thought that I would have lots of time in the kitchen while the plumber was here this morning, I didn't consider the fact that he'd have to turn off the water for some of the repairs.  (Nothing serious, just little things that we don't want to turn into bigger things, and that J didn't want to tackle.)  I'm too messy to even thing about doing anything in the kitchen without being able to wash stuff (including my hands).

So this is the perfect time for me to tell you about a fabulous dessert that I made for a holiday potluck a couple weeks ago.  Right when I was trying to decide what to make for the party, I picked up a magazine full of Chocolate Desserts (one of the newsstand-only issues from Cook's Country).  It had lots of yummy ideas in it, but the one that really caught my eye was the Chocolate Roulade.


A roulade is something rolled up, which in this case is a cake.  You often see them this time of year--pumpkin versions for Thanksgiving, and chocolate versions as Yule Logs.  Crazy as it may sound, I'd never actually made one before!  You bake a large, thin layer of sponge cake, turn it out onto a cocoa-dusted towel while still pretty warm, and roll it up (towel and all).  Once the cake has cooled some, you unroll it, add a layer of filling, then roll it back up (which is easier because it was already rolled up once).  You can finish the cake with a simple dusting of powdered sugar or go all-out with a rich coating of chocolate ganache.  

As with almost everything I've made from the folks at America's Test Kitchen, the roulade turned out great.  The recipe recommends making the ganache (chocolate, cream, butter, and a bit of cognac) first, since it needs time to firm up.  The filling can be mixed up next (mascarpone cheese, cream, instant espresso powder and some powdered sugar) and stashed in the fridge until you need it.  The cake bakes quickly, so it's good to have everything else done first.  I learned a couple things while making this recipe.  One is that you really need to make sure that your towel has a lot of cocoa powder rubbed into it, or the cake will stick.  Thankfully, the ganache will cover any imperfections, and the towel was easier to wash out than I expected. =)  Also, be prepared to dirty almost every bowl and whisk you own.  This was one time when I really wished that I had an extra bowl for my stand mixer.  But it worked out okay in the end.


The verdict?  I think it's safe to say that this one was a hit.  After sampling the scraps from the ends I cut off, Brianna's first question was, "So are you going to save some of it for us?"  When I told her that the whole thing would be going to the party, her response was, "But you can make another one for us, right?"  I think Jamie won't mind at all if I do. =)  Gillian wasn't a huge fan of the espresso flavor in the filling, so I'll have to see what I can come up with for next time.  Everyone at the party really seemed to enjoy it as well.  One warning--the recipe says that it serves 8 to 10, but those would have to be pretty big slices, and this is a very rich dessert.  We fed a lot more than that.  

If you'd like to try this recipe for yourself, you can find it here if you have a web membership for Cook's Illustrated.  If have a copy of Baking Illustrated, it's also in there.  And of course you can find the recipe in the same place where it caught my eye--the recent Cook's Country Chocolate Desserts issue.  (If you're wondering about the stars on top, they're from King Arthur.)


Sunday, December 4, 2011

Virtual Cookie Exchange - Not my mother's Spritz Cookies


I mentioned in my post earlier today that I had a holiday party last night.  It was for a bunch of people from work, most of whom have eaten lots of the baked goods that I take to work.  One person walked into the house, commented on how pretty our Christmas tree looked, then walked over to the kitchen (we have a pretty open floor plan) and said, "So this is Di's kitchen, where the magic happens!" =)

There's definitely something magical about Christmas cookies.  I have fond memories of helping my mom make cookies during the holiday season.  There were certain types that we always made every year.  I don't have quite the same line-up now, but there are still some varieties that have to make an appearance.  One of my mom's favorites was Spritz Cookies.  They were usually in the shape of trees, and the dough was tinted green.  My mom had an old school cookie press that required you to turn the handle on top to make the dough come out--definitely a workout with a stiff cookie dough.  One of my sisters has the cookie press, but I do have the recipe.  I don't make it much, though, since it uses all shortening, no butter.  I just love the flavor of butter cookies, so I use a recipe from Cook's Illustrated that first appeared in the magazine in 2004.  


The dough for these cookies is easy to mix up.  First you whisk together an egg yolk, a bit of cream and some vanilla in a small bowl and set it aside.  Next up is creaming the butter, sugar and salt.  Once that mixture is light and fluffy, you mix in the liquid mixture.  Finally, you stir in the flour.  The fun part is playing with the cookie press.  I have one much like this.  It holds just enough dough for a pan of cookies, about 2 dozen of the small trees.  I spooned a little bit of colored sugar on top of each cookie before baking.  

I almost always bake cookies on parchment lined baking sheets, but that doesn't work for these--the dough from the cookie press won't stick to the parchment.  So use an unlined, ungreased pan.  For the best flavor, be sure to bake the cookies until they are just starting to brown around the edges--if they're still completely pale, they won't have that great browned butter flavor.  I baked mine for 12 minutes at 375ºF.


The verdict?  I love these.  The butter and vanilla flavors are immediately apparent, and they have a lovely crisp texture.  The only thing that you might not like about these cookies is how easy they are to pop in your mouth, since they're bite-sized.  The good news is that the recipe makes at least 6 dozen, so you'll probably still have enough to share even after you eat a bunch yourself.  Brianna paid me a high compliment indeed, making a point to say how much she liked these cookies. =)  

Spritz Cookies - ingredients

1 large egg yolk
1 tablespoon heavy cream
1 teaspoon vanilla
225 grams (two sticks) unsalted butter, slightly softened
140 grams (2/3 cup) granulated sugar
1/4 teaspoon table salt
285 grams (2 cups) all-purpose flour

You can find the full recipe online at Cook's Illustrated, or in the current Holiday Baking newsstand issue.  

Check back next weekend for a full round-up of delicious holiday cookies from our cookie exchange!

Logo courtesy of Allifer Designs