Tuesday, December 30, 2008

Of cheesecake and other things...


I'm tired.  And generally out-of-sorts.  It seems like I have no patience at all lately, especially with my children.  And it's really been bugging me that I couldn't figure out what's been making me so ill-tempered.  And then, this morning, it hit me.  I really, really miss my mom.  

I think it's been lurking in the back of my mind for quite a while.  I'm used to not seeing her much, since I only visit my family once or twice a year.  But I hate that I can't just pick up the phone and call her.  And of course, the times when I'm frustrated with the girls are the worst, since that's when I would call her the most.  

*sigh*  This doesn't have much to do with baking, except that my mom is the reason I love to bake.  She taught me a lot, and was willing to let me try new things (in life in general, not just in the kitchen).  And it really hurts that my daughters won't get to learn the things from her that I did.  

Maybe I'll feel better now that I've gotten some of that out.  Thanks for listening. =)  Now on to the cheesecake!


This week's Tuesdays with Dorie recipe was chosen by Anne Strawberry.  She picked Tall and Creamy Cheesecake.  I really wanted to give the recipe a try, but knew that we really didn't need a full-sized cheesecake around here with all the other leftover Christmas goodies.  (Unlike my first Dorie cheesecake.  I've since learned that it's fine to make smaller versions of things.)  So I decided to halve the recipe and make it in my 7-inch springform pan.  It fit quite well.  Fortunately, the quantities in the recipe lent themselves to easy division by two. =)  

I had leftover Oreos in my freezer (from the peanut butter torte--yes, I had them in there for over six months without eating them =) ), so I used them for the crust. I thought about trying one of the filling variations, but was too tired to mess around with anything, so I stuck to the plain recipe.  I did add about a tablespoon of lemon juice, since I like how the tartness cuts through all the cream cheese.  And I used all sour cream (no heavy cream).  My favorite cheesecake is from Rose Levy Beranbaum, and actually uses more sour cream than cream cheese.  My stand mixer made short work of mixing the batter.


I had to guess a bit at the baking time.  I like my cheesecake creamy and not too dense, so I didn't want to overbake it or let it brown on top.  For my smaller pan, I baked it in its water bath at 325 degrees F for 60 minutes.  It was somewhat set, but still jiggly in the middle.  Then I turned off the oven and left it in for about 40 minutes longer, until the middle was pretty set.  I should have let it cool on the counter for a while, but this was at 11pm last night, so I just stuck it in the fridge and went to bed.  

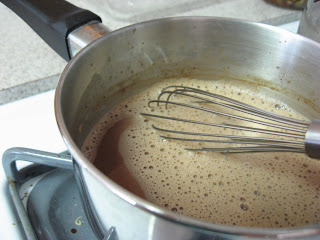
Plain cheesecake isn't very interesting to photograph, so I mixed up some chocolate raspberry sauce to go with it. =)  I started with a recipe for chocolate sauce from Alice Medrich's Bittersweet, and played around with it.  For the raspberry part, I mixed in several tablespoons of raspberry fruit butter and added a splash of light rum to bring out the flavor a bit more.  Yummy.


The verdict?  Ooh, delicious.  The cheesecake has a bit more body to it than my usual one--still creamy, but not quite as silky a texture.  But quite tasty!  How can you go wrong with Oreo crust?  And the chocolate sauce made for a nice contrast.  We'll see how the other taste testers like it later...  

You can find the recipe at Anne's blog.  This one lends itself to all sorts of neat variations, so I can definitely see myself making it again.  Be sure to check out the TWD blogroll for lots of other wonderful cheesecakes!


Delays and cancellations


Check back later...  My Tuesdays with Dorie cheesecake is still chilling in the fridge.  I'll be able to take pictures and finish my post this afternoon.  

And if you're looking for the Daring Bakers December challenge, well, no yule logs here.  I just couldn't find the time to do it with all the holiday craziness.  Be sure to check out the blogroll for some amazing creations.  And I'll be daring again in January. =)

Sunday, December 28, 2008

Bet you can't eat just one (piece)

Every year, I like to make up little holiday gift bags of cookies to take to the daycare, work, etc.  Brianna loves to help hand them out, and I figured that this year Gillian would want to get in on the act as well.  I usually pick up some cute bags at Target and fill them with a few of whatever cookies I've made.  But this year has been a weird one for baking.  For the most part, I've been making one cookie recipe at a time, and they get mostly eaten before I move onto the next one.  So I didn't have a good stockpile of cookies to choose from.

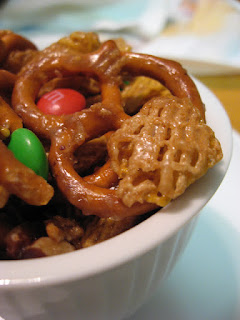
A few weeks ago, I saw a post on Clara's blog that looked interesting.  It was for a snack mix with cereal, nuts, m&ms and marshmallows.  Instead of being the usual salty mix, it was caramely and sweet.  I've made some yummy caramel things over the past few months, and thought it would be nice to add another one to my list.  Plus, I volunteered to make treats for Brianna's kindergarten class party, and thought this would be something that the kids would like.  

For the party batch, I stuck pretty closely to the recipe on Clara's blog.  I knew the kids probably wouldn't like the nuts, so I decided to substitute mini pretzels.  I kept the m&ms and marshmallows, though.  =)  The recipe takes some time, due to the long baking time, but most of it is hands off and you can work on other stuff in between.  You melt together some butter, brown sugar and light corn syrup, then pour it over the mix of cereal and pretzels (or nuts) and mix them together.  Then it goes into a low oven (250 degrees F) for 45 minutes, to be stirred every 10-15 minutes.  Once it's done, you let the mixture cool a bit and mix in the other ingredients.  


The verdict?  Brianna didn't like it.  Figures. =)  She prefers to just eat the plain pretzels.  Gillian liked it.  I loved it.  This stuff is seriously addictive!  Jamie agreed.  I'm not sure what the kindergarteners thought--they were so wound up that I don't think they ate much of it.  But the parents at the party really liked it.

A few days later, it occurred to me that this snack mix would be a great treat for my holiday bags!  Since my target audience was adults this time, I changed things around a bit.  I kept the cereal and pretzels, but added some pecan halves as well.  And I left out the marshmallows.  I wanted to add a bit more flavor to the caramel part, as well.  I thought about using a bit of cayenne, but decided on ground ginger.  And I sprinkled a bit more salt on everything, as well.  I ended up making two batches with my variations, because one wasn't enough! 

The new verdict?  Everyone seemed to love it.  I love the pecans with the caramel coating.  And the ginger was subtle, but definitely added to the overall flavor.  I printed out the recipe on holiday paper and handed it out with the treat bags, figuring I'd get a number of requests for the recipe. =)  This one is a permanent addition to my holiday baking!


Caramel Snack Mix (adapted from CB and Baking Blonde)

3/4 cup light corn syrup 
1 cup packed light brown sugar 
8 tablespoons (1 stick) unsalted butter 
3/4 teaspoon ground ginger 
10 cups Crispix cereal 
6 cups mini pretzels 
2 cups pecan halves 
1/2 teaspoon kosher salt 
1 cup plain m&ms 

Preheat your oven to 250F. Line a very large roasting pan (or two rimmed cookie sheets) with quick release foil and lightly spray with spray oil.

In a medium size sauce pan over low/medium low heat, stir together the syrup, brown sugar, butter and ground ginger. Stir constantly until the butter is melted and the sugar has dissolved. Place the cereal, pretzels and pecans into the prepared roasting pan or cookie sheets. Carefully pour the brown sugar mixture over the cereal mixture. Use a buttered spatula to toss and completely coat the cereal, pretzels and nuts with the brown sugar mixture. Evenly sprinkle with the kosher salt.

Bake for 45 minutes, removing the pan from the oven every 15 minutes to gently toss the mixture with a buttered pair of tongs or spatula to ensure even baking. While the snack mix is baking, spread a few large sheets of parchment paper on the counter. After the mixture has finished baking, turn it out onto the parchment, making sure to spread it out to prevent large clumps. Add the m&m candies and stir to combine.


Thursday, December 25, 2008

Merry Christmas to all!


I hope you all have a wonderful holiday with your families and friends.  


Tuesday, December 23, 2008

Happy blogiversary to me!


Wow!  I can hardly believe I've been blogging for an entire year!  And what a year it's been...  It's totally appropriate that I hit such a big milestone on a Tuesday, since Tuesdays with Dorie has been such a big part of the past year.  Almost half of my posts have been related to this wonderful baking group.  43 weekly Dorie recipes for me so far (I joined for week 7 and have missed only 2 or 3 weeks since), plus a few others from the book that I've made on my own.  9 official Daring Bakers challenges completed, plus a couple of rewinds there, as well.  Lots of new things learned.  Lots of ingredients consumed (don't think too hard about all the butter and sugar...)  And of course, many wonderful new friends made out there in blogland!

I don't have as much free time as I'd like right now, what with all the last-minute holiday stuff to do.  But as soon as I have a few more minutes to myself, I'm going to steal Erin's great anniversary idea and highlight some of my favorite recipes from the past year.  So look for a post on that later this week.  In the meantime, let's get back to this week's TWD recipe...

Donna of Spatulas, Corkscrews and Suitcases chose Real Butterscotch Pudding for us to make this week.  Unlike last week, I didn't mess around with this recipe at all.  Okay, that's not entirely true.  I didn't mess around with the ingredients at all.  The method is another story.  Until I was reading this week's P&Q, I'd forgotten all about the mess I made when making Dorie's chocolate pudding back in July.  The recipe calls for using a food processor.  I have a large one, but it can't handle the amount of liquid in this recipe.  I thought about using my regular blender or immersion blender, but was feeling lazy and didn't want to clean much of anything.  So I went totally low-tech and just used my heavy duty whisk for the whole thing.  It worked just fine.


I did get to add one new thing to my pantry this week.  Up until now, I didn't have any scotch.  And real butterscotch pudding calls for real scotch.  So I headed over to my favorite source of wines and spirits to acquire some.  A very nice person there helped me find a relatively small (200 ml) and not too expensive ($9) bottle of scotch that would work fine for any cooking needs I might have.  It's a blended scotch (Dewar's), rather than a single malt.  It's now residing next to my small bottle of bourbon that I also only use for baking (nice with pumpkin things...).  

And the verdict?  I normally don't go for butterscotch desserts because I find them overly sweet, but I really liked this!  The scotch actually made a huge difference.  I tasted the pudding before I added it, and it was pretty good.  But the scotch made it so much better!  It reminds me of when I add rum to chocolate desserts.  You don't really taste the rum itself that much, but it enhances the overall flavor of the dessert.  Jamie really enjoyed this one as well.  But the biggest fans had to be Brianna and Gillian.  I shouldn't be surprised--I think they love all pudding (okay, except maybe rice pudding).  

Thanks to Donna for picking this week's recipe.  You can find it on her blog, along with lots of neat posts about how she bakes while living on a sailboat.  And to see what the other TWD folks did this week, check out the blogroll.   

Tuesday, December 16, 2008

In a jam


The past couple weeks have been crazy, and I've barely managed to get my TWD posts done on Tuesday.  In fact, I was still baking on Tuesday!  =)  Since I knew that I didn't have the luxury of being off on Tuesday again this week, I figured I'd better get a jump on this week's recipe.  Heather of Randomosity and the Girl selected Buttery Jam Cookies for us to make.  I actually made them at the same time as last week's Sugar Cookies.

The ingredients list for these cookies is pretty straightforward.  Flour, baking powder, salt, butter, sugar, egg, vanilla.  There's a bit of milk, which I predicted would give them a cakey texture.  And for flavor, your favorite jam and some ground ginger.  My favorite jam was easy--I'm still stockpiling Clearbrook Farms Raspberry Butter.  But then I thought I'd try a twist on the recipe.  One of my absolute favorite combinations is raspberry and chocolate.  So I pulled out another favorite, Scharffen Berger cocoa powder, and used half a cup (1.5 ounces) in place of half a cup of the flour.  I left out the ginger, since I wasn't sure how it would be with the chocolate.

Since Dorie said to scoop the dough by rounded teaspoonfuls, I used my #100 disher.  I actually got more cookies than the recipe states--56.  I couldn't really go by color to figure out when they were done, so I just sort of guessed. =)  I baked them on parchment-lined sheets for about 12 minutes.  They didn't really spread much.  


The verdict?  As I expected, the texture was cakey, which is not my favorite.  Dorie says something about them being flaky, which mine certainly weren't.  Right out of the oven, I didn't really taste a lot of the raspberry flavor.  But it was much more noticeable the second day and later.  The chocolate flavor was fantastic. =)  These were a hit with all my taste testers.  I really wanted to make them again to try some changes, but didn't have time.  I'm thinking of reducing or eliminating the milk to change the texture.  And because the chocolate is stronger than the raspberry, I'd probably increase the jam amount by a tablespoon or two.  I'd also like to mix the jam in at the end, for more of a swirl.  When I finally get a chance to play around some more, I'll be sure to post the results.  In the meantime, if you want to see the original recipe, head on over to Heather's blog.  And check out what the other bakers did over at the Tuesdays with Dorie blog roll!


Sunday, December 14, 2008

Simple pleasures


I love weekend breakfasts.  Things are always crazy around here during the week, and no one really gets to eat at home.  Jamie eats oatmeal at work.  Brianna and Gillian get fed at school, though one or both of them may take a granola bar or some dry cereal to munch on during the car ride.  I sometimes get to eat here, but more often it's a muffin or bagel eaten on the run.  

Weekends are different.  Even if I work on Saturday, I get at least one day where I can make something for everyone for breakfast.  My girls love pretty much any breakfast food except eggs (they get that from me).  French toast is their favorite, but they also love pancakes, waffles, muffins...  And along with whatever we're eating, Brianna and Gillian often ask if I'll make them hot chocolate.  


Now I've mentioned before that my girls both love chocolate.  But most of the time, I think the hot chocolate is really just an excuse to eat marshmallows.  Who knew that the mini marshmallow could bring such joy?  =)  Up until yesterday, I've been giving Gillian her hot (well, warm) chocolate in a cup with a lid, so she would just eat all the marshmallows before she even drank anything.  But she's getting better with drinking without spilling, so I gave her a plastic mug and a spoon and let her go crazy.  She had lots of fun putting the marshmallows in her mug and fishing them out again to eat them. =)  Brianna also likes putting some of her marshmallows in her hot chocolate, but first she has to count them.  She's actually getting practice at some simple multiplication and subtraction as she organizes them into groups and then eats them.

As for the actual recipe, sometimes I just wing it, but it finally occurred to me to write down a version that they liked.  You can use whatever dark chocolate you have on hand, adjusting the added sugar to taste.  And while the girls like marshmallows, I actually prefer whipped cream on mine. =)


Easy Hot Chocolate
(2 kid-sized servings)

1 cup (8 ounces) milk (we use 1%)
1 ounce bittersweet chocolate, chopped (this time was Ghirardelli 72% pieces)
pinch of salt
1 to 3 teaspoons granulated sugar (to taste, depending on the chocolate you use)
1/4 teaspoon vanilla
mini (or large) marshmallows

Place the milk and chocolate in a small saucepan.  Heat until the chocolate melts, whisking frequently.  Add the sugar and salt and stir to dissolve.  Continue to heat until it just begins to steam, but not simmer.  Remove from heat and stir in the vanilla.  Whisk until frothy.  Pour into mugs and serve with marshmallows on the side.


Tuesday, December 9, 2008

Handy helpers


When I was a kid, my mom made a bunch of the ornaments on our tree.  One year she painted a bunch of wooden ones, including some Disney characters.  Another year, she made a bunch of "stained glass" ones, where you had to fill a metal outline with different colored bits and then put them in the oven to melt into the finished ornament.  Again, there were a bunch of Disney ones, as my mom was a big fan of Mickey and Minnie.  For as long as I can remember, she had a Mickey or Minnie Mouse watch. =)

For Brianna's first Christmas season, she was about eleven months old, and was already walking.  So when we thought about putting up the Christmas tree, we were understandably concerned about what ornaments were in her reach.  That year my mom sent me a bunch of the old ornaments that she had made.  They have the handy feature of being non-fragile if they get knocked off. =)  As it turned out, I don't think Brianna really paid that much attention to the ornaments that first year.  But a couple years ago she started wanting to help decorate, and those ornaments were the first ones I let her put on the tree.

Fast forward to this year.  We managed to get the tree put up and put the lights on on Sunday night.  That took longer than expected, so I told Brianna that we'd wait until Monday to put ornaments on so she could help.  So when we got home last evening, I got out the wooden and stained glass ornaments for her.  Of course, Gillian wanted to help, too.  There was quite a bit of debate over who got to put which "Mickey Mouse Clubhouse" ornaments on the tree.  I told them to stick to the bottom part of the tree (which is the only part that Gillian can reach anyway).  I'm sure you can guess what happened...


I'm glad that they wanted to help, since it's fun to build holiday memories like this.  But sometimes I wish I had more patience with my children.  Like when it comes to cookie baking and decorating.  They love to do it (well, Brianna does and I'm sure Gillian will, too), but I just get so frustrated with the whole mess sometimes.  I learned something last year, though.  Even though Brianna would really like to help cut out the cookies, it's better if I do that part.  That way I can get it done quickly and get the cookies in the oven.  Then she can have fun with the sprinkles, which is really her favorite part anyway.

This week's Tuesdays with Dorie recipe will be a great one for that.  Ulrike of Küchenlatein chose Grandma's All-Occasion Sugar Cookies for us to bake this week.  I mentioned last week that I'm not a big fan of cut-out cookies.  Mostly that's because I find it hard to concentrate on what I'm doing with the two girls in and out of the kitchen and interrupting me constantly.  I was going to let them help anyway, but I ran out of time (which is why I'm writing this on Tuesday afternoon).  


I actually made the dough on Sunday, so it had ample time to chill in the refrigerator.  And I made it by hand rather than with my mixer.  Since this is a softer dough (even chilled), I rolled the dough pretty much right after I took it out of the fridge.  I divided it in half so I could keep some of the dough chilled while I was cutting out the shapes.  I made sure not to roll the dough too thin, as well.  I didn't have any trouble, but I was trying to work as quickly as possible so the dough wouldn't warm up too much.  The scraps from each round of cutting went back into the fridge to get cold again.  They're still there at the moment, and I may just make thumbprints or something out of them.  I ended up baking my cookies for 12 minutes, but that may vary depending on the size of the cookies.

I like icing on my cookies, so I mixed up a simple glaze of powdered sugar (3 ounces or 3/4 cup), milk (a tablespoon) and vanilla (a splash).  I used the back of a spoon to spread the icing on the cooled cookies.  As I iced each one, I sprinkled it with sparkling sugar, gently shaking off the excess.  You can use a variety of colored sugars and sprinkles, but I went with plain white this time.

The verdict?  I sampled one of the cookies plain to see what I thought.  I liked it.  With the baking time I used, the edges were crisp, but the middle was a bit chewy still.  I haven't tried one of the iced ones yet.  And I'll have to come back and give my taste testers' feedback later this evening.  Over all, this is a recipe I'd make again.  And I may be doing it sooner than I think, since I volunteered to make cookies for Brianna's class holiday party next week.  =)

If you want to give these a try, head on over to Ulrike's blog for the recipe.  She is kind enough to post in English as well as German.  And check out the blog roll for more delicious cookies!

Stay tuned...


...this week's Tuesdays with Dorie sugar cookies will be coming later today.  The dough is chilled, but I haven't had time to bake the cookies.  But I'll have time this afternoon, after a fun-filled morning of teacher conferences and attempts to finish my Christmas shopping. =)

Tuesday, December 2, 2008

Sandwiched


How did it get to be December already?  Time really seems to be getting  away from me.  Which might be why it's taken me until Tuesday morning to actually bake this week's Tuesdays with Dorie recipe.  This week's recipe of Linzer Sablés was chosen by Noskos of Living the Life.  I'm not a big fan of making cut-out cookies, so that might also be why it took me so long to make these cookies.

The dough itself was easy to mix up.  I'm fortunate enough to shop at a store with a great bulk department, so I was able to buy hazelnut meal to try in these cookies.  Since I was down to the wire, I didn't change anything with the ingredients, though another time I might play around with the spices (Dorie calls for cinnamon and a bit of cloves).  Rather than roll the dough out and chill it, I took the easy way out.  Or so I thought... =)  


I scooped the dough out with my #70 disher, and rolled it into balls.  Then I rolled the balls in turbinado sugar and placed them on a baking sheet.  I put them in the oven, but then realized that they might not flatten out enough.  So I pulled the sheet back out of the oven and flattened the balls with the bottom of a glass.  Which was where things got a bit difficult--the dough stuck a little to the glass.  I thought it was because the dough was warm.  Turns out, that might have made it easier--when I did the second sheet with colder dough, they stuck a lot worse.  Something to figure out for next time.  I baked them for about 12 minutes, just until they were getting brown around the edges.  

I thought chocolate would be good with the hazelnut in the cookies, so while they were baking, I mixed up some ganache.  A least that was easy.  When the cookies were cooled, I sandwiched a few of them together with the chocolate.

one of my favorite teas is Tazo Awake; not sure how much it helps with the sleep-deprivation, but it tastes good =)

The verdict?  I'm still not sure on this one.  I liked the taste of the dough. =)  I think the flavors need more time to meld, which might be because I didn't chill the dough at all.  And a lot of times spice cookies are better after a day or two.  I'll have to see what I think of these tomorrow.  I liked them with the chocolate.  I think I'll do a few with jam as well, so see if I like them that way.  (I only sandwiched a few to take pictures.)  And none of my other taste testers are here right now.  (I have the day off; Jamie's at work and the girls are at school.)

Thanks to Noskos for this week's recipe--it was something I haven't tried before, which is always fun.  You can find the recipe on his blog.  And of course, you can check out lots of other cookies from the other TWD members if you check out the blogroll.  


Saturday, November 29, 2008

Sweet Caramel...


...Good times never seemed so good...

Thanks to this month's Daring Bakers challenge, now you, too, can have Neil Diamond stuck in your head all day. =)  After a couple months of savory challenges, we're back to sugar.  More specifically, caramel!  

I recently discovered the joys of salted caramel, so I was happy with this month's challenge.  We had to make Caramel Cake with Caramelized Butter Frosting from a recipe by Shuna Fish Lydon.  Aside from having to make both the cake and frosting recipes, we were given a lot of freedom in this challenge--we could choose any shape, size, flavorings and decorations that we wanted.  I thought about making cupcakes, but in the end, decided to make a traditional layer cake.

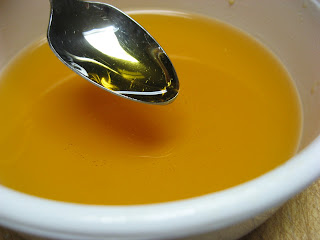
The first step was to make caramel syrup, since it was an ingredient in both the cake and frosting.  After my past misadventures with caramel, I was particularly careful while making the syrup.  After reading Shuna's additional tips on the Daring Bakers board, I went ahead and added a bit of corn syrup to the water and sugar mixture for a little added insurance.  And when it came time to add the water to the caramelized mixture, I used a tip from Linda of Linda's Window.  She recommended cutting a hole in a sheet of aluminum foil, laying the foil on top of the pan, and pouring the water through the hole.  Worked like a charm to avoid being splattered with molten sugar.  Once I was done, I realized that I probably should have let the syrup get a bit darker, but it had a lovely caramel flavor.


On to the cake...  The batter was pretty straightforward to mix.  The recipe cautions that all the ingredients should be at room temperature, so I made sure to take everything out of the fridge ahead of time.  I baked my cake in a 9" x 3" round pan coated with baking spray (Pam for Baking is my friend) and lined with parchment.  I baked it for a total of 40 minutes, and it came out great.  The cake was a bit domed when I took it out of the oven, but as it cooled, the top settled until it was level. 

Next came the frosting.  A major component of the frosting is browned butter.  I melted my butter in a heavy saucepan, watching carefully so I wouldn't burn it.  Once I could see the bits of milk solids on the bottom of the pan turning golden, I turned off the heat and let it sit until it got just a bit darker (the residual heat of the pan is enough to keep it going for a bit).  Then I poured the butter through a coffee filter into a heat proof bowl.  I knew that I wanted a firm frosting rather than a looser icing, so after the butter had cooled on the counter a bit, I put it in the fridge so it would solidify.  Then I put it in my stand mixer and used the paddle to beat in the other ingredients.  I ended up using the full amount of powdered sugar (16 ounces), 4 tablespoons of heavy cream, 3 tablespoons of caramel syrup, about a teaspoon of vanilla, and a scant teaspooon of kosher salt (sounds like a lot, but it tasted great).  


To assemble the cake, I used my serrated knife to carefully slice the cake in half.  I put a thin layer of frosting between the cake layers and then frosted the top and sides of the cake, again not making the frosting too thick.  My decorating skills need some work, but it came out okay. =)

The verdict?  I only got a small taste of the finished cake, since I gave it away.  I took it to Gillian's daycare as a treat for all the teachers right before Thanksgiving.  They cut into it immediately and offered me a piece.  The cake was delicious.  Very moist, and with a dense texture.  I expected that, since the ingredient proportions were very similar to a poundcake.  Although a number of other Daring Bakers thought the cake was too sweet, I thought it was fine.  The frosting was definitely very sweet, but in a small piece, it complemented the cake nicely.  The browned butter gave it a wonderful flavor, and I loved the mix of salty and sweet.  I would happily make both again, although I'd probably use less powdered sugar in the frosting.  

Oh, and I forgot to mention...  The leftover caramel syrup is wonderful in tea. =)

Be sure to check out the Daring Bakers blogroll for more wonderful caramel cakes.  Shuna Fish Lydon’s recipe can be found here.  And thanks to this month's hosts, Dolores of Chronicles in Culinary Curiosity, Alex of Blondie and Brownie, and Jenny of Foray into Food (plus assistance with alternative baking questions from Natalie of Gluten-a-Go-Go).  


Friday, November 28, 2008

Friday with Dorie


This has been an odd week.  Usually I'm sitting here on Monday night trying to finish up my TWD post so I can get to bed.  But this week, because of the holiday, our fearless leader, Laurie, allowed us to post late, which I appreciate, since I didn't even make the recipe until yesterday.  Nothing like leaving your holiday baking to the last minute... =)

I don't really like pumpkin pie.  I like lots of other pumpkin things, but don't really like the custardy texture of the pie.  (Yes, texture again, just like with the rice pudding.)  And pecan pie doesn't appeal much either--too sweet.  But my husband Jamie likes both, so I figured that he would help me eat this week's TWD recipe--Thanksgiving Twofer Pie.  Basically, the idea is that you put pecan pie filling on top of pumpkin pie filling, and hopefully make everyone happy.  =)

One nice feature of baking later in the week is that I was able to check out some of the cool things that other people did.  One that particularly caught my eye was Pink Stripes.  I really liked the idea of making mini pies, since I love crust, and that way if I didn't like the filling there wouldn't be as much of it. =)  For the crust, I used a favorite recipe of mine from Cooks Illustrated.  For those who subscribe to the website, it can be found here.  It's an all-butter crust that uses the technique of fraisage (smearing the dough against the counter) to make a strong, flaky crust.  After the dough chilled, I rolled it out and used my biggest round cutter (about 3 3/4 inches in diameter) to cut out circles of dough.  I carefully pressed them into the cups of a muffin tin that I had sprayed with baking spray (Pam for Baking, Cathy!)  I then put the muffin tin in the freezer while I prepared the fillings.  

I pretty much followed the recipe for the fillings.  The pumpkin one came together quickly in the food processor.  I did make one change to the pecan mixture, which was to use Lyle's Golden Syrup instead of corn syrup.  I spooned the pumpkin mixture into each of the muffins cups.  For most of them, I made sure to leave room for the pecan mixture, but I did make two just pumpkin, for my children who don't really like nuts.  =)  Then I placed several pecan halves on top of the pumpkin and spooned the syrupy brown sugar mixture on top, making sure not to fill the cups too much.  Since my ratio of filling to crust was different than in a regular pie, I had some of the filling mixtures left over, so I filled a couple of 4-ounce ramekins with the excess.  


I deliberately didn't pre-bake the crusts, since I didn't want the top edges to brown too much.  So to make sure that the bottoms browned well and didn't get soggy, I placed the muffin tin directly on my preheated baking stone.  I baked my mini pies for 10 minutes at 45o degrees F, and then turned the temperature down to 300 degrees F and baked them for another 20 minutes.  They turned out great.  I let the pies cool for a few minutes in the pan, but then carefully loosened them and transferred them to a rack to cool completely.  I was afraid that if I left them in the pan, they'd get stuck.  

The verdict?  I was surprised to find that I really liked the combination!  This was definitely a case of the result being more than the sum of the parts.  And I liked the mini pie variation a lot.  As expected, Jamie liked them a lot, too.  We had Thanksgiving dinner with some friends of ours, and they seemed to enjoy them as well.  At least, they didn't complain when I offered to leave some of the extra pies there! =)

Thanks to Vibi of La Casserole Carrée for choosing this week's recipe.  Even though she's not American, she was kind enough to select something that the American members of Tuesdays with Dorie could make for the Thanksgiving holiday.  You can find the recipe here, on Vibi's blog, or of course in Baking From My Home to Yours.  

Thursday, November 27, 2008

Happy Thanksgiving!


Just a quick post for now, since I really need to get my baking finished.  Stay tuned later today or tomorrow morning for some Two-fer Pie.  The pie crust dough is waiting for me in the fridge.  And I made enough to make my favorite apple pie (coming soon as well).  

Meanwhile, we had to figure out something for breakfast.  I wish I had seen these pumpkin pancakes over at PheMOMenon sooner; I might have made them.  As it was, I turned to our usual standby, muffins.  I wasn't in the mood for any of our usual recipes, so I went looking for a new recipe.  I started with Dorie, but nothing jumped out at me.  So I turned to my other trusted source, King Arthur Flour, and found a recipe for Doughnut Muffins.  (If you haven't seen their great blog, go check it out!)  Best of all, it didn't call for anything that I don't have (like buttermilk--I never seem to have it when I need it).  

The recipe says that you can use either all-purpose or white whole wheat flour.  I used half of each (1 1/4 cups, or 5 5/8 ounces).  I kind of eyeballed the nutmeg, since I was grating it.  Time to hit the bulk department--I'm down to my last nutmeg.  Oh, and if you've never tried it, a microplane grater works well for nutmeg.  The batter wasn't as thick as I normally expect it to be for muffins.  That's probably why they have such a domed shape when they're done.  I let the muffins sit in the pan for a couple minutes, then brushed the tops with melted butter and sprinkled them liberally with cinnamon sugar.  


The verdict?  Yummy!  I ate mine plain, but I bet they would be good with some jam.  Ooh, or maybe I can try putting the jam inside--jelly doughnut muffins, anyone?  =)  Brianna ate all of hers, and Gillian ate the top off hers and played with the rest.  I definitely think these will make another appearance, especially since they're quite easy to make.

One more thing to share...  Brianna will be able to enjoy her Thanksgiving dinner more, now that she's finally lost her first tooth.  It took 2 1/2 weeks before it finally got so loose that she was willing to let me wiggle it out Tuesday night.  She won't have to eat quite so carefully now. =)  Happy Thanksgiving, everyone!

Sunday, November 23, 2008

Turn of the century


Everyone has heard of pregnant women having cravings for or aversions to certain foods.  I fortunately didn't have too many problems with that in either of my pregnancies.  The only aversion I really had was to most meat when I was pregnant with Brianna.  It wasn't a problem with Gillian.  And with Gillian, I had a thing for mint chocolate chip ice cream (HEB Creamy Creations, for those of you in Texas).  I had a scoop of it just about every day for several months.  We're talking quite a few gallons all together (I don't really want to think too hard about the total).  And now, while I do like it once in a while, I can definitely live without it.  

When I was grocery shopping at Central Market Friday night, I was reminded of a craving I had during the last month of my pregnancy with Brianna.  I don't normally like really sweet things.  I'd rather eat chocolate. =)  But I ate Nestle butterscotch chips by the handful.  I went through several bags.  Most of the time, I can hardly stand to look at them, since they're so sweet.  Well, what I found was a display of several flavors of Guittard chips that I hadn't seen before.  Butterscotch, Green Mint, and Cappucino.  I don't really like coffee-flavored things, so I wasn't tempted by the cappucino ones.  I did think about grabbing a bag of the mint ones, to put in something chocolate.  But a bag of the butterscotch ones immediately jumped into my cart.  =)  Honestly, I think I'm going back for more, maybe tomorrow--they are full 12-ounce bags, for $1.69 each!


As soon as I got home, I opened the bag for a taste.  Wow.  Very smooth and creamy.  Sweet, but not overpoweringly so.  I started trying to figure out what to make with them, so I wouldn't just eat them all out of the bag.  My first thought was Oatmeal Scotchies.  I haven't had them in forever.  I was all set to make the dough last night, when I discovered a problem--I only had about a cup of oatmeal.  Oops.  So I thought some more.  I had pecans, which I thought would be good with the chips.  And I've been playing around with my standard chocolate chip cookie recipe, adding whole wheat flour to it.  So here's what I came up with:

Butterscotch Pecan Cookies

1 cup (2 sticks) unsalted butter, softened
3/4 cup granulated sugar
3/4 cup packed light brown sugar
1 tsp vanilla
1 egg
1 1/2 cups (6 3/4 ounces) all-purpose flour (I use King Arthur)
3/4 cup (3 3/8 ounces) white whole wheat flour (King Arthur here, too)
1/2 teaspoon table salt
1 teaspoon baking soda
3/4 cup coarsely chopped pecans, toasted
1 1/2 cups butterscotch chips

You can mix the dough in a stand mixer, but I usually just use a large mixing bowl and a wooden spoon.  Cream together the sugars and butter.  Beat in the vanilla and egg.  Mix in the flours, salt and baking soda.  The dough will be stiff.  Stir in the nuts and butterscotch chips.  You can use the dough right away, but I prefer to refrigerate it at least overnight.  

If the dough is chilled, take it out of the fridge so that it can soften a bit while you preheat the oven to 375 degrees F.  Line a heavy baking sheet with parchment paper.  I use a #70 disher (which holds about 2 teaspoons) to scoop the dough onto the baking sheet.  Bake for 11-13 minutes, until the edges are golden brown.  Let the cookies rest on the pan for about 5 minutes before transferring them to a rack to cool completely.  Yields 5 dozen cookies (about 2 1/2 inches in diameter).  


The verdict?  Delicious!  Not too sweet.  The toasted pecans add a really nice touch.  Jamie really liked them; not surprising, since he loves butterscotch.  Both girls ate them as well, although Brianna had to complain about the pecans first.  =)  I think most of these are heading out the door to other people so I don't eat them all.  

Oh, and the post title?  This is my 100th post!  I'm amazed at how much my blog has evolved since I started.  My pictures are a lot better, for one thing. =)  And next month is my blogiversary, so I'm trying to come up with a good way to celebrate.  I don't know what I was thinking, starting it two days before Christmas.  Like people with birthdays on or near Christmas, I don't want it to get overlooked because of the timing. =)  We'll see...


Tuesday, November 18, 2008

Black and white and rice all over


Okay, let me just come out and say it...  I'm a picky eater.  I always have been.  I will say that I've gotten better as I've gotten older.  I'm generally willing to try something at least once.  And there are quite a few things that I wouldn't eat as a child that I like or am at least okay with now.  There are some things that I won't eat because I just don't like the flavor (coconut being a big one).  But I've come to realize that for most of the things I dislike, it's the texture that gets to me.  

One big category of things I don't care for is hot cereal-type dishes.  Oatmeal.  Cream of wheat.  Polenta.  (Though I want to like that one, so I occasionally give it another try.)  And rice pudding.  Which is unfortunate, since this week's Tuesdays with Dorie recipe is Arborio Rice Pudding, White, Black (or Both), chosen by Isabelle of Les Gourmandises d'Isa.  Dorie's recipe does have a few things going for it.  It uses arborio rice, which I do like.  And there's a chocolate version, so how could it be all bad?  My husband does like rice pudding, so I figured if I made it, at least he'd eat it.  

I still almost bailed on this one.  Not so much because I wasn't sure I would like it, but more because I wasn't sure I had the time to make it.  It takes over an hour to cook, and unlike last week's Kugelhopf, you actually have to pay a fair bit of attention to it for most of that time.  And then it has to chill for quite a while (the recipe says at least 6 hours).  I worked all day Saturday.  I ran out of time on Sunday.  And I knew I had to work late on Monday.  It wasn't looking too good...


But I managed to squeeze it in.  Since I was working later on Monday, I didn't have to go in until after 10:00.  I took Brianna to school and Gillian to daycare, and then headed home to finish getting my stuff ready for work.  I had just enough time to make the pudding.  Well, almost.  It was going to be close, so I didn't even bother with trying to cook it on low.  I let it bubble away over medium heat, skimming the top as needed.  It thickened up nicely in about 45 minutes.  I made a few changes to the ingredients, too.  I didn't have quite enough whole milk, so I used 2 cups of whole milk and 1 cup of 1% milk (only 3 cups total, instead of 3 1/4).  I added a bit of salt, as well.  I split the finished pudding between 2 different containers and added some vanilla extract to one (maybe a teaspoon), and 1 1/2 ounces of chocolate (58% Ghirardelli pieces) to the other.  

The verdict?  Well, I didn't hate it.  But I'm not sure how much I like it.  The flavor of both versions is great.  It's that darn texture thing that's still turning me off.  Gillian ate a bite or two, but that's all.  She was pretty tired, though, so she might eat more another time.  Brianna didn't like the rice.  She wanted to know if I could dish some up for her without the rice.  Sorry, not gonna work with this one... =)  I'll have to make her some regular pudding this weekend to make up for it.  Jamie, as predicted, liked both versions.  

Will I make this again?  Probably not, unless I get a special request.  But I'm glad I gave it a try.  For the full recipe, head on over to Isa's blog.  And to see how the rest of the TWD bakers fared, checkout the Tuesdays with Dorie page for links to the various blogs.  


Sunday, November 16, 2008

Chocolate Moose


We have a lot of books in our house. Every time I've moved, I've always vastly underestimated the number of boxes it will take to contain all the books. We have bookshelves, but not nearly enough. Honestly, I don't actually know how many there are. There are cookbooks, of course, but all sorts of other books as well. I have books. Jamie has books. Even at their young ages, Brianna and Gillian have books--board books, early reader books, lots of books.

Anyone with small children nowadays has probably encountered the Laura Numeroff "If You Give..." series. We have several. The one that came to mind this morning was If You Give a Moose a Muffin. We're big weekend muffin eaters around here. The recipes are pretty quick to make, come in all sorts of flavors, and make enough to eat for several days during the week as well. When I was trying to figure out what to make this morning, I asked Brianna what kind of muffins she wanted. She said chocolate. I think she really meant chocolate chip, but I decided to go all the way.


I have several cookbooks that contain chocolate muffin recipes. But the first couple I checked didn't just jump off the page and say "Make me!" So I turned to the internet and one of my favorite sources for recipes, King Arthur. I quickly found a recipe for Chocolate Breakfast Muffins that looked like a good starting place. The recipe follows the muffin method--separately mix together the dry and wet ingredients, then quickly combine them and immediately pan and bake. I did make a few changes--the main one as to substitute white whole wheat flour for part of the all-purpose flour.  The online recipe calls for dutch-processed cocoa, but all I had was natural cocoa, so I decided to give it a try.  Brianna was happy to help, giving her the opportunity to use her cool new spatula. =)  The recipe says it makes 12 muffins with large mushroomed tops; I made 12 regular muffins and 12 minis.  I baked the standard ones for about 16 minutes and the minis for 10 minutes.  When they were done and had cooled for a bit, I finished them with a drizzle of cream cheese icing.  


The verdict?  Definitely a hit!  We'll be making these again.  Very chocolately, but not overly sweet.  The whole wheat flour wasn't noticeable, so score one for mom getting healthy stuff into the kids without them noticing. =)  

Here are the changes that I made to the ingredients.  I followed the method listed in the recipe link above.  After making the muffins, I actually thought to look in my copy of the King Arthur Baker's Companion, and found the recipe there as well.  It said that either type of cocoa was fine, so I guess my substitution was okay. =)  

Chocolate Breakfast Muffins

2/3 cup (2 ounces) natural cocoa (I used Hershey's)
1 cup (4 1/4 ounces) unbleached all-purpose flour
3/4 cup (3 ounces) white whole wheat flour
1 1/4 cup (9 3/8 ounces) light brown sugar
1 teaspoon baking powder
1 teaspoon baking soda
3/4 teaspoon table salt
3/4 cup (4 1/2 ounces) chocolate chips
2 eggs
1 cup (8 ounces) milk (I used 1%)
1 teaspoon vanilla
2 teaspoons vinegar (I used white wine vinegar because it's what I had)
8 tablespoons (4 ounces; 1 stick) unsalted butter, melted

For the icing, I whisked together the following and drizzled it over the muffins:

1 tablespoon cream cheese, softened
1/2 cup (2 ounces) powdered sugar
2 teaspoons milk