Showing posts with label whole wheat. Show all posts

Monday, February 11, 2013

Have flour, will travel


Gillian and I were looking for something fun to do on Sunday afternoon while Jamie and Brianna went to the Tennis Center.  We started off at the park for a bit, but it was still a little too damp after some overnight thunderstorms.  I remembered that some folks from King Arthur Flour were going to be in town for a baking demonstration on yeast breads.  G had been to another cooking/baking demo with me a couple months ago, and was game to try out this one.  It turned out not to be the best for her--it was a much larger group, so it was hard for her to see, and she spent most of the time playing games on my iPad.  We only stayed for about an hour before her attention span hit its limit.  But I enjoyed the part of the presentation that I did get to hear, including some entertaining stories.  With my level of experience, I didn't learn a lot of new stuff, but I'm intrigued by some of the classes that KAF offers at their Baking Education Center in Vermont.  I'm going to add a trip to Norwich to my Mondo Beyondo list.  It would be a great opportunity to meet my blogging friend Rebecca, too.  Maybe I can convince some of my other baking/blogging friends to meet up with me there and we can all take a class together.  Anyone interested? =)
 

When we got to the demo, we each got a booklet of recipes.  G immediately pointed out the recipe for Double Fudge Brownies.  When we got home, J & B still weren't back, so I suggested that we could bake something together.  G quickly suggested the brownies.  I knew it wouldn't be a problem to get my employees to eat some of them, so we made the full 13"x9" pan.  The recipe calls for brown sugar, which I think helps keep the brownies moist.  I used natural cocoa powder rather than the Dutch-processed that was called for (I prefer the way it tastes) but did keep the espresso powder to boost the chocolate flavor.  The somewhat sneaky ingredient is white whole wheat flour.  Granted, these are brownies, so there isn't a whole lot of flour, but a little extra whole grain is always a good idea, right?

The verdict?  You would never guess that there was whole grain flour in these brownies.  They are fudgy and a bit chewy, and altogether yummy.  The change in cocoa worked out fine.  We added a mix of chocolate chips and m&ms to our batter, but next time, I'll put the m&ms on top instead.  The candy shells sort of melted into the brownies when we let them rest overnight.

If you'd like to try these for yourself, you can find the recipe in the KAF Whole Grain Baking cookbook.  And if you think you'd like to join me on a trip to New England, let me know!


p.s. We got this nice KAF bowl scraper to take home with us--you can never have too many of those!

Sunday, August 19, 2012

'Tis the season...almost


I blame it on Starbucks.  I stopped in there one morning last week because I didn't have anything at home to make a quick breakfast.  So I got some iced tea (it's August in Texas, so I seldom drink hot tea between 7am and 10pm) and stared at the pastry case, looking for something to eat.  The pumpkin scones caught my eye, so I got one.  It was tasty, and it got me started thinking about making my own pumpkin baked goods.  Yes, it's still August, and frequently over 100ºF, but I couldn't get the idea out of my head.  Maybe doing some fall baking will encourage the fall weather to come sooner.  Probably wishful thinking, I know, but we did at least have some serious rain yesterday that kept the temps in the 80s.  The girls and I went to the movies yesterday morning (we finally saw Brave), and came out to find a torrential downpour going on.  We tried to wait it out, but finally gave up and made a run for the car, getting rather soaked in the process.  So we came home and put on dry clothes (actually pjs for the girls) and had hot chocolate.  We can certainly pretend that fall isn't far off. =)


I made the first batch of pumpkin muffins Thursday evening, intending to take them to work Friday morning.  I kept a couple for the girls to eat for breakfast, but Gillian informed me that "you know I don't like things with pumpkin!"  I didn't know that; I figured the addition of chocolate chips would make pretty much any baked good acceptable to my daughters.  So I gave a muffin to Brianna and took the rest to work.  Then Friday evening Gillian informed me that she had a taste of Brianna's muffin and decided that she did like them.  She was rather put out to discover that we didn't have any more at home.  I promised her that we could make more for breakfast on Sunday, so that's what we did.


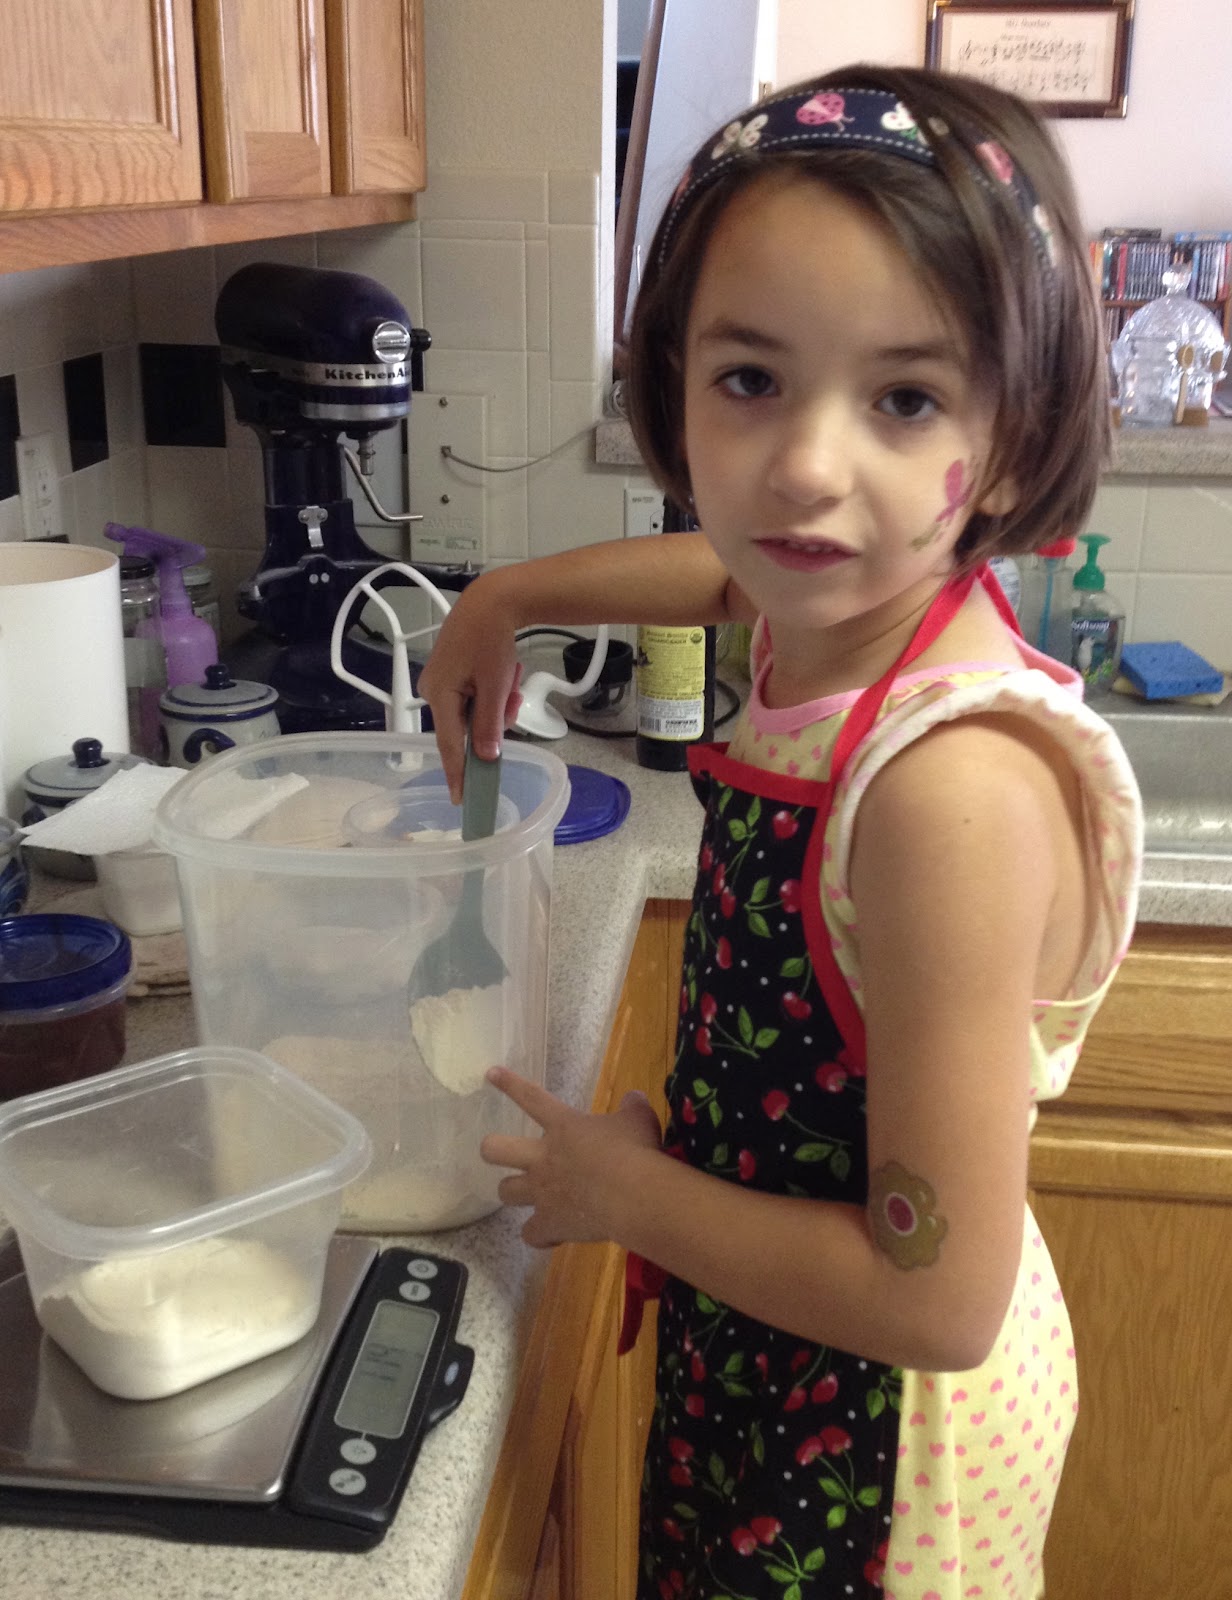
A lot of the time, I just gather ingredients as I go, but when I'm baking with the girls or prepping things the night before so I can bake in the morning, I actually do a fairly complete mise en place.  First we took out the butter and cut it into smaller pieces so it would soften more quickly.  I also took out the eggs so they could warm up a bit--Gillian cracked them into a small bowl to make them easier to add to the mixer later.  I measured the pumpkin and yogurt into another small bowl.  Gillian measured the sugars into a bowl of their own.  Then we measured the dry ingredients (flours, spices, leaveners) into a larger bowl and Gillian whisked them together.  (We did all of the measuring using our scale.)  From there it was pretty easy to mix things up.  First the sugars got creamed with the butter and the vanilla was added.  Next the eggs were mixed in, followed by the pumpkin and yogurt.  Then the dry ingredients were gradually added while the mixer was running.  Finally, we added a cup of chocolate chips, folding them in with a spatula (which also helped make sure all the ingredients in the bottom of the bowl were completely mixed).

I used a scoop (a #
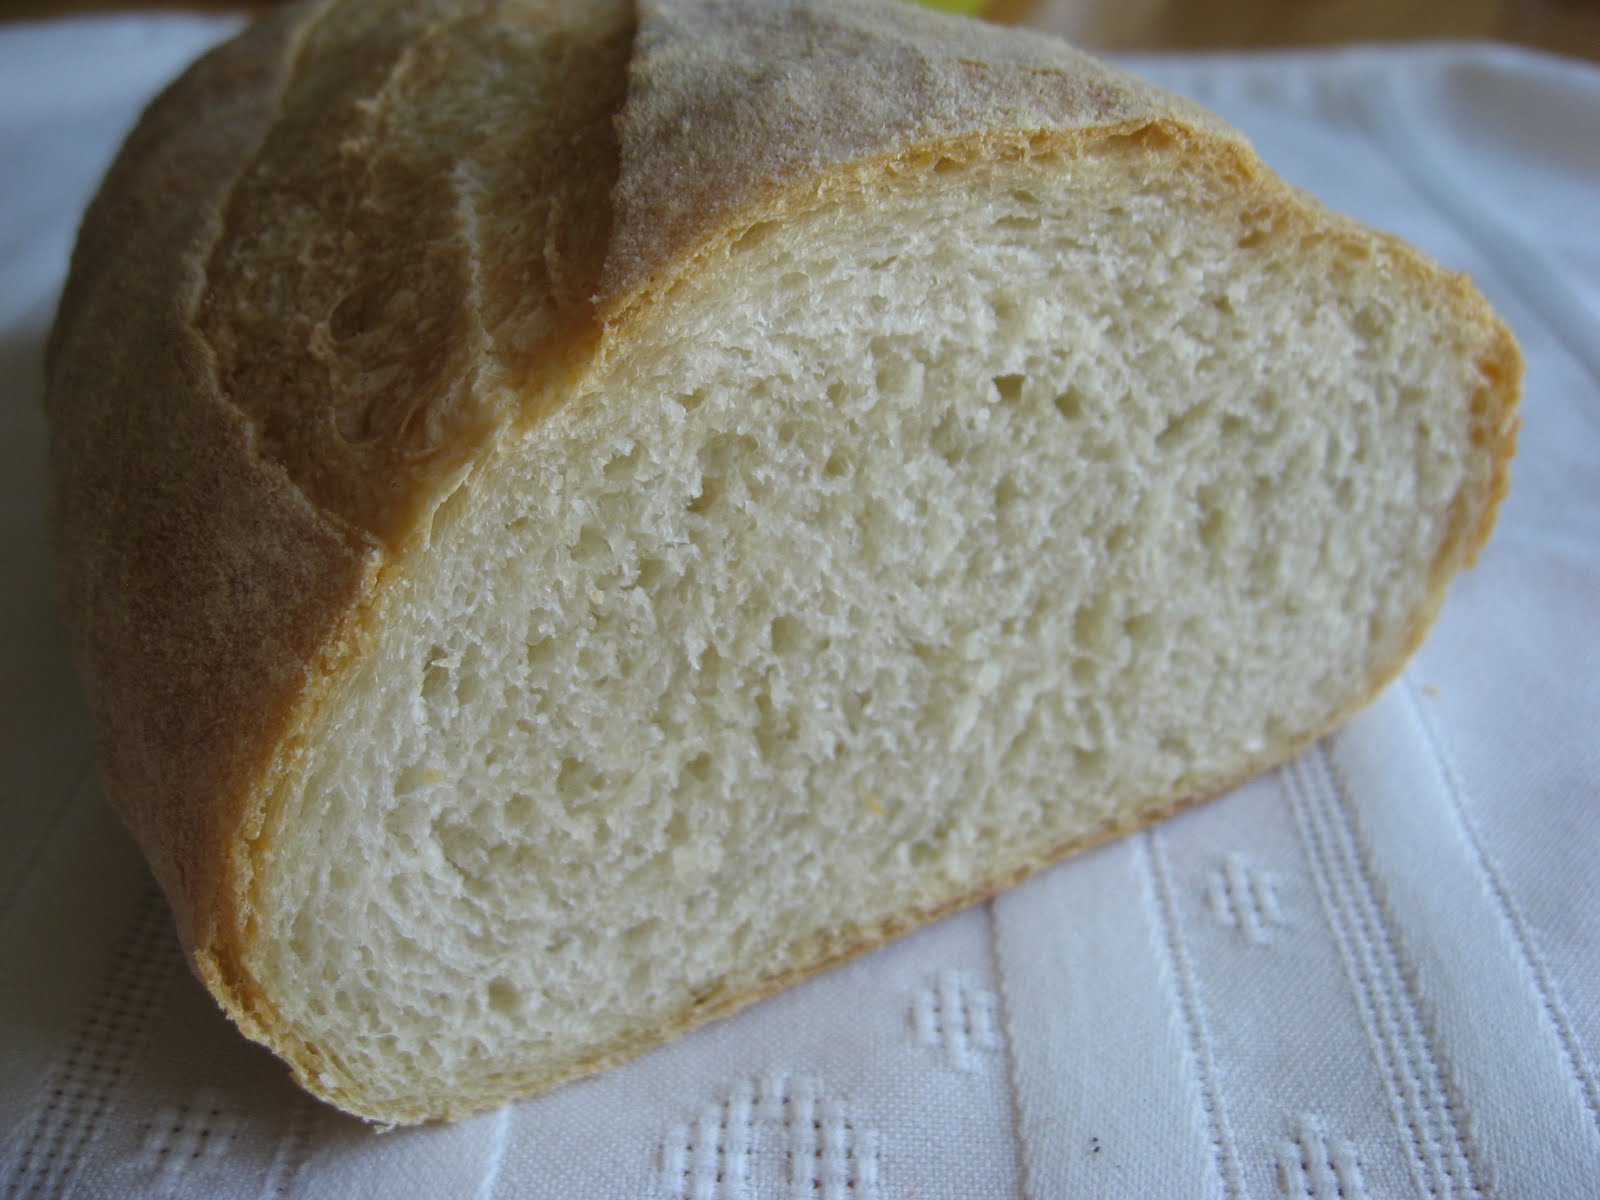
16 disher) to put the batter into the muffin pan.  The muffins baked at 400ºF, and for us they took 20 minutes.  We let them cool in the pan for about 5 minutes, then put them on a rack and let them cool just a bit longer before digging in.


The verdict?  As I said, Gillian has now decided that she likes these muffins.  Brianna does too; she commented that they taste best when still a little warm.  Judging by how quickly the first batch disappeared at work, these were definitely a huge hit there as well.  I got several requests for the recipe.  While I've blogged about these muffins before, for Tuesdays with Dorie, I'm going to share the recipe here, since I've made several changes.  

Chocolate Chip Pumpkin Muffins
(adapted from Dorie Greenspan's Baking From My Home to Yours)

1 cup (135 grams) all-purpose flour
1 cup (135 grams) white whole wheat flour
2 teaspoons baking powder
1/4 teaspoon baking soda
1/2 teaspoon table salt
3/4 teaspoon ground cinnamon
1/2 teaspoon ground ginger
1/4 teaspoon freshly grated nutmeg
pinch allspice
8 tablespoons (1 stick/115 grams) unsalted butter
1/2 cup (100 grams) granulated sugar
1/4 cup (50 grams) light brown sugar
1/2 teaspoon vanilla extract
2 large eggs, at room temperature
3/4 cup (170 grams) canned pumpkin puree (not pumpkin pie filling!)
1/3 cup (75 grams) plain yogurt
1 cup (170 grams) chocolate chips (or nuts or dried fruit--any mix you like)

Make sure your rack is in the center of the oven and preheat the oven to 400ºF.  Line a standard 12-cup muffin pan with paper muffin cups (I use grease-proof ones like these) or spray the molds with baking spray.

In a medium bowl, whisk together the flours, baking powder, baking soda, salt and spices.  Set aside.

Using a stand mixer fitted with the paddle attachment or with a hand mixer in a large bowl, beat the butter until soft.  Add the sugars and beat until light and smooth, then mix in the vanilla.  Next, beat in the eggs one at a time.  Continue to beat the mixture for about a minute after the eggs are in, then mix in the pumpkin and yogurt.  Stop the mixer and scrape down the sides of the bowl.  Then, with the mixer on low, gradually add the dry ingredients, mixing only until they disappear.  Remove the bowl from the mixer, and fold in the chocolate chips with a spatula, making sure that all the ingredients are completely blended. (I find that some of the butter/sugar mixture sits in the bottom of the bowl and doesn't get thoroughly mixed in with the paddle.)

Divide the batter between the prepared muffin cups.  Bake the muffins for 20-25 minutes, or until a toothpick inserted in the center comes out clean and the tops of the muffins are lightly browned.  Allow the muffins to cool in the pan for 5 minutes, then remove them from the pan and put them on a rack to finish cooling.

Sunday, April 15, 2012

Move to the music


I know I survived just fine before I had an iPod and iPhone, but I've recently really started to appreciate the benefits of portable music.  I can listen to music while I'm getting ready in the morning, either from songs on my phone or through streaming my favorite local radio station.  I've also been using the music options to get Brianna & Gillian moving when they're in the shower.  It's like a timer--it's a race to see who can get done in fewer songs.  Sometimes they just dance while they're drying off.  This past week, I found a new use, once I remembered that I had headphones for my phone, too.  Listening to music while I was in the kitchen baking was a great way to avoid listening to whatever Disney Channel show the girls were watching.  I can only take so much of that most days (yet they never seem to tire of it).  And hey, I figure I burned some extra calories as I was dancing around the kitchen.  Fortunately B&G weren't paying any attention to me, so there wasn't any critique of my dance style. =)


I'm thinking that I may have to start using music as a way to get the girls moving a little better in the morning, too.  Way too much time is spent arguing about clothing choices, or just lying on the floor complaining about how tired they are.  Meanwhile, I'm trying to finish packing lunches or figuring out something portable for them to take for breakfast in the car.  Some weeks I don't to a very good job of planning, and by Thursday or Friday I'm scrambling to find them something to eat.  That would be why my girls end up eating cheese sticks (aka string cheese) and dried fruit (cherries for G, apricots or prunes for B) for breakfast. 

We all really like it when we have scones or muffins or bagels available.  (Which reminds me, I meant to make bagels this week, but didn't get to it.  Coming soon!)  If I bake on the weekend, I make enough that we're able to get through 2 or 3 days during the week as well.  Occasionally I manage to bake in the morning before work on the other days.  The secret to being able to have just-baked muffins for breakfast?  Doing most of the prep the night before.  A recent favorite for that treatment has been some great Apple Cinnamon Crumb Muffins that I found over at Two Peas and Their Pod.  The streusel topping uses melted butter, and is quick to mix up.  I store it in a container in the fridge overnight.  In the morning, I just have to break it up into small clumps before putting it on top of the batter--and the crumbs hold their shape nicely in the oven, since the butter has had a chance to firm back up.  I mix the dry ingredients together in the large bowl that I plan to use for the final batter, and cover the bowl with plastic wrap.  (I use white whole wheat flour, btw.)  I even get out the muffin pan and fill the cups with paper liners.  Then the first thing I do in the morning is turn the oven on to preheat while I'm doing other stuff (showering or packing lunches).  I quickly dice up the apples, whisk together the wet ingredients (I've used plain yogurt instead of buttermilk with good results), and stir everything together. I use my #16 disher (which holds 1/4 cup of batter) to fill the muffin cups.  In the 20 minutes or so that it takes for the muffins to bake, I take care of some more of my morning tasks. 


The verdict?  The girls liked these muffins quite a bit.  I also shared a bunch of them with my co-workers, and they were a huge hit with everyone.  It's always a good sign when baked goods are completely gone before lunch time.  Everyone loved the fact that they're a little healthier than the average muffin, but still taste really good.  I highly recommend that you try them for yourself--you can find the recipe here at Two Peas and Their Pod.  


Friday, September 30, 2011

All in knots


Every once in a while we end up doing our Central Market shopping on Sunday morning.  Usually we shop Friday and Saturday nights (one CM, one HEB, depending on my work schedule), but we didn't want to go Saturday night last weekend for fear of not being back in time for the start of Doctor Who.  The girls like to watch too, and the 11pm replay is way too late for them.  Heck, most of the time it's way too late for me, too.  

Anyway, the great thing about shopping on Sunday morning is that everything is fully stocked, including the bakery!  Sure, I love baking my own bread.  But I worked Saturday and was still tired on Sunday (from what seemed like a very long week), so there was no way I was going to pass up the still-warm loaves of Durum Sourdough and Ciabatta.  We actually saw some of the bakers still at work, so Gillian and I stopped to watch for a minute.  Her comments?  "Mommy, he has a different kind of weigher than you do."  (He had a balance.)  "But he's making those rolls like you make!"  He was, in fact, making knotted rolls, though they were a bit simpler than these ones that I made last week.  He wasn't joining the ends together to make rounds.  It was neat that she recognized that we make the same sorts of things at home that they make at the bakery.  How many kids can say that?


I discovered these rolls as I was reading my new issue of Fine Cooking (Oct/Nov 2011).  They caught my eye both because they looked delicious and also because the recipe is from one of my favorite authors, Peter Reinhart.  They looked like they'd be pretty easy to make--it's a straight dough, no preferments necessary.  The nice thing is that you can mix up the dough, then either leave it at room temperature to rise if you're baking the same day, or stick it in the fridge to rise overnight.  You can keep it in there for a few days if you don't get back to it right away.  The full recipe of dough makes 18 rolls, so I decided to bake half the first day after refrigerating my dough, then do the other half a couple days later. 

I mostly followed the recipe, though I did decide to substitute some white whole wheat flour for part of the bread flour.  I used about one-third www flour.  I didn't really add any extra liquid, so the dough was probably a bit stiffer than it was supposed to be.  Next time I'll probably add a little extra milk.  The only other big change I made was to omit the egg wash on the rolls--most of the time I can't be bothered to fuss with it.  It probably won't surprise you that I'm one of those people who prefers matte finish over glossy on my pictures... =)


The verdict?  These were a big hit, especially with the girls.  Baking them in batches on different days worked really well, too.  That way we were able to get through them before they got stale.  I'm sure we'll be making this recipe again.  I doubt that the girls had any idea that there was whole wheat flour in them, either. =)

If you'd like to try the original recipe, you can find it in the Oct/Nov 2011 issue of Fine Cooking, or here on the Fine Cooking website.   My friend Kayte baked along with me on this one, so if you'd like to see the rolls finished the way they were supposed to be (with egg wash & seeds on top), check out her blog post.  I'm also submitting these rolls to Yeastspotting, where you can see lots of other yummy yeasted treats.  

Sunday, June 27, 2010

Shaping up


It's been a while since I posted anything for the BBA Challenge.  Wow, in fact, it's been three months since I wrote about the Light Wheat Bread.  Why?  Well, it's not because I haven't been baking bread.  It's because I got stuck.  Kind of like my friend Kayte did with the Focaccia.  The next bread up (alphabetically) is the Marbled Rye Bread, which this obviously is not. =)  For some reason, I just haven't been in the mood to make it.  I like rye bread, so that's not the problem.  One issue is that I can't find white rye flour here, so I'm going to have to try to sift my whole rye flour to lighten it, and I just don't feel like it.  And I prefer hearth breads over sandwich loaves.  So to get past my block, I'm cheating a bit.  I just skipped over that recipe and the next one (the multigrain sandwich bread) to get to something I would like.  I did make the Pain a l'Ancienne a while back with some of the other Slow and Steady Bakers.  It was okay, but I wasn't that excited by it, and actually neglected to take pictures of it.  So next up after that is Pain de Campagne.


This bread is a close cousin of the French Bread that I made earlier this year.  The difference is that Pain de Campagne has a bit of whole grain, rather than just white flour.  For mine, I used white whole wheat flour.  Like the French bread, this one starts the day before, with a firm preferment, pâte fermentée.  Since the next bread on the list (Pane Siciliano) also uses pâte fermentée, I made a double batch of it.  On day 2, I mixed up the dough.  To avoid the mess I had when mixing the French bread, I first mixed the preferment with the water, to soften it.  To that I added the yeast, flours and salt.  Once the dough is kneaded, it gets a 2-hour bulk fermentation.  My dough was quite active, and doubled in size in about an hour, so I gently deflated it and let it rise for another hour.  

As for the shaping, Pain de Campagne is often formed into interesting shapes, not just baguettes.  I only tried out one of them, an epi, which is shaped like a stalk of wheat.  First you form the dough into a baguette, then cut the dough as shown in this handy shaping document from Jeffrey Hamelman.  I used about a third of the dough for the epi, and baked it on a sheet pan so I didn't disturb the shape once I made it.  The rest of my dough was simply shaped into a bâtard.  I'm actually getting pretty good at shaping those, again thanks to Hamelman and the great shaping instructions in his book, Bread.  My loaves baked for about 25 minutes.


The verdict?  Not bad.  Tasty, but like the French bread, the bread is a little dry for my taste.  I need to work on my epi shaping--I think my main problem is that I used my kitchen shears, which are a bit too short to do the job right.  And my loaves didn't brown as well as I would have liked.  I did like the addition of the whole wheat flour.  I'll probably make this recipe again at some point, especially since I want to try some of the other shapes.  But for now, there are lots of other recipes to make!

Next up is Pane Siciliano.  And never fear, I will go back to the Marbled Rye Bread and Multigrain Extraordinaire at some point.  To see what the other BBA bakers have been up to, you can check out the blogroll.  And for updates on the Slow and Steady subgroup of bakers, watch Nancy's blog for round-ups.  


Saturday, April 3, 2010

When the moon hits your eye...


If I had to pick a single favorite food, it would be pizza.  I think I could eat pizza every day and not get tired of it.  But it has to be the right kind of pizza.  It's a good thing that I only lived in Boulder for less than a year, because the people there seem to have a thing for Chicago-style deep dish pizza, based on the restaurants that I went to.  I suppose that's alright if you like that sort of thing, but I grew up eating real pizza, which is to say, thin crust pizza that comes in enormous slices. =)  The sort of pizza we would order by the slice after football games in high school.  (I admit, I was a band geek in high school; a bunch of us would go out after the games and almost always end up at the same place, eating pizza.)  Whenever I go to visit family on the east coast, I try to eat pizza while I'm there.  Fortunately, Austin is home to a lot of people transplanted from the northeast, so we are lucky enough to have some great pizza places.

I know it's not my usual thing to write about savory dishes on this blog, but I'll defend this post by pointing out that it's still baking. =)  I'm actually surprised that I haven't posted about pizza dough more often, since we eat it almost on a weekly basis.  My one previous post was for a Daring Bakers challenge, and featured a recipe from the Bread Baker's Apprentice.  That one was good, but not my favorite--I had some trouble working with the dough.  Since we eat pizza so often, I've tried a number of different recipes over time.  For a while, one from Cook's Illustrated was my standby.  Lately, though, I've tried a couple from my new Peter Reinhart book, Artisan Breads Every Day.


The most recent one that we've been making is the Neo-Neapolitan Pizza Dough.  The original recipe calls for all bread flour, but I like substituting white whole wheat for part of it.  Reinhart mentions several times in the book that it's possible to substitute whole grain flour for part of the white flour in most of the recipes but that addition water will be needed.  He says to add 1/2 tablespoon (1/4 ounce) of water for each 1 ounce of whole grain flour that you substitute.  I made my pizza dough with 4 ounces of white whole wheat flour, so I added 1 ounce of extra water.  (So 20 ounces of bread flour, 4 ounces of white whole wheat flour, and 18 ounces of water.)  The recipe has olive oil and sweetener (sugar, honey or agave syrup) as optional additions.  I used the sweetener once, but found that the crust darkened too quickly (totally burned one pizza) so now I skip it.  I do add the oil.  

The recipe says that the dough should be refrigerated overnight before using it.  I've actually been making it in the morning, portioning it into balls for individual pizzas, and putting the dough balls in the fridge to ferment during the day.  It seems to work quite well.  I also like the fact that the dough makes a lot--I make 6 portions of dough at 7 ounces each.  Three of them go into the fridge to be used that evening, and the other three go directly into the freezer to save for the following week.  Jamie and I each make our own pizzas and the girls share one.  The nice thing about individual pizzas is that everyone can have the toppings that they like. =)


I'm the boring one.  I prefer just sauce and cheese on mine.  We use whole milk mozzarella (the kind you buy in blocks, not fresh mozzarella) because it has a much nicer texture than part-skim.  We just try not to go crazy with it. =)  I also add some freshly grated parmesan on top.  Occasionally I'll also sauté some mushrooms to add to mine.  Jamie is much more adventurous in his toppings.  He usually has pepperoni (we always use turkey pepperoni--Jamie says it tastes just as good but is much less greasy).  He also adds olives (sometimes black, lately green) and mushrooms.  He likes spicy things too, so he often adds some crushed red pepper flakes or adds a bit of hot sauce to his sauce.  And he prefers romano to parmesan.  The girls mostly go with cheese, sometimes adding pepperoni.  When we were making the pizza that I photographed, we were low on pepperoni, so they had salami instead.  I put Brianna to work cutting it into smaller pieces.  Both Brianna and Gillian like helping add stuff to their pizza. =)

With some of the previous recipes I've made, we would pre-bake the crust for a minute or two, then add the toppings and finish baking.  With this dough, though, the bottom was getting too brown when I did that.  But even with cornmeal on the peel, the dough tends to stick to it when we add sauce and toppings to the raw dough.  So I've started doing things another way.  I put a sheet of parchment paper on the peel and put the dough on top of that, then add toppings.  The pizza then goes into the oven, parchment and all.  It's a good idea to pull the parchment out after a minute or two of baking, once the crust has set on the bottom.  Otherwise, it tends to get rather charred around the edges, from baking at 550F for too long. =)  The pizzas bake for 5-7 minutes each, depending on the amount of toppings.


The verdict?  I think I have a new favorite dough!  We've made this one a couple times now, and I really like how it turns out, from both fresh and frozen dough.  The whole wheat adds a nice flavor.  Most of the crust is thin and crisp on the bottom, while the edges are chewier, with some nice bubbles.  

If you'd like to try this recipe for yourself, you can find it here.  But I highly recommend getting a copy of Artisan Breads Every Day--there are many other wonderful recipes to try.  And if you're a huge pizza fan, it's worth getting your hands on a copy of Peter Reinhart's pizza book, American Pie.  I was lucky enough to be able to borrow it from my library, and I'll definitely be buying my own copy at some point.

One last thing, this pizza has been submitted to Yeastspotting!


Sunday, March 28, 2010

Mmm, toasty


Next up for me in the BBA Challenge was Light Wheat Bread.


This is a perfect bread for Brianna and Gillian--a nice sandwich loaf, but with some white whole wheat flour in place of some of the white flour to make it healthier (plus it tastes better).


The verdict?  It makes wonderful toast.  I think almost the entire loaf was consumed toasted.  Though some, as Tracey reminded me, made it into grilled cheese, where it was also excellent. 


If you'd like to give this one a try, you can find the recipe here.  Next up, Marbled Rye Bread!

Wednesday, March 4, 2009

In the bag


We're a brown-bag lunch sort of family. Okay, technically mine and Jamie's are blue, and Brianna's is pink. =) I've pretty much always taken my lunch to school or work, since I was little. Early on, my mom would make my lunch. That apparently lasted until I started to complain about what was in it (I don't like PB&J sandwiches), at which point I was told that if I didn't like it I could do it myself. =) Nowadays I take lunch to work most of the time because I know I'll like what I have, and it definitely saves money.

It was a bit of a shock this past fall when I realized that I would need to do something for Brianna's lunch when she started kindergarten. Up until that point, she got fed at day care (as Gillian still does). I had a feeling she wouldn't be that interested in buying lunch at school--she can be kind of picky. I asked her, and she wanted to bring lunch from home. And she has, every day but one so far--when I went and ate Thanksgiving lunch with her at school. (Mmm, cafeteria turkey and mashed potatoes. =) )


Brianna's lunch is usually a mix of different small things to eat, since I'm never sure how hungry she's going to be at lunch time. Today's, for example, included: a small yogurt drink, a small juicebox, a handful of blackberries, a small bag of Cheezits (probably for afternoon snack), and a little bagel with garlic cream cheese. The fruit varies (applesauce, blueberries, grapes, even cherry tomatoes). The snack varies (pretzels, goldfish). And the bready bit varies. Sometimes it's an actual sandwich. Sometimes it's bread with the meat and cheese on the side. Sometimes it's a wrap (tortilla in place of bread). This weekend, though, Brianna asked if she could have bagels in her lunch this week.


In the past, I've bought mini bagels at the grocery store. They're convenient and not that expensive. But frankly, they have about as much taste as cardboard. So in keeping with my BYOB goal, I decided to make my own mini bagels this past weekend. I've made big ones before, so I just had to adjust my shaping and timing a bit. I thought about trying a recipe that I saw on Baker's Banter, but I'm used to boiling rather than steaming the bagels before baking them. I'm sure I'll try their method eventually.   I usually form my bagels by making ropes of dough and joining the ends. But this time I tried the poke a hole in the middle approach shown in the article. It worked quite well with the smaller (about 2-ounce) pieces of dough. After shaping, I boiled the bagels for about 90 seconds on each side. I topped a handful of them with salt and left the rest plain--the salt ones need to be eaten right away or the salt dissolves and makes the bagels soggy on top. I baked them for about 5 minutes less than I do the big ones.

The verdict? Quite tasty, as expected. These are the perfect size for Brianna and Gillian. We ate some for breakfast on Sunday. I sliced the rest in half and put them in the freezer for B's lunches. Every day so far this week, she's actually eaten everything in her lunch. =)


If you want to BYOB, here's the recipe.  And I'm also submitting this to Yeastspotting.  

Mini Bagels

1 cup (5 ounces) white whole wheat flour (King Arthur)
2 1/2 cups (12.5 ounces) bread flour (King Arthur)
1 1/2 teaspoons table salt
3 tablespoons granulated sugar
1 1/2 tablespoons instant yeast
1 1/2 cups (12 ounces) room temperature water (I used bottled since my tap water is extremely hard)

canola oil (for dough bucket)

2 quarts water
2 tablespoons packed light brown sugar

toppings, if desired

Place the flours, salt, sugar and yeast in the bowl of a standing mixer.  Mix with the paddle on low speed until the dry ingredients are well blended.  Add the water and continue to mix with the paddle until a shaggy ball of dough forms.  Switch to the dough hook.  Knead the dough on low speed (between 2 and 4) about 7 minutes.  The dough will be much smoother, but will still be tacky.  Transfer the dough to a rising container that has been greased with canola oil.  Let the dough rise at room temperature until doubled in size (about 1 1/2 hours, I think).

Preheat the oven to 400 degrees F.  Place the two quarts of water in a wide pot and bring it to a boil.  When it boils, add the brown sugar and turn the heat down so the water just simmers.  

Meanwhile, remove the dough from the container and portion it into 15 equal pieces (2 ounces by weight).  Form each piece of dough into a smooth ball (like you're making rolls) and allow it to rest for a few minutes.  Poke a hole in the center of each dough ball with your finger and thumb and then twirl the bagel on your finger to widen the hole.  (see great pictures here--just scroll down)

Add the bagels to the water 3 or 4 at a time.  Simmer them for 90 seconds on each side, then remove them from the water and place them on a clean lint-free kitchen towel to drain.  After a few minutes, transfer them to a large baking sheet (13 x 18) lined with parchment paper.  Once all the bagels are on the baking sheet, place the pan in the oven (I usually put it directly on top of my baking stone).  Bake for about 20 minutes, then flip the bagels over and bake for about 5 minutes longer so that both sides brown well.  Let cool until just warm before slicing.


Sunday, January 18, 2009

A future in food styling


I know I said the challah would be next (and it's coming as soon as I finish writing the post), but I'm taking things a bit out of order.  When I was off last Wednesday, I mixed up a batch of light whole wheat bread using the Artisan Bread in Five method.  It's pretty similar to the master bread recipe that I started with.  You just substitute a cup of whole wheat flour (I used King Arthur white whole wheat flour) for a cup of the all-purpose flour.  After I mixed it, I let it rise at room temperature for a couple hours and then put it in the fridge.  I pretty much ignored it until Saturday morning.  When I checked on it, I noticed that the dough had deflated some.  So I stirred it around in the bucket with a spatula, thinking that might get the yeast going some more.  And it did.  When I checked it again this morning, it was bubbly and had risen back up somewhat.  I took out a pound of the dough and made a batard with it.  After letting it rise at room temperature for about an hour and a half, I baked it for 35 minutes.

The bread was cool just in time for lunch, so I used it to make some sandwiches for Brianna and Gillian.  Chicken and mozzarella cheese for Gillian, chicken and "orange cheese" (sharp cheddar) for Brianna.  It's funny how they're different about so many little things... =)  After cutting the sandwiches in half, I turned around to get a couple plates out of the cupboard.  When I turned back, Brianna told me, "Look, Mommy!  I stacked it up so it looks nice.  Will you take a picture of it?"  "Sure, I can do that."  "And then will you put it on the computer?"  How could I say no? =)


Sunday, January 11, 2009

More fun with bread


Lately my pantry seems a lot more full than before.  And I'm not quite sure why.  Okay, I do have some idea.  I've always had a lot of chocolate on hand.  (And it's about to get worse, since as usual Jamie did his best to completely fill my Christmas stocking with assorted bars of chocolate.)  The canisters for light brown sugar, cornmeal, regular sugar and AP flour live on my kitchen counter, but others are in the pantry--cake flour, dark brown sugar, powdered sugar, bread flour, whole wheat flour, whole wheat pastry flour, rolled oats, semolina.  And with all the baking I've been doing, I keep extra of a lot of stuff on hand--unopened bags of all-purpose flour, bread flour, white whole wheat flour, brown sugar, powdered sugar, granulated sugar.  Most of this stuff I use quite regularly.  And occasionally I'll pick up something just because it looks interesting and I might want to use it in something.  Which is why, when I decided that I was going to try the European Peasant Bread from my new cookbook, I actually had rye flour on hand.  Now I just need to find a container for it...  

Before embarking on my second Artisan Bread recipe, I had to acquire a new piece of equipment as well.  Since the first batch of dough threatened to escape my 4-quart container (I wish I'd taken a picture!), I wanted something bigger.  I managed to get down to my favorite restaurant supply store, Ace Mart, just a few days after Christmas.  Thank you to the nice employee who let me in even though it was about 2 minutes before closing time!  I got in and out with what I wanted, picked the girls up from day care, and went home to make dough.  


This dough is similar to the first one I made from this book, with some whole wheat and rye flour substituted for part of the all-purpose (2.5 ounces each of whole wheat and rye; 27 ounces AP flour).  I went with white whole wheat flour, since that's what I had on hand.  I used an extra two ounces of water (26 ounces total), as I did with the master boule recipe, since I use King Arthur all-purpose flour.  I cut the yeast and kosher salt back to 4 teaspooons each.    (The basic recipe and method can be found here.)

The first loaf I baked from this batch was the simple boule shape.   With the later loaves, I tried my hand at baguettes.  I need to work on my shaping skills!  A boule is pretty easy with this rather wet dough.  I have a harder time making other shapes without handling the dough too much.  I did find some great tips here, with pictures that help a lot.  I got one baguette that turned out pretty good!  


Even though the recipe says it makes 4 1-pound loaves, I found that I was able to make three, but then there wasn't quite enough dough left for a fourth.  So I made a second batch of dough and added the remaining old dough to it, figuring it would add flavor.  I've made three loaves from that and have enough left in the fridge for one more.

The verdict?  We all really liked this one!  The whole grains give some interesting flavor to the bread.  Brianna happily ate it in her lunch all week.  And it makes great toast.  The loaves made with the old dough did develop more interesting flavors, but didn't turn out quite the way I'd hoped--kind of dense.  I'm still working on the shaping issues; I think my dense baguettes were handled too much.  And I've learned that while you can get away with a minimal rising time with this dough, the bread is much better if you let it rise longer after shaping.  I found some great tips here on how to deal with the dense crumb.  On the whole, I'm having a lot of fun experimenting!  

And I'm submitting this European Peasant Bread to Yeastspotting.  

Next up:  Challah