Showing posts with label BBA challenge. Show all posts

Wednesday, May 23, 2012

Sunday, January 22, 2012

I'd like to propose some toast


I usually pack my lunch to take to work.  It saves money, not to mention that it's usually nice not to have to go anywhere to get food.  That means more reading time. =)  Occasionally, I just have to get away from work for a bit, but I try to keep that to a minimum.  I get lots of comments from those who envy my lunches, even when it's just a sandwich.  "I bet you made that bread, didn't you?"  No, I don't always, but I definitely like to when I have the time.  I generally prefer hearty breads or rolls for my sandwiches, rather than traditional "sandwich bread."  I'd rather save those pan loaves for toast, or better yet, French toast.  They're also good for grilled cheese, but not what I prefer for cold sandwiches.  

White bread dough also makes good dinner rolls, or hot dog & hamburger rolls.  I almost never buy those anymore.  Homemade ones just taste better, as well as hold up better to juicy burgers or sauerkraut on dogs.  Another great thing is that white bread loaves or rolls are relatively quick to make--you use a straight dough that is done all in one day.  There's no need to remember to make a preferment the night before.  The butter and sugar in the dough can slow the rising times a bit, but you can remedy that with either some SAF Gold yeast or using a slightly warmed oven as a proofing box.  Either way, look out, since although the dough can get off to a slow start when proofing, once it gets going it can blow the lid off your container if you're not paying attention. =)


I've pretty much decided that there's no way I'm going to fully complete the BBA Challenge, but my friends Kayte and Margaret are still trying to get it done.  (Some of the recipes just don't appeal to me, and I don't feel like making them just to say that I did.)  Even though I've skipped a bunch of recipes they invited me to join in on the White Bread variations.  I don't actually make regular white bread very often--I usually can't help myself from substituting some white whole wheat flour for part of the bread flour.  In fact, I did just that with the second variation of the BBA white bread, which I posted quite a while back.  This time I decided to stay true to the recipe and make it with just bread flour.  The first variation uses dry milk powder and water rather than milk or buttermilk.  Fortunately I had some dry milk in my pantry, though I think it's almost time to replace it.  Unless it's pretty fresh, I find that it tends to clump up and make small lumps in the dough.  

I made the dough with the lesser amount of water, but still found it to be quite sticky.  I added some additional flour while it kneaded in the mixer.  I often start doughs in my stand mixer then finish kneading them by hand so I don't overheat the machine.  That's what I did for this recipe, and I ended up kneading in a bunch of bench flour by hand to get the dough to the point where it was just tacky rather than sticky.  I didn't keep track of the time, I just kneaded until I got a fairly decent windowpane.  It wasn't perfect, but I tend to be impatient when kneading. After the initial proofing (which took a couple hours), I formed the dough into one pan loaf and half a dozen oval rolls.  After letting them rise, I baked the rolls first--they got 15 minutes at 400ºF.  Then I turned the oven down to 350ºF and baked the loaf for about 30 minutes.


The verdict?  Whole grains and hearth breads are wonderful, but sometimes you just want some plain white sandwich bread.  This one is delicious.  The girls and I sampled some of it with jam for a snack, and it was a hit all around.  B is excited to have the rolls for her lunch, and I'm sure both girls will be happy to have bread stashed in the freezer so we can make toast for breakfast.   

If you'd like to make this bread for yourself, I highly recommend getting a copy of The Bread Baker's Apprentice.  There are still a lot of people out there trying to baking through the whole book--you can read about it on the BBA Challenge Facebook page.  You can read Kayte's post about this bread on her blog.  And check out Yeastspotting for lots of other delicious yeasted treats.


Thursday, December 9, 2010

Fruitcake, Italian style?


I'm slowly but surely working my way through the BBA Challenge.  It's taken me longer than I expected, but I'm still enjoying baking through all the recipes in The Bread Baker's Apprentice.  I have jumped around a little bit lately.  One of the recipes I initially skipped over was Panettone--I got to that point in the "P" section back in July.  I wasn't in the mood for a holiday bread then, so I decided to save it for closer to Christmas.  This past weekend was the perfect time, since it was the weekend of our annual potluck with the Italian genealogy group.  It was a crazy weekend due to work stuff, but I'm glad I had time to make this recipe--it gave me a chance to get geeky about bread dough.


The panettone recipe starts with a wild yeast preferment--it's the first dough in the book to use a sourdough starter (which can catch you by surprise since it's not in the sourdough section).  Rather than make the sourdough starter from BBA, I used the one that I developed using the method in Reinhart's most recent book, Artisan Breads Every Day.  It's a firm starter with about 67% hydration.  Since the BBA one is 100% hydration, I got to do some math!  I know, I'm crazy like that--math is fun. =)  

First, I converted everything to grams, since I find that much easier to work with.  For the sponge, you need 200g of 100% hydration starter, 225g milk, and 125g all-purpose flour.  So the starter is contributing 100g each of water and flour.  There isn't any other water in the sponge, so I needed 100g of water from my starter.  With my starter being 67% (meaning 2 parts water for 3 parts flour) I would have to use 250g to get 100g of water.  The total flour for the sponge is supposed to be 225g--100g from the starter, and the additional 125g.  My 250g of starter has 150g of flour, so I only needed to add 75g of additional flour.  The 225g of milk did not change.  Did I totally lose you yet?  It wasn't really that scary, was it?


I went with dried fruit rather than candied.  I ended up using 170g of golden raisins, 85g of dried cranberries, and 85g of dried apricots (snipped into small bits with my kitchen shears).  I used light rum for the alcohol.  For other flavoring, I used maybe half a teaspoon of Fiori di Sicilia (the 1 tablespoon called for in the recipe seems outrageous--that is very strong stuff) along with about half a teaspoon of vanilla and a few drops each of lemon and orange oil.  I didn't have my fruit in time to do an overnight soak, so I used heat to speed up the process.  I put the fruit in a medium saucepan with about 1/4 cup of water.  I brought it to a boil and them simmered it until most of the water was absorbed.  Then I removed it from the heat and added the rum and flavorings.  I let it macerate for a couple hours, until most of the liquid was absorbed. 

Other than that, I mostly stuck to the recipe.  I left out the almonds.  I did use SAF Gold yeast, and had no problem with my dough rising.  I let the dough rise until it was about one and a half times its original volume, then stuck it in the fridge for the night.  For the first hour it was in the fridge it was still rising quite a bit, so I deflated the dough a couple times.  When I pulled it out the next morning, the dough had mostly filled my 4-quart container.  I shaped the dough while it was cold.  I had decided to make lots of mini panettones--I formed 25 at 70g each.  2 dozen went into cute little wrappers (that you can find at Sur la Table) and one went into a greased 4 oz ramekin.  The dough took about 90 minutes to proof, then I baked the minis for about 30 minutes (at which point they were 190ºF and golden brown on top).  


The verdict?  These were a big hit with the Italian crowd.  I was a bit worried that they weren't sweet enough (I don't eat much panettone, so I had no frame of reference).  A couple people assured me that they were just right.  I sent some home with the people who enjoyed them the most, and had a few left over.  They made a great breakfast for a couple of days.  (It's got fruit, so it's perfect for breakfast, right?)  I can definitely see myself making these again during the holidays.  I even have a dedicated panettone spatula now--boy, that Fiori di Sicilia is strong stuff.  I think the spatula will smell like it forever. =)

If you'd like to try this recipe for yourself, do yourself a favor and get your hands on a copy of The Bread Baker's Apprentice.  It has many wonderful recipes.  Check out the BBA blogroll to see how others did with this recipe (though most made it quite a while back).  For other yummy yeasted creations, check out Yeastspotting (including this great post on holiday breads).  


Friday, November 12, 2010

Playing catch-up


How much menu planning do you do?  We shop once a week--okay, technically twice, since we shop at both HEB and Central Market each weekend--so I plan meals a week at a time.  I try to plan a mix of things, since I know there will be nights when I get home late and won't want to cook anything complicated or time-consuming.  Some meals will be eaten as a family, and some will be done in two seatings (feed the girls to get them to bed, then J & I eat later).  The nights we shop (generally Friday and Saturday) are a free-for-all.  We all eat different things, depending on what jumps into the cart.  Jamie often eats sushi, since he's the only one who likes it.  Salads are popular as well.  One night during the week, we often eat homemade pizza.  And I try to plan something for Sunday or Monday that will have lots of leftovers so that I have something to eat for lunch for the week.  Sunday is also my day for making those more complicated or time-consuming things. =)  

That would include some of the French Fridays with Dorie recipes.  One of the recipes for November is Roast Chicken for Les Paresseux, aka Lazy People. =)  I managed to make this one last Sunday.  When I was growing up, we almost always had Sunday dinner, and we'd often have a roast of some sort.  We don't do that very often these days, but it's nice when I have the time and energy to make something more involved.  We had the chicken with mashed potatoes and roasted green beans.  I actually stole the potatoes from the Hachis Parmentier recipe.  I did make that one a couple weeks ago, and while I didn't like it that much with the sausage, the potatoes on top were fantastic.  (Jamie really liked it, though, and happily ate the leftovers.)   


This particular recipe didn't provide me with much in the way of lunch (I tend to go with things like casseroles, spaghetti, soup, etc. for that), but the leftovers did come in handy.  I had leftover potatoes and most of a bunch of rosemary, and I saved the half of the garlic head that was roasted outside the chicken.  So I was all set for my next bread recipe in the BBA Challenge, Potato Rosemary Bread!


The last bread I posted for the BBA Challenge was the Pane Siciliano back in July.  I skipped over the Panettone for now, but plan to make that in December.  I made the Pizza Napoletana for Daring Bakers a couple years ago.  I did make the Poolish Baguettes and Portuguese Sweet Bread back in August, but didn't get as far as posting about them.  I liked the Poolish Baguettes better than the French Bread baguettes that I made, mainly because I think the addition of whole wheat flour added flavor to the bread.  The Portuguese Sweet Bread made excellent french toast, but was a bit light in texture for regular toast.  Both were good, and I'm glad that I tried them.  But I was quite excited that the next bread was a decidedly savory one.  

The Potato Rosemary Bread starts with some biga for a preferment.  The full biga recipe in the book makes 18 ounces, but I only needed 7 ounces.  Fortunately the math gets a lot easier when you convert to metric, since 7 ounces is 200 grams.  So I ended up using 120 grams of bread flour, 80 grams of water, and about 1/8 teaspoon of instant yeast.  The biga needed to ferment at room temperature for a few hours, then went into the fridge for the night. 

You're supposed to take the biga out of the fridge about an hour before you want to make the final dough, but that timing didn't work for me on Thursday.  Since I was working with a cold preferment, I compensated by using warm water instead of room temperature.  I also warmed up the mashed potatoes (in the microwave) so they wouldn't make the dough too cold.  I mixed the biga with the water, then added the potatoes and some olive oil.  Next in were the flavorings of chopped rosemary and black pepper.  Finally, I mixed in the bread flour, salt and instant yeast.  I mixed the dough by hand initially, using my dough whisk.  Then I used my stand mixer with the dough hook to develop the dough.  Once the dough was close to ready, I took it out of the mixer, added the roasted garlic, and finished kneading by hand.  Then it went into my 2-quart dough bucket to rise.  Once the dough was doubled, I portioned it into 60 gram pieces and formed them into round rolls.  (I ended up with 17.)  I baked them for a total of 20 minutes, and the house smelled fantastic by the time they were done.


The verdict?  This bread is fantastic!  Everyone here loved the rolls.  I will definitely be making this recipe again--maybe even this weekend, since I still have some leftover mashed potatoes.  The rolls are great, but I'd like to try a larger loaf as well.  

If you'd like to try the chicken recipe, I highly recommend that you get your hands on a copy of Around My French Table.  For tips from some of the other members of the group, read the P&Q as well.  For the bread, check out Peter Reinhart's book, The Bread Baker's Apprentice.  There are many, many wonderful breads in this book.  Next up, Pugliese.

I'm submitting these rolls to Yeastspotting.


Sunday, July 11, 2010

Brought to you by the letter S


I was recently amazed to discover that Gillian can write a lot more than I realized.  I knew she could recognize all the letters and write her name (a few of the letters are interesting, but you can make out what she's writing).  We were at Borders for story time, and afterwards they got to make Father's Day cards.  She sat there and asked me what letters she needed to say "Happy Father's Day." I offered to help her write it, but she insisted she could do it herself.  She only needed me to explain how to form one of the letters.  Boy, this kid is quick, even more so than her big sister.  She's not even four yet!  And with the timing of her birthday (October), she'll be almost 6 by the time she can start kindergarten.  It's really hard sometimes to figure out what to do with my smart kids to keep them challenged.


Jamie and I realized a couple weeks ago that boredom may be a lot of the reason B is driving us crazy lately.  She doesn't have enough to do of her own, so she starts bothering G and wanting to play with her stuff.  And I get tired of explaining, that yes, those toys were originally hers, but now G gets to play with them, since they're geared more toward a 3-year-old than a 7-year-old. *sigh*  Fortunately, we were able to come up with a few ideas...J is teaching her how to play chess, since he loved it as a kid (and still does).  I can play, but am nowhere near his level.  And he's a much more patient teacher than I am.  He found a couple of chess books for kids, too.  Another thing that B really likes is puzzles, both word puzzles and the jigsaw variety.  I think it's time to get some new ones--harder ones that G can't do yet, with more, smaller pieces.  

She's also been reading a lot, which is good, but that only keeps her occupied for so long.  Besides some new Betty & Veronica comics (J is the comic book influence), the main thing she's been reading is her Christmas present from my sister Kate.  Kate got her the entire collection of Ramona books.  With the new movie coming out next week, she's been trying to read as much as she can beforehand.  She's already talked me into taking her to see the movie.  The only movies I've seen in a theater for the past several years are the ones I've taken B to.  Going to the movies isn't in the budget much.  


Of course, you're all familiar with my main source of entertainment these days--baking. =)  And a lot of the books I read are cookbooks.  I was thinking the other day that I've gained an amazing amount of knowledge and skill through my participation in various baking groups.  Tuesdays with Dorie and Daring Bakers have helped with cakes and other sweets.  For bread, though, the biggest influence is definitely the BBA Challenge.

I mentioned in my last BBA post that I got stuck on the Marbled Rye and decided to jump ahead for the time being.  Since I was making pâte fermentée for the Pain de Campagne, I figured I'd make a double batch so I'd have some ready for the next recipe, too, which is Pane Siciliano.  I was really looking forward to this one, because I've really enjoyed every bread that I've made with semolina.  The addition of semolina flour gives bread a pretty yellow color and I like the texture it contributes, too.  

The dough for Pane Siciliano is fairly lean (bread flour, semolina flour, salt, yeast and water) but does have a small amount of olive oil and honey added to it.  After the initial mixing, my dough was rather sticky.  Rather than add flour when kneading, I decided to try Peter Reinhart's stretch and fold technique from his newest book, Artisan Breads Every Day.  I did the stretch and fold on an oiled countertop 3 or 4 times in about 45 minutes, and then let the dough rise for another 45 minutes.  When it was time to divide the dough for shaping, I decided that I wanted to set some of it aside for pizza crust.  I did three portions of 7 ounces each that I formed into balls and stuck in the fridge to use for dinner.  The remaining dough was about 23 ounces, and I shaped that into the traditional "S" shaped loaf.  It's supposed to be topped with sesame seeds, but I didn't have any.  The shaped loaf is retarded overnight in the fridge to develop flavor.  The next morning, I pulled it out of the fridge and let it warm up a bit while the oven preheated, about 45 minutes.  The loaf only took about 20 minutes to bake.


The verdict?  I really enjoyed this bread.  It made a very nice loaf, and excellent pizza crust.  Next time I make it, I'll make sure I have sesame seeds on hand so I can try it that way.  Everyone else here loved it as well.  Jamie is my main critic for the various pizza crusts that we've tried, and he commented that he really likes how this dough worked--stayed nicely firm and crisp on the bottom with his choice of toppings, but was tender on top.  I loved the edges of this crust--nice and puffy.  I love the bubbles. =)

If you'd like to try Pane Siciliano for yourself, check out a copy of The Bread Baker's Apprentice.  There are so many excellent recipes and such good information on how to make bread.  To see how everyone else is doing with the challenge, check out the BBA Challenge blogroll.  Also, check out Yeastspotting for lots of other yummy yeasted treats.  And I'm submitting this to Bread Baking Day #32: Italian Breads!


Sunday, June 27, 2010

Shaping up


It's been a while since I posted anything for the BBA Challenge.  Wow, in fact, it's been three months since I wrote about the Light Wheat Bread.  Why?  Well, it's not because I haven't been baking bread.  It's because I got stuck.  Kind of like my friend Kayte did with the Focaccia.  The next bread up (alphabetically) is the Marbled Rye Bread, which this obviously is not. =)  For some reason, I just haven't been in the mood to make it.  I like rye bread, so that's not the problem.  One issue is that I can't find white rye flour here, so I'm going to have to try to sift my whole rye flour to lighten it, and I just don't feel like it.  And I prefer hearth breads over sandwich loaves.  So to get past my block, I'm cheating a bit.  I just skipped over that recipe and the next one (the multigrain sandwich bread) to get to something I would like.  I did make the Pain a l'Ancienne a while back with some of the other Slow and Steady Bakers.  It was okay, but I wasn't that excited by it, and actually neglected to take pictures of it.  So next up after that is Pain de Campagne.


This bread is a close cousin of the French Bread that I made earlier this year.  The difference is that Pain de Campagne has a bit of whole grain, rather than just white flour.  For mine, I used white whole wheat flour.  Like the French bread, this one starts the day before, with a firm preferment, pâte fermentée.  Since the next bread on the list (Pane Siciliano) also uses pâte fermentée, I made a double batch of it.  On day 2, I mixed up the dough.  To avoid the mess I had when mixing the French bread, I first mixed the preferment with the water, to soften it.  To that I added the yeast, flours and salt.  Once the dough is kneaded, it gets a 2-hour bulk fermentation.  My dough was quite active, and doubled in size in about an hour, so I gently deflated it and let it rise for another hour.  

As for the shaping, Pain de Campagne is often formed into interesting shapes, not just baguettes.  I only tried out one of them, an epi, which is shaped like a stalk of wheat.  First you form the dough into a baguette, then cut the dough as shown in this handy shaping document from Jeffrey Hamelman.  I used about a third of the dough for the epi, and baked it on a sheet pan so I didn't disturb the shape once I made it.  The rest of my dough was simply shaped into a bâtard.  I'm actually getting pretty good at shaping those, again thanks to Hamelman and the great shaping instructions in his book, Bread.  My loaves baked for about 25 minutes.


The verdict?  Not bad.  Tasty, but like the French bread, the bread is a little dry for my taste.  I need to work on my epi shaping--I think my main problem is that I used my kitchen shears, which are a bit too short to do the job right.  And my loaves didn't brown as well as I would have liked.  I did like the addition of the whole wheat flour.  I'll probably make this recipe again at some point, especially since I want to try some of the other shapes.  But for now, there are lots of other recipes to make!

Next up is Pane Siciliano.  And never fear, I will go back to the Marbled Rye Bread and Multigrain Extraordinaire at some point.  To see what the other BBA bakers have been up to, you can check out the blogroll.  And for updates on the Slow and Steady subgroup of bakers, watch Nancy's blog for round-ups.  


Sunday, March 28, 2010

Mmm, toasty


Next up for me in the BBA Challenge was Light Wheat Bread.


This is a perfect bread for Brianna and Gillian--a nice sandwich loaf, but with some white whole wheat flour in place of some of the white flour to make it healthier (plus it tastes better).


The verdict?  It makes wonderful toast.  I think almost the entire loaf was consumed toasted.  Though some, as Tracey reminded me, made it into grilled cheese, where it was also excellent. 


If you'd like to give this one a try, you can find the recipe here.  Next up, Marbled Rye Bread!

Wednesday, March 17, 2010

On a roll


Okay, show of hands.  How many of you put stuff off and aren't even really sure why you're doing it?  Then, when you finally get around to doing whatever you should have done a long time ago, you wonder why the heck you waited so long.  Because whatever it was wasn't as bad as you thought it would be, and you feel so much better for having done it.  Lots of things leap to mind for me.  Taxes, for instance.  I knew we were going to get a refund.  I had all the paperwork I needed.  And yet, I only got it done a week and a half ago!  Check-ups for the girls is another thing.  I just need to pick up the phone and schedule the appointments.  This would have been the perfect week for it.  But have I done it?  No.  Why?  I don't know.  It's not like either of them need shots or anything that would make it unpleasant.  *sigh*

Where am I going with this?  I've really got to get better about posting stuff.  As I looked at my notes for this recipe, I realized that I made these rolls all the way back at the end of January!  Thank goodness I did take notes, or this would be an extremely short post. =)  I uploaded the pictures earlier today.  And when I realized it was getting late in the evening, I thought about leaving the rest of the post until tomorrow.  But I'm not going to do it.  I'm going to get it done!


I'm getting ahead of myself.  "This recipe" is the next bread in the BBA Challenge, which for me is Kaiser Rolls.  I was really looking forward to making these.  I love kaiser rolls.  But it's near impossible to get authentic ones around here (here being the middle of Texas).  Sure, you can find rolls that are the right shape.  But they're soft, and kaiser rolls are supposed to be hard rolls.  Nothing here comes close.

By now, I'm quite comfortable making breads with preferments.  For these rolls, you use some pâte fermentée, which is like a bit of regular dough that you ferment overnight to add flavor.  I snuck a little white whole wheat into mine, subbing 2 ounces www flour for 2 ounces of the AP flour.  I ended up using 7 ounces of water due to the addition of the whole grain flour.  I should mention that I decided that if I was going to the trouble of making my own kaiser rolls, I might as well make a whole bunch.  So I doubled the recipe.  That worked out quite well, since the original recipe calls for 8 ounces of preferment, but the formula for the pâte fermentée makes about 16 ounces.  The only unusual ingredient in the final dough is barley malt.  I still had most of a jar of barley malt syrup in the fridge from when I made bagels, so I was all set.  I ended up making rolls in two sizes.  I did 8 4-ounce rolls and 7 3-ounce rolls.  I formed the rolls by knotting them, a technique I've done before for these (includes a link to photos).  


The verdict?  I loved these rolls!  They have a great texture, with a crisp outside and soft inside.  And the flavor was perfect.  I think it was the malt that made the difference--it's really not detectable as a flavor, but it just adds that little something...  I will absolutely be making these again.  And soon, since I recently finished off the last of my freezer stash.  I can't really offer a lots of other opinions on these, since I might have...kind of...sort of eaten most of them myelf...  Brianna did have a couple of the smaller ones in her lunch, and as far as I know, she liked them.  See, another reason why I should make them again soon, so someone else will get to try them.  =)

Next up is supposed to be Lavash.  I've actually made that one before, for the September 2008 Daring Bakers challenge.  You can check out the results here.  I haven't been motivated to make it again, so I'm going to jump ahead to the Light Wheat Bread.  And hey, I might even get the post written this week!  To see where everyone else is at with the BBA Challenge, check out the blogroll.  Some people have finished the whole book!  And for lots more yeasty goodness, head on over to the Yeastspotting page.


Thursday, February 11, 2010

Italian bread


I mentioned in my last post that Brianna was sick last week and into the weekend.  I could tell when she was finally really feeling better--she actually ate all of her dinner on Sunday night.  But that's wasn't very surprising, since everyone else cleaned their plates as well.  Spaghetti and meatballs has that effect around here.  And Gillian is very proud of herself for the fact that she can pronounce it correctly (she's been working very hard at it).  =)  Italian dishes are always a hit around here.  And what better to go with a plate covered in tomato sauce than Italian bread?

Okay, to be honest, we didn't eat Italian bread with our spaghetti this week.  We would have, but I had just made some sourdough rye (yet another upcoming bread post), so we ate that.  But we did have Italian bread with our chicken parmigiana a few weeks ago when my Dad was here.  And it was fantastic.  It was next up for the BBA Challenge, perfectly timed.  I've made this recipe several times before, and it's always a hit.  I was kind of surprised when I looked through my archives and realized that while I took pictures, I never actually posted about this bread.  It's definitely time to remedy that.


Since I've made this one before, and because I've been having so much fun playing with my sourdough starters, I decided to combine the two.  Italian bread is yet another of the breads that employ some sort of preferment to add flavor.  In this case, being Italian, it uses biga, which is a firm preferment consisting of flour, water and a small amount of yeast.  Conveniently, the percentage of hydration for the biga is pretty much the same as my bread flour starter.  So I substituted some of the starter for part of the flour and water, and omitted the small amount of commercial yeast.  I ended up using 3 ounces of my 67% hydration starter, 9 ounces of flour, and 6 ounces of water, giving me a total of 18 ounces and keeping the hydration at about 67%.  I let the mixture sit at room temperature until it almost doubled in size.  I don't actually remember how long that took, but I was going by the activity of the starter, not by the clock.  Once it was doubled, I followed the instructions for the biga, lightly degassing the dough and then putting it in the fridge overnight.

The next day I made the dough.  Having learned my lesson with the French bread, I started by cutting the biga into pieces (I usually just use my kitchen shears) and putting it in the bowl of my stand mixer with the water (6 ounces) and oil.  I stirred these ingredients together with the paddle attachment to start softening the biga.  Then I added the rest of the ingredients, switched to the dough hook, and mixed the dough until it formed a ball.  I kneaded it for a couple minutes in the mixer, then finished it by hand on an oiled surface.  I stuck the dough in my 4 quart bucket and let it rise at room temp for about an hour and a half (dough tends to rise fast in my kitchen).  

As far as shaping goes, I decided I wanted to be able to use the leftover bread for toast and sandwiches, so I went for one really big loaf.  I shaped the full amount of dough into a batard shape.  I put it on a sheet of parchment paper on my peel, sprayed it with Pam (high heat version) and covered it with plastic to rise.  For hearth baking, I use my baking stone (preheated to 500F as directed) and put the bottom of my broiler pan on the floor of my gas oven.  When I put the loaf in the oven (parchment and all), I added hot water to the steam pan as directed and sprayed water in the oven as well.  I baked the bread for about 30 minutes total, rotating it and removing the parchment paper after 15 minutes.  I don't remember the exact time, but I went by temperature, taking the loaf out when it was over 200F.


The verdict?  It was really hard to wait for the bread to cool before we tried it.  The five of us went through about half the loaf at dinner the night I made it, so I think it's safe to say everyone liked it.  =)  Brianna quickly requested that I save some of the remaining bread for her lunches.  The sourdough starter worked nicely in the biga--it didn't add sour flavor in this case, but just made the bread more flavorful in general.  I'm sure I'll make this Italian bread many times more.

If you'd like to try this recipe, I highly recommend getting your own copy of The Bread Baker's Apprentice.  Be sure to check out the BBA Challenge blogroll to see how everyone else is doing (we're all at different points in the book).  And head over to Yeastspotting to see this and many other wonderful yeasted creations.  Next up in the challenge--kaiser rolls!  


Sunday, January 17, 2010

Snap, crackle, pop


Okay, I think I'm finally getting back on track with the BBA Challenge.  I hit a slump a couple months ago after making the English muffins, which didn't turn out all that well.  A lot was going on, both at home and at work, and I just lost most of my bread-baking motivation.  In December, I finally got back on track with blogging (thanks to all the cookie baking), but then the holidays happened, and work got even crazier.  But I finally had some vacation time around Christmas, and got the focaccia made.  That turned out really well, so I pressed on to the next recipe, French bread.


I admit, I've been a bit intimidated by the French bread recipe.  Not by the dough itself; that didn't look too difficult.  But while I've gotten better, I still feel like I don't have the best shaping skills in the world--and baguettes are definitely my weak point.  As with many of the other BBA breads, this one starts with a pre-ferment.  I've made bigas and poolishes before, but this time, I got to try pâte fermentée.  Like the other pre-ferments, the point is to develop flavor by giving part of the dough a head start.  Pâte fermentée is the most dough-like of the pre-ferments--the ingredient ratios are the same as for the final dough; you just make it a day or more ahead of time so it has time for fermentation.

The dough was easy to mix up, though I did make quite a mess.  The recipe says to cut the pâte fermentée into pieces and put the them in a bowl with the flours, yeast and salt.  Then you're supposed to mix everything together a bit, then add water.  Yeah, well, that resulted in flour everywhere, including all over me!  (and of course I wasn't wearing my apron...)  I don't think I actually lost all that much flour (I was able to recover quite a bit from the counter), but I'll definitely adjust the mixing order next time.  I kneaded for just a bit with the mixer, then finished it by hand.  It was a very nice dough to knead.


As I mentioned, before starting, I was concerned about shaping the dough into baguettes.  But the dough was very easy to work with.  I decided to go with the three small baguettes.  I followed the directions, first pre-shaping as batards and then forming the baguettes.  The dough extended so easily, almost like magic. =)  I used my improvised couche again and the loaves held their shapes nicely.  For a change, I was even able to score the loaves neatly, though I think I should have made the cuts just a bit deeper.  Next up was getting the loaves into the oven.  I really need a bigger peel--mine definitely wasn't up to the job of moving all three baguettes.  I ended up putting parchment on the back of one of my half-sheet (13x18) pans and putting them on that.  I transferred them to my baking stone, parchment and all, and added water to the steam pan in the bottom of my oven (I use the bottom part of my broiler pan).  I baked my baguettes for 30 minutes, at which point they had great color and a temperature of about 205F.


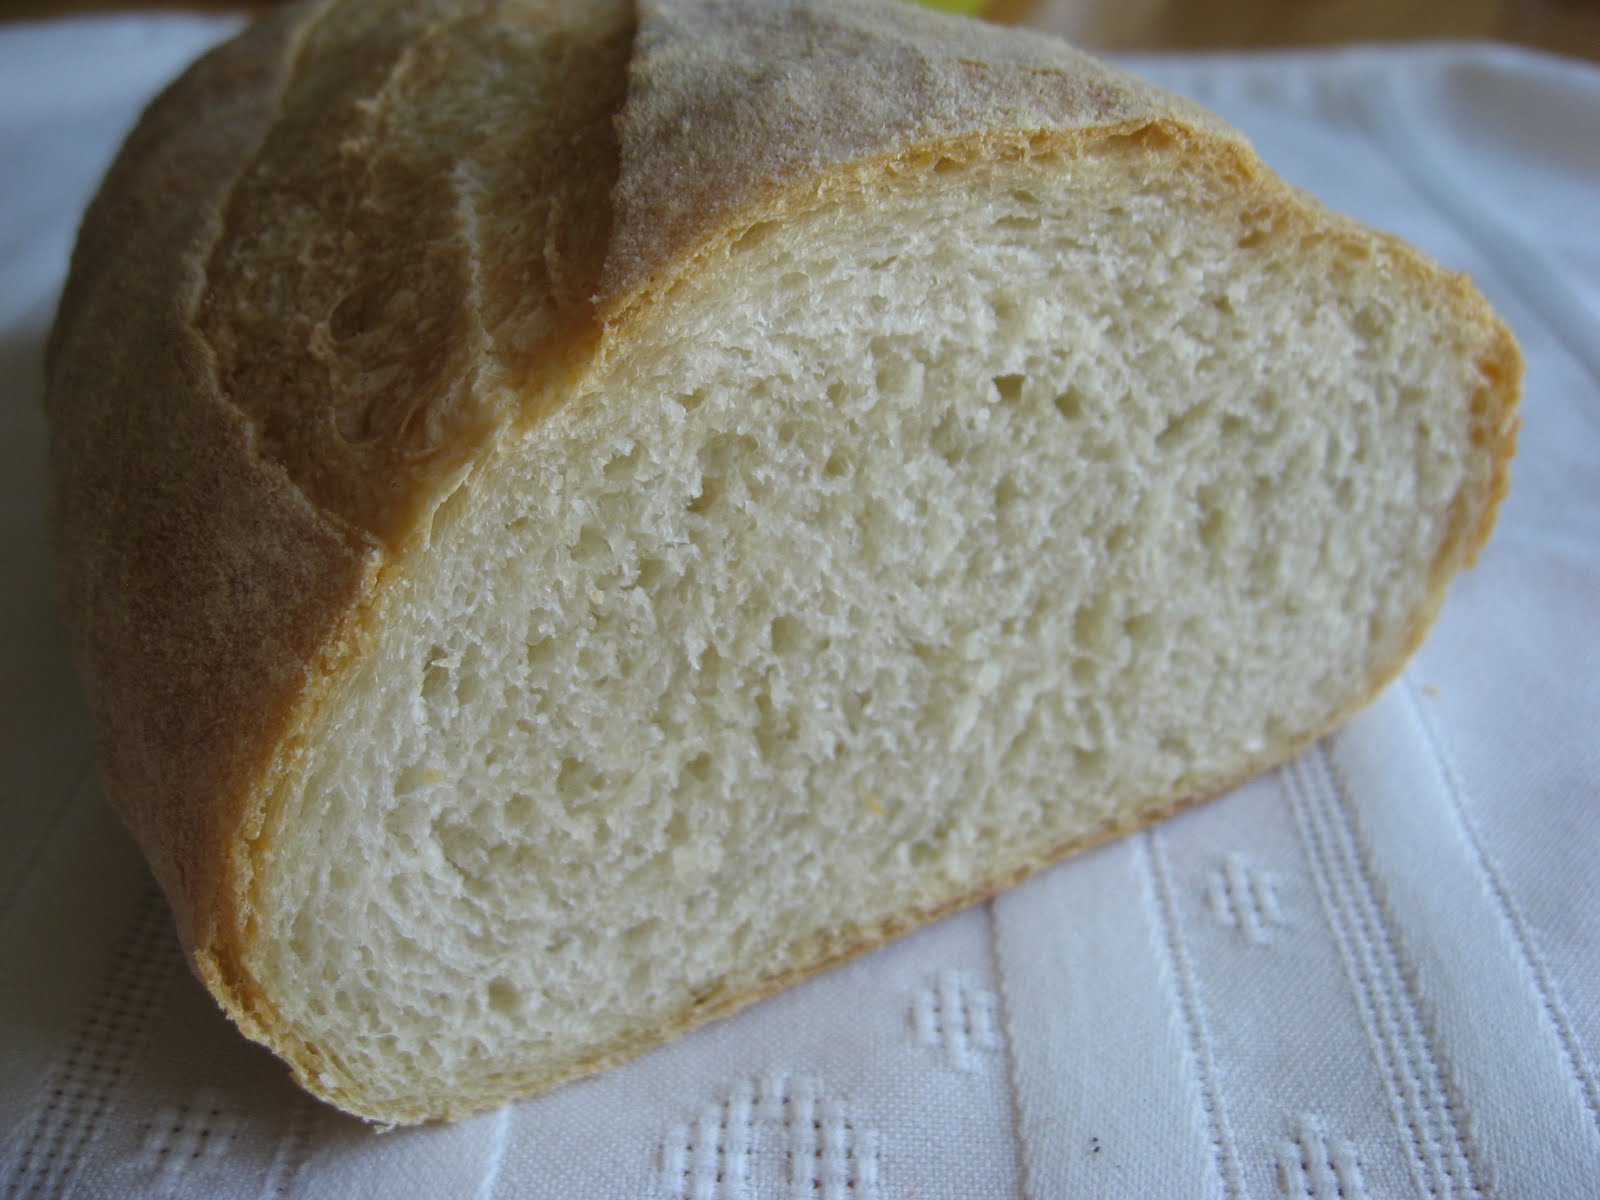
The verdict?  Tastes just like French bread!  I know, so surprising. =)  And it looked and sounded like French bread, too.  Shortly after I removed the baguettes from the oven, I could hear them crackling.  The crust was quite crisp--it cracked a lot when I cut the first piece.  The bread was good, especially when very fresh and with some butter and salt.  But to be honest, French bread isn't really my favorite.  It seems rather dry, and seems to stale quickly, though I was able to give it new life as garlic bread. =)  Not sure how often I'll make it, but I'm really glad that I tried it.

If you want to try this one for yourself, you can find the recipe in The Bread Baker's Apprentice, of course.  I highly recommend getting your own copy if you don't have one.  And watch for a round-up of all the Slow and Steady bakers on Nancy's bread blog in the near future.


Monday, December 14, 2009

My weekend project


This is a significant post for several reasons.  For one, this makes the 12th post I've done this month, which is a new record.  I've done 11 several times, but never more than that.  And I'm not done for the month, what with at least two more holiday cookies, not to mention some TWD recipes and some more bread.  This also marks my return to posting about the BBA Challenge.  Hard to believe it's been over two months since I posted my variation on the Cranberry Walnut Celebration Bread.  I did make the next recipe, English Muffins, in mid-October.  I wasn't that happy with how they turned out, though, and don't feel like remaking them right now, so I'm just going to skip posting about them.

I've been procrastinating on the Focaccia for quite some time, and it took a couple of different things to finally get me back on track with BBA.  One was that our annual Christmas potluck with the Italian genealogy group coincided with a full weekend off from work (both Saturday and Sunday!).  I knew that the focaccia recipe made a large quantity (a half-sheet pan, 13"x18") and that it would be perfect for a crowd (so we wouldn't eat it all ourselves).  The second was that I signed up for an evening class with Peter Reinhart here at Central Market in January!  I'm very excited about going, and the anticipation has me re-energized about bread baking.  The class is mainly about his new book, but I'm hoping that if I take my copy of BBA maybe he'll sign it for me. =)


Anyway, on to my recipe notes.  The main thing that had me putting off this bread was the fact that it takes two days.  Since I finally had a Saturday off, though, I figure it was time to tackle it.  It turned out that the whole process wasn't as bad as I thought it was going to be.  I used my mixer for the dough, first with the paddle for the initial mixing, then with the dough hook for kneading.  I did have to add a bit of additional flour to get the dough to clear the sides of the bowl.  After the mixing, it was mostly waiting.  You stretch and fold the dough, then wait a while before doing it again, several times.  Then the dough is gently spread in the pan by using fingertips to dimple the dough, with the help of lots of herbed olive oil.  I went with a simple rosemary and garlic oil, since rosemary was the only fresh herb I had on hand.  Here's what I used:

1/2 cup extra-virgin olive oil (nothing fancy)
1/4 cup chopped fresh rosemary
3/4 teaspoon kosher salt
1/4 teaspoon freshly ground black pepper
3/4 teaspoon granulated garlic

Once the dough was in the pan, it was covered with plastic and placed in the fridge to develop flavor overnight.  That was Saturday night.  On Sunday morning, I took the dough out of the fridge early, since the recipe says that it needs about 3 hours to proof.  It got some more herbed oil and more dimpling.  At about 2 1/2 hours, I realized that the dough was starting to try to escape from the pan.  So I quickly turned the oven on to preheat, and dimpled the dough  one more time to deflate it just a little.  Once the oven was ready (500 degrees F), I put the pan in, turned down the temp to 450 degrees F as directed, and baked it for 10 minutes.  Then I rotated the pan and baked it for 10 minutes longer, at which point it was starting to brown nicely.  I took it out of the oven and immediately took the focaccia out of the pan and carefully transferred it to a rack to cool.

The verdict?  This stuff is good.  Really good.  But it would be hard for it to be bad, with all that oil adding flavor.  =)  I assume everyone at the potluck liked it--it disappeared very quickly.  The girls and Jamie all liked the focaccia a lot, so I have a feeling I'll be making it again soon.  I'd like to experiment with some different herbs as well as other toppings.  If you'd like to try this one for yourself, get your hands on a copy of the book.  You won't regret it.  And don't forget to check out some of the other bakers who have taken on the BBA Challenge.


Monday, October 5, 2009

There's a party goin' on right here


The next recipe for me in the BBA Challenge is Cranberry-Walnut Celebration Bread.  It's a bread reminiscent of the holidays, filled with cranberries and flavored with orange.  The picture in the book is of a lovely double braid.  But I just wasn't in the mood for that.  While I'll eat walnuts, I prefer pecans, and that tends to be what I have on hand in my freezer.  I loved the raisin bread that we made recently, but didn't really want another fruit filled loaf.  What I wanted was cinnamon rolls, or something similar.  So I decided to take that idea and run with it.


I started off making the dough according to the recipe.  I left out the orange extract and used buttermilk, since I actually had some on hand.  I kneaded the cranberries into the dough, but not the nuts.  After the first rise, I turned the dough out onto a lightly floured counter.  I rolled it out into a large rectangle (not sure of the exact size; somewhere in the neighborhood of 12"x16", I think).  I spread a couple tablespoons of softened butter over the dough, leaving a 1" clear border along one of the long edges.  Then I sprinkled a mixture of 3 tablespoons vanilla sugar mixed with 1/4 teaspoon ground ginger over the butter.  I sprinkled chopped toasted pecans over the sugar.  Then I rolled the dough into a log, starting with the long edge away from the clear border.  I pinched the dough closed and then cut it into 15 pieces of equal width, using unwaxed dental floss.

I placed the pieces cut side down on a parchment-lined baking sheet (half sheet pan, 13"x18"), leaving a couple inches between them.  I sprayed the rolls with canola oil spray and covered them with a large piece of plastic.  I let them proof at room temperature until almost doubled in size (the rolls were starting to touch each other in places).  Then I baked the rolls at 350 degrees F for about 25 minutes, until they were golden brown.  I removed them from the oven and left them on the sheet pan to cool a bit.  I drizzled the warm rolls with a simple glaze of powdered sugar mixed with a tablespoon or two of milk (sorry, no exact measurements).


The verdict?  There is no doubt in my mind that I'll be making these again.  They turned out great!  I should really bake with dried cranberries more often.  Brianna wasn't entirely thrilled--"When are you going to make something I like again? Like with chocolate chips?" (I'll let you imagine the whiny 6yo tone of voice...)  Gillian thought they were great, as did Jamie.  I admit, I'm sure I ate more of them than anyone else here.  Being of sound mind (and knowing that we couldn't eat them all before they got stale), I packed up a bunch of the rolls to take to Gillian's daycare teachers.  I got back an empty container and heard that they enjoyed them quite a bit. =)  I think these would be a fabulous addition to a holiday brunch.  One thing I would do next time is use a bit more ginger in the filling; bits of crystallized ginger might be nice along with the pecans.

Next up for me in the BBA Challenge is English Muffins.  The main group is well ahead of that recipe, but I'm baking along with the Slow and Steady sub-group.  Check out Nancy's blog for a round-up of everyone's cranberry breads in the near future.  And for this and many other wonderful bread recipes, check out The Bread Baker's Apprentice.  I'm also submitting this post to YeastSpotting.