Showing posts with label Artisan Breads Every Day. Show all posts

Sunday, March 24, 2013

How to get to Carnegie Hall


I was reminded last weekend that my skill in the kitchen didn't develop overnight.  Sunday night I made dough for rolls and stuck it in the fridge.  (It's the recipe for Hoagie Rolls from Artisan Breads Every Day--a really lovely dough to work with, which I forget when I haven't made them in a while.)  Monday morning, I got up early and portioned the dough and formed the rolls.  I managed to get them baked before I had to go to work.  Boy, did the house smell good when I left. =)  At one time, I never would have had the confidence that I could pull that off, but in the past 5 years of baking and blogging, my baking skills have improved tremendously.  How?  Through repetition, of course.  And also good teachers--Dorie Greenspan, Peter Reinhart, and lots of others.  

Yet I still get frustrated when things don't turn out quite the way I wanted to--when they aren't perfect.  The demons of perfectionism and I-don't-have-enough-time have been really getting to me lately, which is a lot of the reason why I haven't been posting much.  I get hung up on the idea that if I don't have anything new and exciting to post, I shouldn't even bother.  But there's beauty in sharing the things that have gotten better with practice, and in writing just to express what's on my mind. 


Wednesday, November 21, 2012

Tuesday, November 6, 2012

It's alive!


It's the 6th of November, and I've already done more blog posts than any other month since May.  By now, those of you familiar with NaBloPoMo have probably figured out that that's my goal for this month.  I figure that if I can manage to get some sort of post up every day for a month, then I'll get back on track with fairly regular posting after that.  I get too hung up sometimes on having a post just right.  I worry too much that my pictures aren't very good.  I'm just not a recipe writer (for the most part, anyway), so that slows me down when I can't easily link to an already published recipe.  But I'm trying to let all of that go and just find something to write about every day, no matter how simple or silly.

Today's is definitely on the silly side.  A few weeks ago, I pulled my sourdough starter, Ernie, out of the back of the fridge where he'd been languishing for...probably 8 or 9 months.  It took a couple days of feeding, but he did wake up, and I've been baking bread more often since then.  Most of the time I cheat a little, and spike the final dough with a bit of instant yeast in addition to the yeast present in the starter.  Apparently Ernie is pretty active, based on the picture above, and I can probably cut back a little on the instant yeast boost. =)

Monday, September 5, 2011

It's a beautiful day in the neighborhood


This has been the first pleasant day we've had in months.  Breezy and dry, with 70s this morning and 80s this afternoon.  There's only one problem--it's dry.  Way too dry.  We had almost no rain in July, none at all in August, and none so far this month.  It's crazy--I've read how much rain has been falling in Louisiana and the southeast US from tropical storm Lee, and all we've gotten from it has been wind.  There won't be any grilling around here for Labor Day, at least there better not be, with all the wildfires burning around the Austin area.  (Thankfully, none are near us at the moment, but we know people close to the affected areas.)

Still, parents with the day off from work and kids with the day off from school flocked to the park this morning to enjoy the lovely weather.  We were among them.  We're lucky to have some really great places to play, like the playscape at San Gabriel park.  The girls got to run around like maniacs for about an hour, and I got to sit in the shade and read.  Well, and take some pictures. =)  Then it was home for lunch and naps.  I love extra days off. 


I did some baking yesterday.  I'm starting to get back into the bread baking mood, now that we're actually seeing some days below 100º. (The Austin area has had 79 days of 100º+ so far, and there's still a chance we could have more.)  I even revived Ernie, my sourdough starter, and have baked sourdough bread two weekends in a row.  Last weekend, I baked Pain au Levain from one of my favorite books, Artisan Breads Every Day.  I really like that recipe, but I wanted to make something quicker this time.  I turned to one of my trusted resources, King Arthur Flour, to see what I could come up with.


I have to say, I really like the recent redesign that KAF did on their recipe section.  For one thing, it's much more iPad-friendly.  I was also happy to see that in addition to weights in ounces, many recipes now give the option for grams as well.  It's an easy conversion if I have to do it myself, but it's nice to save a step.  I do have to wonder, though, why it will tell me that a tablespoon of sugar is 14 grams, but not give me a weight for 2 1/2 teaspoons of salt.  Oh well, it's not like it's that hard for me to figure out for myself. =)  

There's a section of sourdough recipes, with all kinds of interesting stuff (including pizza and waffles and even chocolate cake).  I settled on the recipe for Rustic Sourdough Bread.  There is a handy blog post to go along with it, showing how the recipe can be adjusted to give different results depending on how much time you have on your hands.  I went for the quicker version, which still has nice flavor while only taking a few hours.  I fed Ernie Saturday night, so I had a nice active starter ready to go Sunday morning.  I did have to do some math, though.  I keep a firm starter, with a hydration of about 66%.  That means that for every 100 grams of flour, it has 66 grams of water.  The recipe has a link to KAF's fresh starter, and the instructions for it led me to believe that it's a 100% hydration starter, meaning that it has equal amounts of water and flour.  So I had to figure out how much total water and flour were in the original recipe (totaling the amounts from the starter and what is added later).  I decided to keep the amount of starter constant, so I had to figure out how much water and flour were in the same amount of my starter (the recipe calls for about 225 grams of starter) and adjust the additional water and flour accordingly.  This is where I love my notebook.  I didn't want to write it out here, so the photo below shows my calculations and notes for this recipe:


The verdict? Well, we've managed to polish off the first loaf already.  Samples yesterday, toast for breakfast today, sandwiches for lunch.  The other loaf got sliced and went in the freezer for B's lunches this week (and maybe some for me, too).  The flavor is nice--a bit of tang, but not too sour.  It was a hit with B, which is good, since she can be picky about bread.  I'll definitely be making this recipe again--I love how easy it is, as long as I remember to feed my starter first.

If you'd like to try this bread for yourself, you can find the recipe here at KAF.  If you don't have a starter of your own, there are a number of great tutorials on the web, including this one from my friend Phyl.  I made mine using the steps in Artisan Breads Every Day, and posted about it here.  For more yummy and beautiful breads, be sure to check out the collection each week at Yeastspotting. 


Sunday, November 7, 2010

That blessed arrangement, that dream within a dream


There's no question about it--my husband is much better at gift-giving than I am.  He clearly puts a lot of thought into it and comes up with lots of great things, many of which I wouldn't think of for myself.  He's directly responsible for my love of cooking magazines, for instance.  About 10 years ago, I had the flu.  The real deal--I was extremely miserable for most of a week.  To make me feel better, Jamie brought me an issue of Fine Cooking to read while I was stuck in bed feeling horrible.  I had cookbooks, and watched cooking shows on PBS, but I'd never actually read a cooking magazine.  All it took was that one issue, and I was hooked. =)  


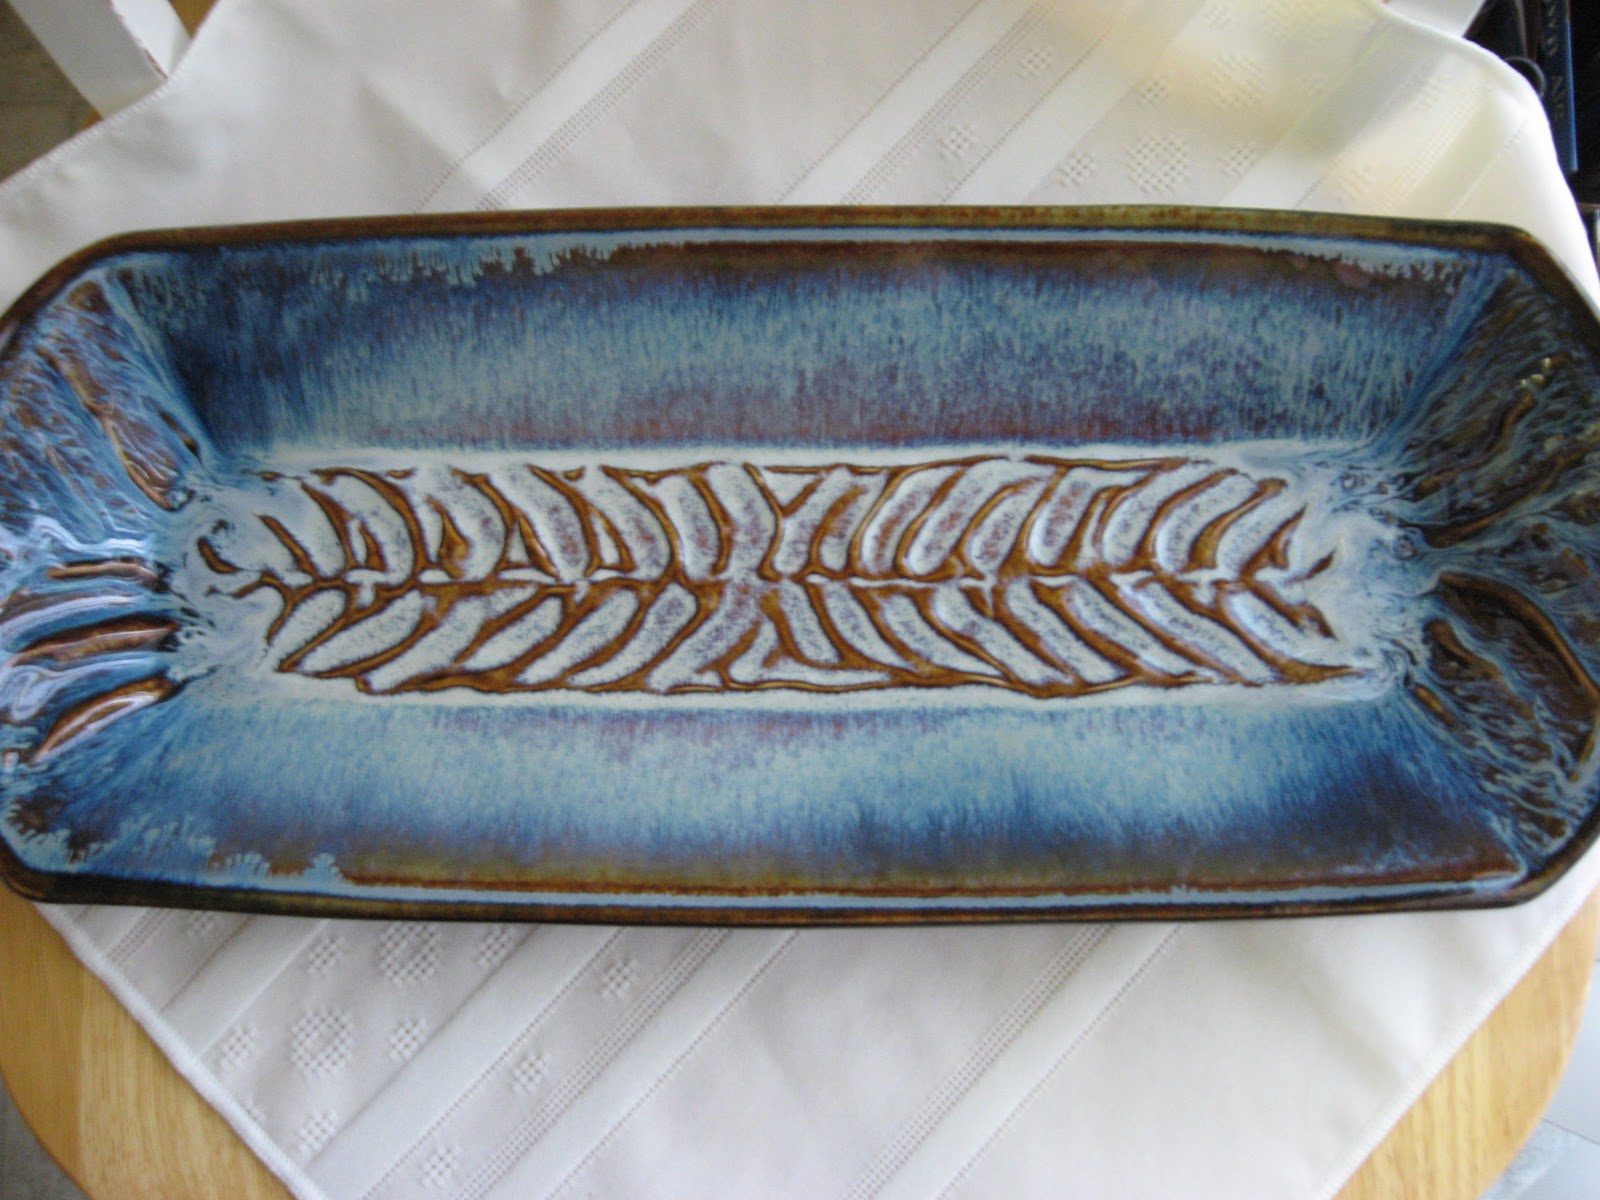
He's continued to feed my baking and cooking obsession hobby.  He's responsible for quite a few of the cookbooks I've acquired in the past several years, especially since I started blogging.  For our anniversary a couple weeks ago, he got me another gift that I'll be able to use a lot.  He checked some lists of traditional anniversary gifts.  This was number eight for us (though we were together five years before we got married, as well).  There are a few variations, but one of the options for #8 is pottery.  So he went to a wonderful local gift shop and got me a couple of lovely pieces.  One is the gorgeous serving tray pictured in the photos in this post.  (I'm sure the other will make an appearance soon.)  I pretty much immediately wanted to bake something just so I could take photos. =)  I've been having a hard time writing bread posts lately, partly because I think after a while it's hard to come up with interesting pictures.  This was the perfect thing to get me going again.  (And yes, he did consider that I could use the dishes for blog photos.)


To start with, I chose a bread that I've been wanting to make again for a while.  The recipe is from one of my favorite bread books, Peter Reinhart's Artisan Breads Every Day.  The official name is Soft Rye Sandwich Bread.  I just refer to it as sourdough rye, since it does use a sourdough starter for the preferment.  The final dough is spiked with a bit of commercial yeast as well, which means the bread doesn't take forever for the final rise. =)  The great thing about a lot of the recipes in this book is that the doughs require minimal kneading, since they get a long, slow fermentation in the fridge which allows time for the gluten to develop on its own.  The dough can be held for several days, too, so you can bake when you have time.  

The rye flour is just in the perferment, so the rye flavor is fairly mild.  A bit of molasses in the dough adds some flavor and color.  You have the option to add some cocoa powder as well, to darken the color, but I skip it.  Caraway and orange oil are other optional flavorings, but I go for the plain version.  The dough can be baked in loaf pans, or as freeform loaves, which I prefer.  This time, I made the dough into two bâtards.  I dusted the tops with a bit of flour, which makes them easier to score and makes for a nice contrast after baking. 


The verdict?  I love this bread.  I've made it several times now, and it's always delicious.  I can happily eat it just with some butter, but it also makes terrific sandwiches--especially with ham. I think everyone else likes it, too, but this one was mainly for me. =) I love the slight tang from the sourdough and the fact that since I made the bread, I can leave out the caraway, which I don't like. Mmm.

If you'd like to try this bread for yourself, I highly recommend getting the book (or checking it out from your library, if you can).  I've made at least a dozen recipes from it so far, and have enjoyed them all.  

For more wonderful yeasted treats, be sure to check out Yeastspotting!


Sunday, June 20, 2010

Time to make the doughnuts...again


Besides Sunday mornings when I was a kid, the other time in my life that I most associate with doughnuts is college.  I didn't eat them that often then, but it was always a bit of an event.  There was a great place that we went to, usually very late at night when we were stick of studying and doing homework.  It was an event because it was a bit of a drive, and usually a whole bunch of us would pile into a car or two and go together.  As far as I know, the place was open during the day, too, but I only ever went there once in daylight, and that was at 7am. =)   They had just about any sort of doughnut you could want.  One of the most popular was doughnuts (no hole) split in half and filled with glazed fresh fruit, that varied with the season.  They often had strawberry, which was a favorite with a lot of people.  Just once or twice, I remember them having peach, which was fantastic.  But my usual picks were cinnamon sugar doughnut holes (granulated sugar, not powdered) and a tiger tail--I love twisty doughnuts of all kinds.  But I have to admit, doughnuts are one of the things that I've been kind of scared to attempt at home.


The last time (the only time) I made doughnuts, they didn’t turn out as well as I’d hoped they would.  That's probably why it's taken me two years to try again. =)  They were reasonably tasty when just made, but ended up rather greasy as they cooled. I tried to get away with a smaller amount of oil and a regular pan, and it was just too hard to keep the temperature steady. This time I did things the way I should have before. I used my enameled cast iron Dutch oven (about 6 quarts in volume; 5 inches deep), so I knew once it got hot, it would retain the heat pretty well. I also used the whole bottle of oil (48 ounces/1.5 quarts), figuring I could strain it and reuse it if this worked out. I got out my digital thermometer that connects to a display that sits on the counter and is easy to read. I was set.

The other thing I needed to figure out was the dough. Last time, I probably should have stayed away from a brioche-type dough that was sticky and difficult to work with unless it was very cold. Fortunately, I had a good idea for what to try this time around. One of my favorite cookbooks right now is Peter Reinhart’s Artisan Breads Every Day. And within that book, one of my favorite recipes is the All-Purpose Sweet Dough that he uses for all sorts of sweet breakfast treats--cinnamon buns, sticky buns, fruit-filled rolls and a delicious crumb cake. It was one of the doughs he demonstrated for us at the class I went to back in January. It’s quite versatile, and it makes a lot of dough, so you can use part of it for one thing and the rest for another if you want.  (I used the rest of mine to make a cinnamon swirl loaf--no raisins--that B would actually eat.)


The dough is easy to make, though you do have to plan ahead just a little bit since it gets an overnight rise. First, you mix instant yeast with warm milk and let it sit for a couple minutes to get the yeast going. You don’t absolutely need to do that with instant yeast the way you do with active dry, but it’s nice to give the yeast a bit of a head start when dealing with an enriched dough. Meanwhile, you can mix together the dry ingredients--all-purpose flour, sugar, and salt. I do this directly in the bowl of my stand mixer. Then you add the yeast/milk mixture to the flour mixture along with some melted butter (or oil, if you prefer) and stir to combine. At this point, I attach the bowl to the mixer and let the dough rest for a few minutes. Then I knead the dough with the dough hook. The dough should eventually come together in a smooth ball; the sides of the bowl should be clean, but the dough may stick a bit at the bottom.  Once kneaded, the dough goes into an oiled container (I use a 4-liter food storage container) and goes into the fridge for the night.

The morning after I mixed up the dough, I took the dough out of the fridge and cut off a piece that was about 500g.  I rolled it out on a lightly floured counter until it was about half an inch thick.  Then I cut out doughnut shapes.  I used a 2-1/2 inch round cutter for the outside and a 3/4 inch one for the middle.  I got 8 or 9 on the first pass.  I gathered the scrapes, rerolled, and got several more, ending up with a dozen all together.  I put them on a parchment-lined sheet pan, sprayed them with oil, and covered them with plastic wrap.  Then I let them rise until they warmed up and got quite puffy, about an hour.


Once the doughnuts looked like they were almost risen enough, I started heating the oil.  I was aiming to keep the temperature at about 360F.  I fried the doughnuts 3 or 4 at a time (and did a batch of holes, too).  I adjusted the gas to keep the temp from going below 350F (it dropped when the doughnuts went in) and from getting above 370F.  It worked out pretty well.  When the doughnuts were golden brown on one side, I flipped them and did the other side.  I didn't really keep track of the time, but it was 1-2 minutes per side.  The finished doughnuts went onto a cooling rack set over a paper bag topped with paper towels to drain.  Once they cooled a bit, I dipped one side in glaze (some chocolate, some vanilla) and topped some with sprinkles (since B and G love sprinkles).  =)

I love how the blue sprinkles coordinate with B's blue nail polish. =)

The verdict? These were a huge hit with my girls. And I can’t lie, I really enjoyed them as well. The dough was tasty but not too sweet. The chocolate glaze turned out really good, especially considering that I was making it up as I went along. =) We will definitely be making these again. Not too often, since I hate having to clean up after frying stuff, but these were worth it.

Want to try these for yourself? For starters, make a batch of the All-purpose Sweet Dough (found in the recipe for Cinnamon Buns).  The glaze was pretty simple.  I mixed a couple cups of powdered sugar with a tablespoon of corn syrup and enough water to make a thick glaze.  Then I divided it in half.  One half got about half a teaspoon of vanilla.  The other half got an ounce of melted bittersweet chocolate.  I had to add a bit of extra water to the chocolate one to get a glaze that was fluid enough for dipping.

Next time I really want to try twisted doughnuts.  And I need to find a good cake doughnut recipe to make cinnamon sugar ones.  Any suggestions?  And what's your favorite type of doughnut?

Oh, and these doughnuts have been Yeastspotted!

Oh, no, G doesn't like chocolate, not at all. =)

Saturday, April 3, 2010

When the moon hits your eye...


If I had to pick a single favorite food, it would be pizza.  I think I could eat pizza every day and not get tired of it.  But it has to be the right kind of pizza.  It's a good thing that I only lived in Boulder for less than a year, because the people there seem to have a thing for Chicago-style deep dish pizza, based on the restaurants that I went to.  I suppose that's alright if you like that sort of thing, but I grew up eating real pizza, which is to say, thin crust pizza that comes in enormous slices. =)  The sort of pizza we would order by the slice after football games in high school.  (I admit, I was a band geek in high school; a bunch of us would go out after the games and almost always end up at the same place, eating pizza.)  Whenever I go to visit family on the east coast, I try to eat pizza while I'm there.  Fortunately, Austin is home to a lot of people transplanted from the northeast, so we are lucky enough to have some great pizza places.

I know it's not my usual thing to write about savory dishes on this blog, but I'll defend this post by pointing out that it's still baking. =)  I'm actually surprised that I haven't posted about pizza dough more often, since we eat it almost on a weekly basis.  My one previous post was for a Daring Bakers challenge, and featured a recipe from the Bread Baker's Apprentice.  That one was good, but not my favorite--I had some trouble working with the dough.  Since we eat pizza so often, I've tried a number of different recipes over time.  For a while, one from Cook's Illustrated was my standby.  Lately, though, I've tried a couple from my new Peter Reinhart book, Artisan Breads Every Day.


The most recent one that we've been making is the Neo-Neapolitan Pizza Dough.  The original recipe calls for all bread flour, but I like substituting white whole wheat for part of it.  Reinhart mentions several times in the book that it's possible to substitute whole grain flour for part of the white flour in most of the recipes but that addition water will be needed.  He says to add 1/2 tablespoon (1/4 ounce) of water for each 1 ounce of whole grain flour that you substitute.  I made my pizza dough with 4 ounces of white whole wheat flour, so I added 1 ounce of extra water.  (So 20 ounces of bread flour, 4 ounces of white whole wheat flour, and 18 ounces of water.)  The recipe has olive oil and sweetener (sugar, honey or agave syrup) as optional additions.  I used the sweetener once, but found that the crust darkened too quickly (totally burned one pizza) so now I skip it.  I do add the oil.  

The recipe says that the dough should be refrigerated overnight before using it.  I've actually been making it in the morning, portioning it into balls for individual pizzas, and putting the dough balls in the fridge to ferment during the day.  It seems to work quite well.  I also like the fact that the dough makes a lot--I make 6 portions of dough at 7 ounces each.  Three of them go into the fridge to be used that evening, and the other three go directly into the freezer to save for the following week.  Jamie and I each make our own pizzas and the girls share one.  The nice thing about individual pizzas is that everyone can have the toppings that they like. =)


I'm the boring one.  I prefer just sauce and cheese on mine.  We use whole milk mozzarella (the kind you buy in blocks, not fresh mozzarella) because it has a much nicer texture than part-skim.  We just try not to go crazy with it. =)  I also add some freshly grated parmesan on top.  Occasionally I'll also sauté some mushrooms to add to mine.  Jamie is much more adventurous in his toppings.  He usually has pepperoni (we always use turkey pepperoni--Jamie says it tastes just as good but is much less greasy).  He also adds olives (sometimes black, lately green) and mushrooms.  He likes spicy things too, so he often adds some crushed red pepper flakes or adds a bit of hot sauce to his sauce.  And he prefers romano to parmesan.  The girls mostly go with cheese, sometimes adding pepperoni.  When we were making the pizza that I photographed, we were low on pepperoni, so they had salami instead.  I put Brianna to work cutting it into smaller pieces.  Both Brianna and Gillian like helping add stuff to their pizza. =)

With some of the previous recipes I've made, we would pre-bake the crust for a minute or two, then add the toppings and finish baking.  With this dough, though, the bottom was getting too brown when I did that.  But even with cornmeal on the peel, the dough tends to stick to it when we add sauce and toppings to the raw dough.  So I've started doing things another way.  I put a sheet of parchment paper on the peel and put the dough on top of that, then add toppings.  The pizza then goes into the oven, parchment and all.  It's a good idea to pull the parchment out after a minute or two of baking, once the crust has set on the bottom.  Otherwise, it tends to get rather charred around the edges, from baking at 550F for too long. =)  The pizzas bake for 5-7 minutes each, depending on the amount of toppings.


The verdict?  I think I have a new favorite dough!  We've made this one a couple times now, and I really like how it turns out, from both fresh and frozen dough.  The whole wheat adds a nice flavor.  Most of the crust is thin and crisp on the bottom, while the edges are chewier, with some nice bubbles.  

If you'd like to try this recipe for yourself, you can find it here.  But I highly recommend getting a copy of Artisan Breads Every Day--there are many other wonderful recipes to try.  And if you're a huge pizza fan, it's worth getting your hands on a copy of Peter Reinhart's pizza book, American Pie.  I was lucky enough to be able to borrow it from my library, and I'll definitely be buying my own copy at some point.

One last thing, this pizza has been submitted to Yeastspotting!


Saturday, January 30, 2010

Sunny day...sweepin' the clouds away...


I've always liked to bake bread, but it used to be that I didn't do all that much of it.  A few years ago, my husband Jamie got me Rose Levy Beranbaum's The Bread Bible (don't remember the exact occasion).  I tried a few things, but they didn't always work out that well.  After starting my blog a couple years ago, I did start baking more bread, as recipes came up with Tuesdays with Dorie and Daring Bakers.  I made a whole lot of bagels.  The real breakthrough came last year, though.  First, my husband got me a copy of Artisan Bread in Five Minutes a Day for Christmas.  I was fascinated--it gave me a way to make homemade bread more often without investing a lot of time.  It also gave me the idea that I might be able to BYOB, yes, bake all my own bread.  I was a bit nervous about the idea, but figured that the worst that would happen is that I'd quit if I couldn't do it.

Then in May, Nicole of Pinch My Salt came up with the great idea to bake all the way through Peter Reinhart's The Bread Baker's Apprentice.  I already had the book--I bought myself a copy about a year before that--and had made several of the recipes either for Daring Bakers challenges or on my own.  Again, I was nervous about the idea, but a whole bunch of my blogging friends were doing it--many of them at a slower pace, and I figured I could keep up with that.  

At this point, it's probably safe to say that I've baked more bread in the past year than in the previous 10 years or so combined. =)  And I'm still going.  We just started a second year of BYOB.  Last year I made lots of things for the first time--croissants, anadama bread, casatiello, raisin swirl bread, English muffins and ciabatta.  I've gotten really good at making my own hot dog and hamburger buns, from a variety of recipes.  I've made all sorts of rolls and sandwich breads for Brianna's lunch.  This year is off to a good start--I made real French bread.  And my collection of bread books keeps growing.  My most recent acquisition is Peter Reinhart's newest book, Artisan Breads Every Day.  I even got to go see him in person, for a class where he demonstrated recipes from the new book.  (More on that coming soon!)  With this latest book, I've embarked on a new challenge for the new year--sourdough!


What really got me doing was a recipe in the new PR book for Crusty Cheese Bread.  The pictures looked fabulous, and I just had to make it.  But first I needed sourdough starter.  I admit, I've been rather scared at the prospect of getting my own starter going.  Many of the recipes I've read seem to require a lot of attention.  But the one in Artisan Breads sounded pretty easy.  I also liked the fact that it started off with a small quantity of ingredients--I hate the idea of throwing away lots of flour and water.  There's still some of that, but as I get going, I figure I'll bake with it more often and reduce the waste a bit.  I'm not going to go into all the details here (especially since I didn't take pictures of the process).  If you're interested, I highly recommend getting your own copy of the book.  But a few things to note...

The one unusual ingredient I needed at the beginning was pineapple juice.  It's in there to create a more acidic environment to keep unwanted bacteria from thriving.  We don't drink much pineapple juice, so I just bought a can of concentrate, reconstituted just enough for phase 1 of the starter process (first you make a "seed culture"), and stuck the rest in my freezer to use at some point.  I started off making two different seed cultures, one with regular white bread flour and one with white whole wheat flour (I used King Arthur flour for both).  By the third day, I was seeing some activity.  I had a setback on day 4, though, when I came home from work to find that my bread flour one had turned an interesting shade of orange.  Colors like that aren't a good thing, so down the drain it went.  I was kind of upset about it, but kept on with feeding the www one.  When I hit the 4th phase and was supposed to discard half of the seed culture, I had a great idea.  I kept the extra and fed it with bread flour, while I kept using www flour for the first half.  By the time I built each into a "mother starter" the second one was mostly white bread flour.  So meet my two starters:


Bert and Ernie.  =)  Bert is the white whole wheat one.  They look a little different in part because of the different colors of the flours, but also because Bert was fed right before the photo, while Ernie was fed yesterday.  One of the things I really like about PR's mother starter is that you can stick it in the fridge for up to 5 days and take some out as needed.  Longer than that and you'll need to feed it again before using it.  Both versions are firm starters, though the www one is a bit higher in hydration because you use a bit more water with the whole grain (about 75% versus about 66% for the bread flour one).  After feeding, I leave the starter out on the counter overnight or while I'm at work (depending on whether I end up feeding at night or in the morning) and pop it in the fridge when I get up or get home.  So far it's worked nicely.  

Okay, at long last, we get to the first recipe I made with the starter.  The Crusty Cheese Bread looked too good to pass up.  First you use some of the mother starter to make a larger quantity of sourdough starter.  I used the bread flour one for this recipe.  I mixed up the ingredients (mother starter, bread flour, water) in the early afternoon and left it to ferment at room temp for about 5 hours (things rise quickly in my kitchen).  I decided to mix the final dough right away, but you can also store the starter in the fridge for several days.  

The dough was made up of all the sourdough starter, water, milk, agave nectar, bread flour, salt and some added instant yeast.  You could probably do it with just the wild yeast, but using some instant yeast allows you to things done in a shorter amount of time while still having lots of flavor from the sourdough starter.  The dough also has chives or onion added for flavor; I went with the chives.   I used half the dough right away, letting it rise for a couple hours before shaping and baking.  The other half went into the fridge.  For the first loaf, I kneaded in cheddar cheese cubes before shaping the dough into an oval boule.  Then I let it rise for about an hour, scored the top, let it sit for about 15 minutes, then baked it.  I baked the loaf on my baking stone and poured hot water into a steam pan in the bottom of my oven when I put the dough on the stone.  I baked the loaf for 30 minutes, rotating it halfway through for even baking.

I baked the second loaf three days later.  For that one, I patted the dough into a rectangle, spread shredded fontina over it, and rolled the dough up like I would for cinnamon rolls.  I pinched the ends closed and ended up with a baguette sort of shape.  That loaf only took about 25 minutes to bake.  I don't have pictures of that one, but it was rather ugly--I ended up with big cheesy bubbles where the dough pushed through the slashes in the top of the dough.


The verdict?  Aesthetics aside, both versions of the bread were fantastic.  When I baked the first loaf, about 5 minutes in, I stood in my kitchen trying to figure out what I was smelling.  It was the chives, which had started cooking where the dough hit the hot baking stone.  The whole house smelled amazing by the time the bread was done.  =)  The sourdough definitely added to the flavor of the bread as well.  Brianna preferred the first loaf, which isn't surprising considering her love of yellow cheddar (I used Tillamook sharp).  Gillian prefers "white cheese" (of any variety, sharp or mild), so that's why I made the second loaf with fontina (Boar's Head; I couldn't get the Italian one I prefer).  I took some of the second loaf to work, where it was a big hit as well.  I'll definitely be making this bread again in many variations. 

If you'd like the recipe, I highly recommend getting a copy of the book.  If you don't want to buy it, maybe you'll be lucky like my friend Tracey and your local library will have it.  I've been baking away, and will have more sourdough results to share soon! =)  I'm also submitting this bread to Yeastspotting--head over there every Friday for more amazing yeasted treats!