Showing posts with label Jeni's. Show all posts

Sunday, June 9, 2013

Different than the day before


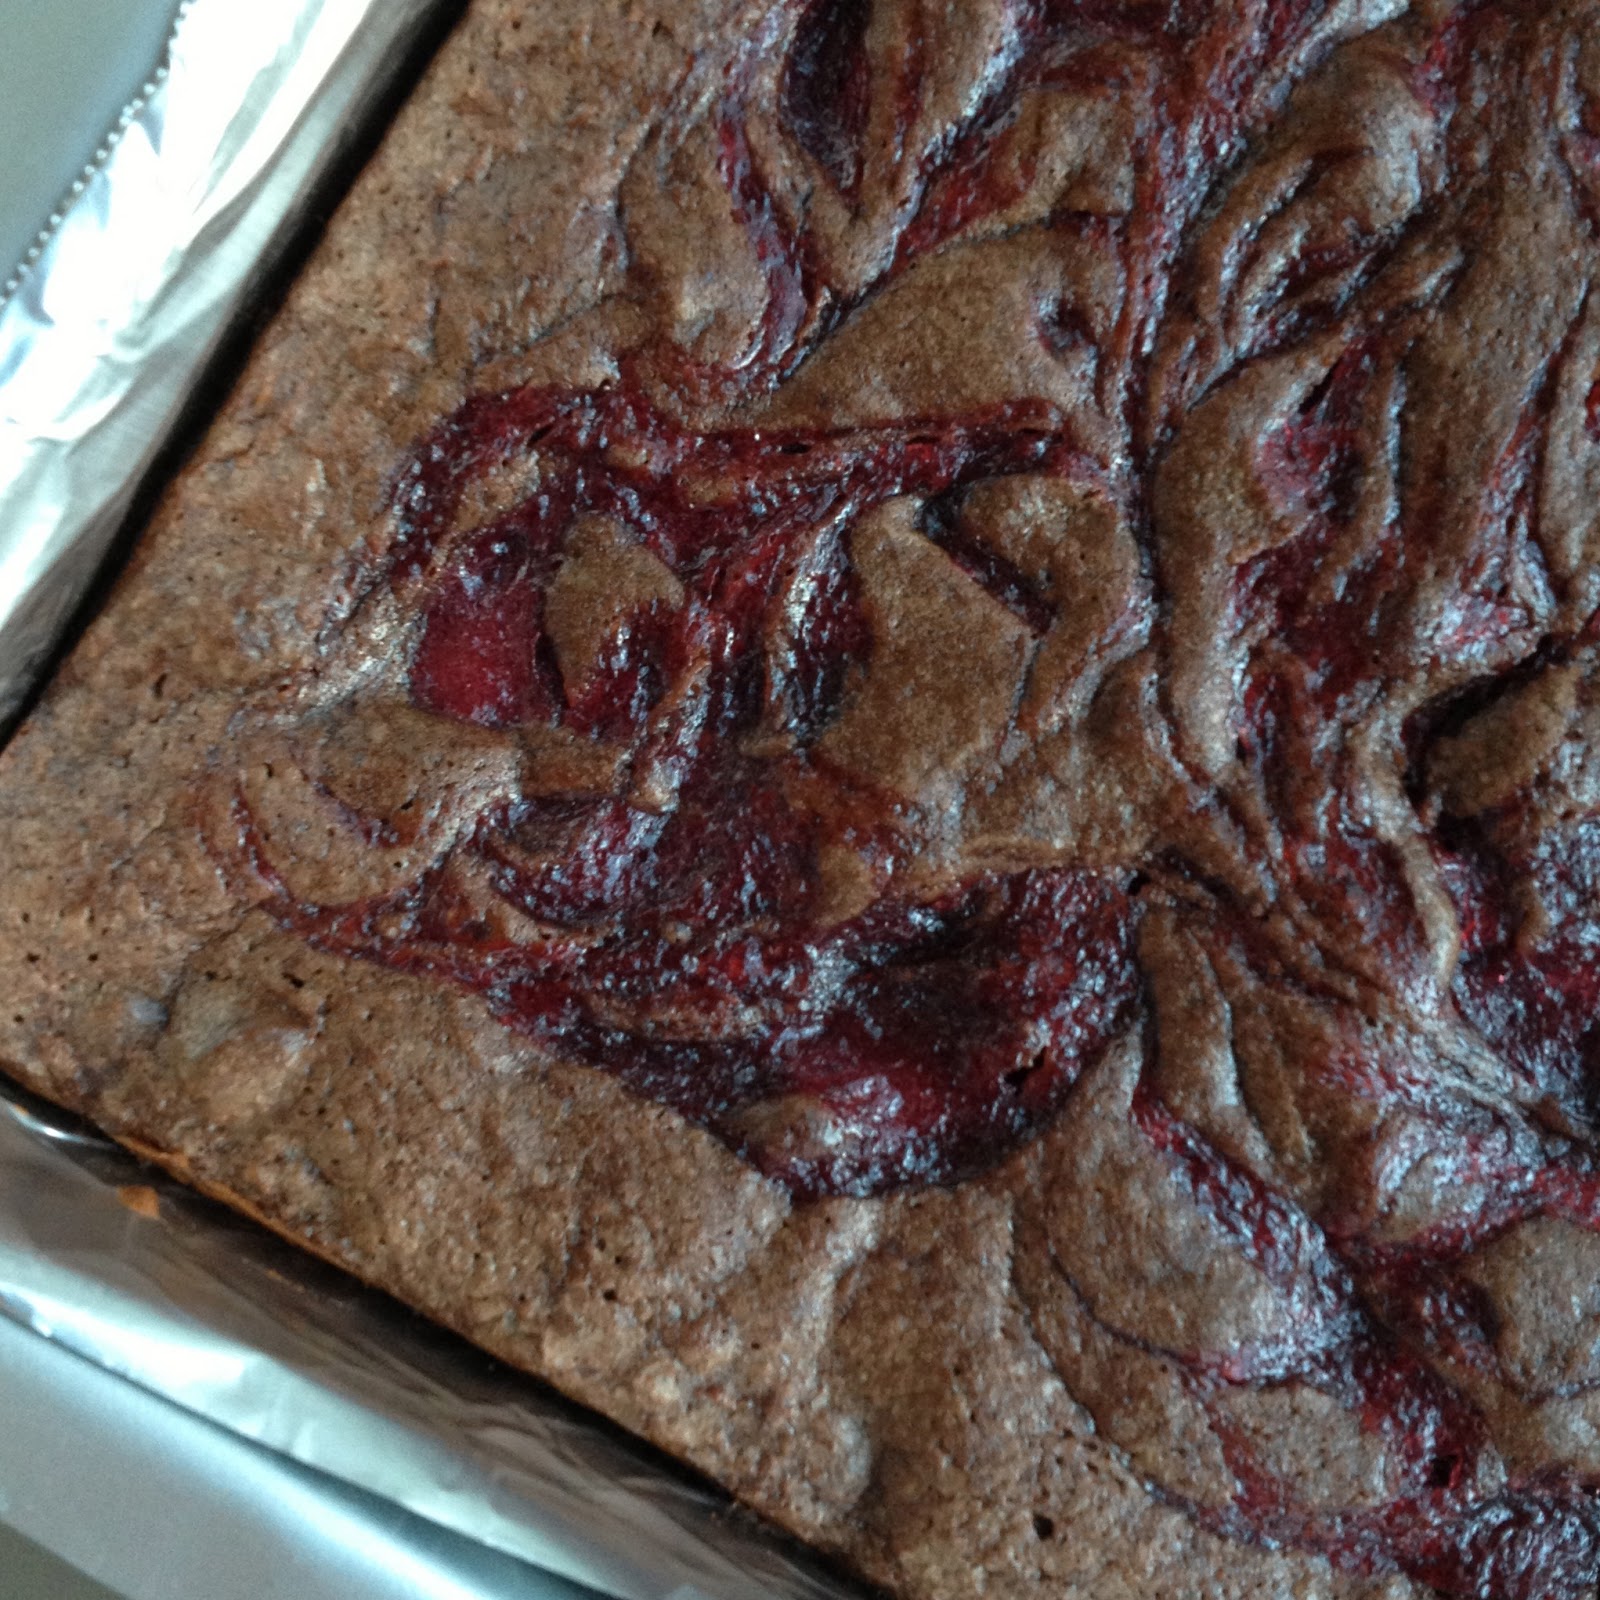
Costco had raspberries for about $4 for 12 ounces the last time I was there.  I bought 3 packages, with the intent of making Jeni's raspberry sauce with a lot of them.  I made a double batch of the sauce, and ended up with about 2 pints.  Some will almost certainly end up inside or on top of ice cream, and I'll probably eat some with yogurt, but I've been looking for other things to make as well.  I was in a brownie mood today, and decided to try swirling some sauce on top of the batter before it went into the oven. The brownies are the Classic Brownies from Cook's Illustrated--I made half the recipe (in an 8" pan), throwing in some chocolate chips instead of adding nuts.  I dolloped about 50 grams of raspberry sauce on top of the batter and swirled it in with a chopstick.  I baked the brownies for 30 minutes.  

The verdict?  Quite tasty!  Raspberry and chocolate is one of my very favorite flavor combinations.  The girls thought they were good but weren't totally thrilled.  That's okay, since that means more for me! =)


Sunday, August 12, 2012

Al dente


One of the time-honored traditions of parenthood is feeling like an idiot when you finally figure out what's going on with one of your kids that you think you should have realized much sooner.  Case in point, Gillian being "not that hungry" all the time lately.  It seemed really odd, since she wasn't even eating some things that she really likes.  One of the things was this ice cream.  Last weekend, I asked the girls for suggestions on what kind of ice cream to make next.  Gillian--"Chocolate!"  Brianna--"Can you make cookie dough ice cream?"  We decided to have the best of both worlds and combine the two.  But once it was made, Gillian didn't want to eat it.  That's when I finally realized that she wasn't eating much because she couldn't, sort of.  Poor kid has two loose teeth in front and has molars coming in in the back.  No wonder she didn't want to eat big pieces of cookie dough that had really firmed up in the freezer!  Not to mention bagels, croutons, sandwiches with chewy bread...  It all makes sense now.  I made sure to stock up on lots of her favorite yogurt flavors, and she's been eating the raspberry sorbet since I made that.


Now back to the cookie dough ice cream.  I was inspired by this recent post from Michelle of Brown Eyed Baker.  I like cookie dough ice cream, but sometimes it's just too sweet for my taste.  For the strongest contrast, I decided to go with the Darkest Chocolate Ice Cream in the World from Jeni's.  The recipe calls for bittersweet chocolate in the 62%-70% range, so I went with 70% El Rey chocolate.  I've made the recipe before and was turned off by the strong underlying coffee taste (probably because I used Starbucks VIA).  This time I simply subbed water and a teaspoon of instant espresso powder for the half cup of coffee in the chocolate syrup part of the recipe.

For the cookie dough, I used the recipe that Michelle posted, with a small variation.  I didn't use the mini chocolate chips that she suggests.  I don't like regular chocolate chips in ice cream--they're way too hard when frozen.  I borrowed a trick from Alice Medrich and made my own chocolate bits.  I melted 85 grams (3 oz) of 60% chocolate and spread it in a thin layer on a small metal pan lined with non-stick foil.  I put the pan in the freezer for about 15 minutes, and once the chocolate had hardened, I chopped it into small pieces.  Because the chocolate is no longer in temper, it melts more readily (so work fast with the chopping), especially in your mouth.  I used a small scoop to make balls of the cookie dough and stuck them in the freezer while I churned the chocolate ice cream.  Once the ice cream was done, I layered it in the container with the chunks of cookie dough so that there would be lots of cookie dough in every scoop.


The verdict?  We're all sad that we finished this one off this evening (well, except for G).  I can't believe I didn't think to add cookie dough to chocolate ice cream before this.  I'll definitely make this one again, and am already thinking of other combinations to try.  Like maybe peanut butter cookie dough in chocolate ice cream. =)

As I mentioned before, Michelle has this great post where you can find the recipe for the cookie dough (as well as her version of the chocolate ice cream).  You can find the Darkest Chocolate Ice Cream recipe in Jeni's book or here at Saveur.  This is my final recipe for my friend Phyl's Ice Cream Week.  Be sure to check out his post for some links to other yummy flavors.


Monday, August 6, 2012

Sweet and sour


Welcome to Ice Cream Week 2012!  I did something along those lines in July last year, but this time around, Ice Cream Week is being hosted by my friend Phyl.  I'm indebted to Phyl for providing me with the push I needed to get out of my recent blogging slump.  I could blame it on a number of things--still getting adjusted to my new job location/hours, the parenting fun of ridding my children and my home of lice, the joy that is a Texas summer, being sucked into watching Olympics every chance I get...  But what it really comes down to is what one of my former bosses called "analysis paralysis."  I worry too much about what to write and how to make sure it's "perfect," when sometimes I really just need to sit down and do it.  And while I'm at it, stop being so hard on myself for everything that I don't get done and that isn't perfect. =)

First up in our themes for this week is Summer Fruit.  Since I haven't been able to spend much time in the kitchen recently, I started off by checking my archives for recipes that I made but never posted.  But I rarely make fruit ice cream.  I think the problem is that they never taste that fruity to me--the flavor of the fruit is muted by the dairy ingredients.  And one of the things I love about most fruit is its acidity. So instead of a fruit ice cream, I bring you a sorbet.  (That's actually our theme for Wednesday, so stay tuned for another one then.)  


This recipe comes from my favorite ice cream book, Jeni's Splendid Ice Creams at Home.  The recipes are arranged by season in the book, depending on when the ingredients are at their peak.  The way my tastes run, I've mostly made recipes from the Autumn and Winter sections, but this one is squarely in the Summer category.  The recipe is for Sour Beer Sorbets, and can be varied depending on the type of stone fruit you want to use or have available.  The sour beers are Belgian lambics, one of the few beers I'll happily drink.  I had a bunch of nectarines on hand, so I picked up a bottle of peach lambic and was all set.  The recipe is pretty simple--simmer pureed fruit with some sugar and corn syrup (which helps the final texture), chill the mixture, strain it if desired, add the beer, and churn.  I'm lazy, so I didn't bother to peel my nectarines before pureeing, so I did strain my mixture.  When I tasted the mixture after simmering but before adding the beer, it seemed a bit flat and overly sweet.  However, the acidity of the lambic beer took care of that.  I also added a pinch of salt to the mixture.  

The verdict?  This is very tasty sorbet.  The texture is smooth and not overly icy or hard to scoop.  There's a hint of alcohol taste, but it's certainly not overpowering.  I'd definitely like to try other flavors, particularly the Plum & Black Currant variation.  

I've got my work cut out for me, since I don't have any other ice creams ready to go for this week's festivities. =)  But I'm looking forward to the challenge.  Be sure to check out Phyl's blog; he'll have posts every day this week (I'll probably only manage 3 or 4 at most) and will share links to other friends who are participating.  His recipe for today is Citrus Beet Ice Cream.  You should check it out for the color, if nothing else. =)


Tuesday, January 31, 2012

Flavor of the month


So here we are at the end of January.  For the most part, my new FOCUS plan is off to a good start!  I did get derailed slightly during the past week--my dad & his girlfriend Judy (who is really great) got here in time for Brianna's birthday last Wednesday and went home Sunday afternoon.  That was okay, though, because I only had one item left to fill in on my list when they got here--the Ingredient focus.  When I came up with the list, I figured that one would be an opportunity to highlight a new ingredient each month.  But I wasn't feeling it.  I considered--and discarded--several possibilities, but nothing was really grabbing my attention.  Since part of my goal this year is to focus on things that have value for me instead of just doing things because I think I should, I didn't want to force myself to make something that might or might not get eaten.  I was also running out of time, so that was a factor. =)  

Some of my best ideas come as I'm lying in bed at night before I fall asleep.  I've taken to keeping one of my notebooks handy so I can jot stuff down more easily so I don't lose it.  Sunday night, what was going around in my head was the fact that my ingredient and pantry categories were already sort of overlapping.  I also wanted to blog about Brianna's birthday cake.  I was also thinking about the new cookbook I bought last Friday.  Something in my brain put all of those things together and got them to gel.  I didn't want to write about ingredients (I'll combine that with pantry going forward), I wanted to write about flavors.  


I've mentioned before that around here, the preferred cake flavor for everyone but me is chocolate.  When I asked B what kind of cake she wanted, I fully expected her answer of chocolate cake with chocolate frosting.  But she surprised me with the filling--she started to ask for vanilla, like last year's cake, but then changed it to raspberry.  Chocolate and raspberry is one of my all-time favorite flavor combinations.  Sold!  I'm not sure exactly what it is about those two flavors that works so well together.  I also like cranberry with chocolate, so I think it has to do with the fruity tartness in contrast to the rich chocolate.  Whatever it is, I'm not complaining. =)  Our favorite filling is Swiss meringue buttercream, for its smooth, creamy texture.  I've tried different ways to flavor it, with varying success.  This time, I turned to the raspberry sauce from my copy of Jeni's Splendid Ice Creams at Home.  It was fabulous in ice cream, and I thought it would work well in the frosting, too.  

B decided she wanted a rectangular cake rather than a round one.  I learned a long time ago that it's a total pain to try to slice a regular 13" x 9" cake horizontally to form two layers.  Instead, I have a couple of quarter sheet pans.  My go-to chocolate cake recipe is the Chocolate Fudge Cake from The Cake Bible.  I love that it gives the option to use natural cocoa powder, which I prefer, and it's made with brown sugar, which contributes to the moist fudgy texture.  The recipe calls for two 9" round pans, but I find that it works great for two thinner 13" x 9" layers.  The baking time is shorter--about 20 minutes. I line the pans with parchment, and let the cakes cool in the pans.  

When I was ready to assemble the cake, I flipped one of the layers onto my serving tray and peeled off the parchment.  I spread the cake with a thin layer of straight raspberry sauce (which is more like jam than sauce in texture), then topped that with a nice layer of the raspberry buttercream.  I then flipped the second cake layer on top (and removed the parchment from that as well).  I put the cake in the fridge so the filling would have a chance to firm up while I made the chocolate frosting.  My favorite recipe for that is a great recipe from Fine Cooking.  It uses sour cream, and I love how the tang cuts through the sweetness of the powdered sugar in the frosting.  It's also really easy to mix up with a bowl and a whisk.  Once the cake had chilled a bit, I covered it with the chocolate frosting.  I used more of the raspberry buttercream to decorate the cake with a shell border around the bottom and stars around the top, as well as a festive message.


The verdict?  Using the raspberry sauce to flavor the Swiss meringue buttercream works very well--you still have a smooth texture.  I've tried using fruit puree in the past, and it tends to be too watery and make the buttercream break.  The raspberry sauce is also tart enough to balance the sweetness of the frosting, plus it makes it such a lovely pink color.  As for the flavor combination, this was a winner, no surprise there.  You can really taste the fruit, and it works so well with the rich chocolate.  I also love the contrasting textures of the silky buttercream and denser chocolate frosting.  

Part of the fun is figuring out what flavors appeal to you, and I love pulling together components from different sources to see how they work together.  I encourage you to do the same, but figured I'd share the ones I used here in case you're looking for inspiration.  The Chocolate Fudge Cake recipe can be round in The Cake Bible.  If you aren't fortunate enough to have a copy, your local library might.  The Chocolate-Sour Cream Frosting recipe can be found in this post (adapted from Fine Cooking).  There are lots of places to find Swiss meringue buttercream; my go-to is Dorie's recipe, which can be found in this post.  The raspberry sauce is pretty straightforward to make, and can be found in the middle of this article in the Post-Gazette (I used regular raspberries, not black).


Thursday, September 1, 2011

Sourpuss


I had a conversation the other day with a friend who is thinking of starting a family.  He asked me, "Kids--they're worth it, right?"  My response?  "Most of the time."  I love my girls, and I can't imagine life without them.  But sometimes, like tonight, they just push all my buttons.  Awhile back I decided that Thursday is invariably the worst day of the week--prime time for some sort of meltdown.  Everyone is tired.  We're tired on Friday, too, but by that point, the end of the week is definitely in sight.  On Thursday, we're almost as cranky, and still have to find a way to get through another day.  

Fortunately there wasn't a homework meltdown from B this evening.  (That was last night.)  And at least G didn't wait until right before bed to have her every-other-day marathon bathroom session.  (Sorry, I know it's mostly a food blog, but anyone have any great solutions for 4yo constipation?)  But by now, I really just wish they'd finish up with the fooling around in the bathroom (they're supposed to be brushing their teeth) and go to bed already...  Though on the plus side, I did manage to feed them something for dinner that they both ate without complaint.  And it wasn't macaroni and cheese--there were actual vegetables involved. =)


Oddly enough, although I'm feeling tired and decidedly cranky, I have no interest in one of my usual stress remedies, chocolate.  (I know, crazy, right?)  I do, however, wish I had some of this frozen yogurt left.  It would really hit the spot right now.  It's lemon frozen yogurt with raspberry sauce, from Jeni's Splendid Ice Creams at Home.  

I've made about a dozen recipes from the book so far--some that I've posted, and some that I haven't.  (There's some Milkiest Chocolate with Marshmallows and Fudge Swirl in the freezer right now, for instance.)  But it really hadn't occurred to me to try any of the frozen yogurt recipes.  Then I went to a class that Jeni did here at Central Market last month.  She mentioned that the lemon frozen yogurt was her favorite, and we got to sample it at the class.  So I put it at the top of my list to try next.  

More than with Jeni's ice cream recipes, you have to plan ahead a little for the frozen yogurt.  The recipe calls for draining the yogurt for at least 6-8 hours to remove excess liquid.  I didn't have cheesecloth, so I improvised.  I lined my medium strainer with coffee filters, put it over a bowl, and added my quart of lowfat yogurt.  I covered the top with plastic wrap, and stuck the whole contraption in the fridge overnight.  By the way, can I just say that it's harder than I expected to find lowfat plain yogurt?  I saw plenty of nonfat, and several brands of whole milk, but not a lot of choices for lowfat.  I used Wallaby for the lemon.  I think I'm going to try Stonyfield for the next batch, and see which I prefer.  Another thing to note--you won't need all of the yogurt for this recipe, but the extra can be used for other things, like in place of sour cream in dips.

Besides draining the yogurt, you make a lemon syrup with lemon juice and sugar.  The zest from the lemons gets added to the milk/cream mixture, which is similar to the ice cream, but with smaller amounts to account for the volume that will be added by the yogurt.  Once the milk mixture is boiled and thickened with cornstarch and whisked into the cream cheese, the strained yogurt and lemon syrup are whisked in.  I did add a pinch of salt that wasn't called for in the recipe.  I also chilled my finished mixture in a regular ice bath rather than in a ziploc bag.  Once the mixture was thoroughly chilled, I churned it and then layered it with Jeni's raspberry sauce as I packed it into a freezer container.


The verdict? I think I have a new favorite flavor.  Much as I love chocolate, and the salty caramel (when I don't overcaramelize it), the lemon frozen yogurt is to die for.  I do want to try the Lemon Cream ice cream as well, for comparison.  What's actually up next is lime frozen yogurt with blackberry sauce.  I'll keep you all posted on how that goes.  Molly of Orangette says that she likes to eat this frozen yogurt from a teacup.  I'd have to say my favorite way to eat this flavor is in a cone.  You have the tart, refreshing tastes of lemon and raspberry with the crisp texture and browned butter-vanilla flavor of the cone.  Mmm.  I admit, I polished off most of the quart all by myself.

If you'd like to try this one for yourself, you can find the recipe here at The Splendid Table.  But I strongly encourage you to get your hands on a copy of the book, so you can try lots of other fantastic recipes as well.


Sunday, July 24, 2011

Sundae Sunday - Nuts about caramel


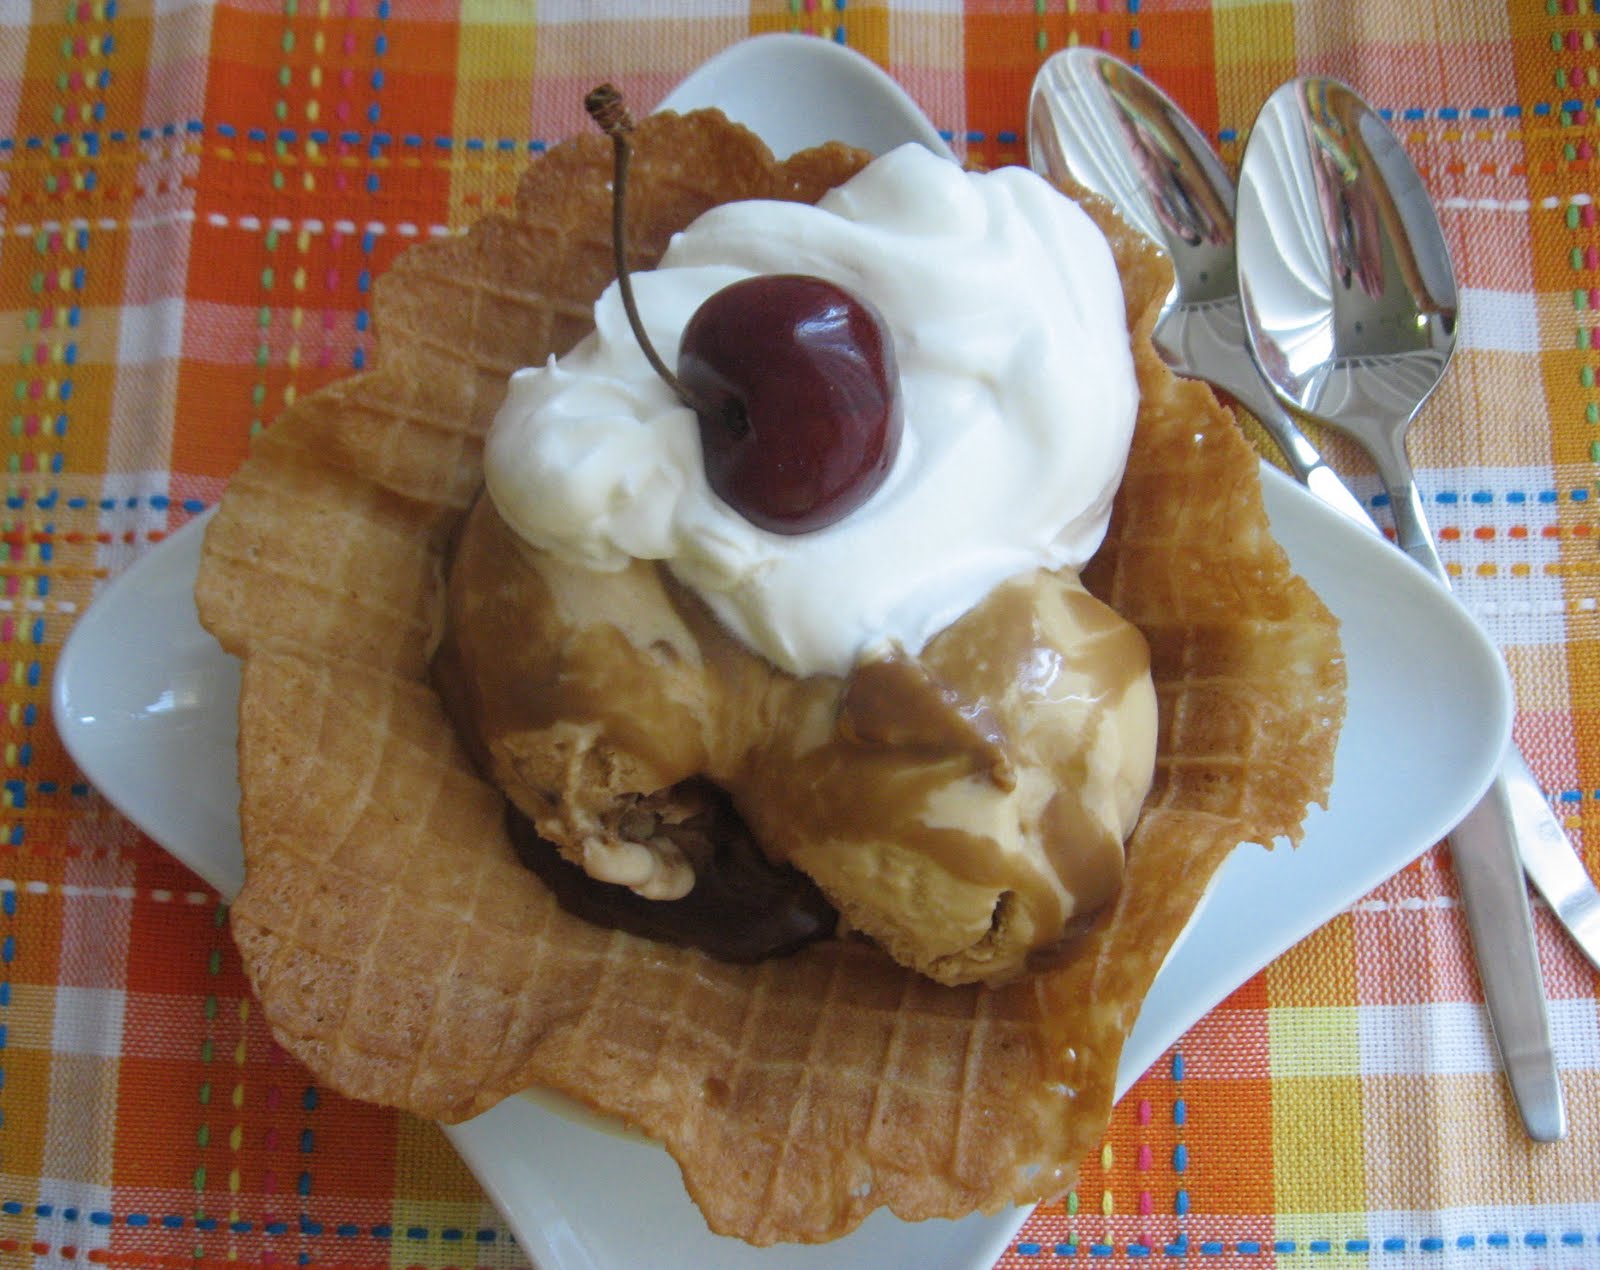
So what do you think makes a sundae a sundae?  Is it just having sauce on ice cream?  Is it adding whipped cream?  Is it the cherry on top?  Well, I have all of those today, so there's no doubt in my mind that this is a sundae. =)  I don't eat sundaes much.  I usually eat a single scoop of ice cream, plain, in a small bowl or ramekin.  Eating a small amount means I can get away with eating ice cream more often.  Occasionally I'll put some chocolate or caramel sauce on top.  But whipped cream?  Never.  And cherries?  I don't even like them. Jamie got to eat the one on this sundae; he's the one who bought the cherries in the first place, so I can make him some ice cream with roasted cherries.


But since this is Sundae Sunday, I went all out.  At the base is a waffle bowl, made from the same recipe as my cones, but sandwiched between a couple small bowls to give it shape.  The ice cream is salty caramel with pecan pralines.  (You can also find the salty caramel ice cream recipe in this Bon Appetit blog post. Thanks, Mike!)  It's topped with a sinfully sweet butterscotch sauce and topped with softly whipped cream and a cherry.

I added the pralines to the ice cream because I wanted something that wasn't too plain, and I thought they would be good with the caramel ice cream.  Initially, I was thinking of using hot fudge or some other chocolate sauce for the topping, but then I decided that I wanted to stick with the caramel theme.  Regular caramel sauce seemed too obvious; I wanted something with a little more character.  I consulted my bookshelf on Eat Your Books, looking for butterscotch sauce.  I was a bit surprised when it pointed me to my copy of Ratio, by Michael Ruhlman.  But sure enough, there was a butterscotch recipe in there.  Butter, dark brown sugar, cream, salt, vanilla, and the intriguing ingredient of cider vinegar were fairly quickly combined into a delicious topping.  As for the whipped cream, I made it by hand--I've finally learned that the best way to do that is to use a large bowl and my big balloon whisk, even for a relatively small amount of cream.  The whipping goes fast that way, and I can easily stop before the cream gets over-whipped.


The verdict?  Wow.  This sundae was totally decadent, and completely delicious.  I let the caramel for the ice cream get a little too dark, so the ice cream wasn't very sweet.  But that was okay with the pralines and sauce, both of which were quite sweet.  I don't usually go for nuts in my ice cream, but I like how the pecans were crunchy, while the praline coating melted into the ice cream.  The butterscotch sauce was wonderful--the additions of vinegar and salt really gave it an excellent flavor.

Butterscotch Sauce
(adapted from Ratio by Michael Ruhlman)


55 grams (4 tablespoons) unsalted butter
115 grams (4 ounces, or a packed half cup) dark brown sugar
115 grams (4 ounces, or half a cup) heavy cream
1/2 teaspoon vanilla extract
1 teaspoon cider vinegar
1/4 teaspoon fine sea salt

Place the butter and brown sugar in a small heavy-bottomed saucepan.  Cook for 5 to 10 minutes over medium heat until the sugar has completed melted into the butter and the mixture is thick and bubbly.  Remove the pan from the head and whisk in the cream.  Let the mixture cool slightly--about 5 minutes--then whisk in the vanilla, vinegar and salt.  Makes about a cup.

For more info on making the butterscotch sauce, check out this article from Shuna Fish Lydon, with great how-to photos.

And be sure to check back later this week for my Sundae Sunday round-up!


Thursday, July 14, 2011

It's a virtue


People seem to think that I have a lot of patience.  When they learn how long I've worked in customer service, they think I must be a patient person.  When they see something that I've created, be it a fancy cake or a piece of needlework, they say how making those things must take a lot of patience.  Honestly, though, I think most of the time it's more stubbornness than patience--because I don't feel very patient a lot of the time, especially when I'm dealing with my children.  And when I get an idea in my head, I don't want to wait.  I want to make it happen now!


You've all seen that in action with all my recent posts about frozen treats.  Sure, it's summer, and a great time for ice cream.  But I want to make all the different flavors right now.  I actually didn't make any new ones last weekend because I knew there wouldn't be room until we finished eating some of the ones I'd already made.  I can hardly wait to make some more, though.  It's not just flavors that I've been experimenting with, either.  After buying some cones and waffle bowls at the grocery store that weren't very tasty (and arrived broken as well), I decided that I needed to make my own.  Jeni's book has a recipe, but I was lacking one important thing--a waffle cone iron.  


It wasn't always the case, but these days Austin has quite a few different places to shop for housewares. The place I end up at most often is Sur la Table.  When SLT came to town a few years ago, the local Williams-Sonoma store expanded quite a bit as well.  But despite the fact that they have a lot more to offer these days, I still don't shop there all that often.  For some of the basics, I like to go to Ace Mart, a local restaurant supply store.  And for some items, like cake boxes and decorating tools, I shop at All in One Bake Shop.   I may not like shopping for clothes or shoes, but I can shop for kitchen gear all day long. =)  Where do you all like to shop for bakeware and related stuff?  I can always use some new places to check out.  =)

How Brianna deals with the fact that I need more practice making cones without holes at the bottom...

When I started looking for a waffle cone maker, I started with Sur la Table and Williams-Sonoma.  SLT didn't even have one on its website.  W-S had one, but it was listed as online only.  Sometimes that information isn't accurate so I still checked the store, but no luck.  I even tried Bed, Bath & Beyond, but same thing--online only.  If I wanted to buy one online, I could just order one from another favorite of mine, King Arthur Flour.  I was about to give up and resign myself to having to wait a week or so, when I thought of something else.  I'm not sure why I don't usually think of them, but we also have a Crate & Barrel store in Austin.  I checked their website first.  Success!  They have this one.  And it was on sale!  Even better, I was able to check store availability from the website, and it looked like my local store had some in stock.  I was doing this on a day off, so I headed right down to look.  They had one!  As it turned out, a lot of other ice cream related stuff was on sale, which is how I ended up with the cute dishes pictured here, as well as a couple of these glasses.  

Give me your tired, your poor, your huddled masses yearning to eat ice cream...

The verdict?  Well, I think you can see that the cones were a big hit with Brianna and Gillian.  My only problem is that now they want ice cream for dessert every night.  Unfortunately, I just don't have the patience for it--I swear they can take an amazingly long time to finish eating an ice cream cone. =)  They had plain dark chocolate ice cream in their cones, but the others pictured are filled with a flavor that I made just for me.  (Though I just discovered that J did sample some.)  I love the combination of chocolate and raspberry, so I made a batch of the Milkiest Chocolate Ice Cream in the World, and layered it with some fabulous raspberry sauce and some of the Chocolate Bombe Shell.  

As for the cones, I've made them a couple times.  I think I'm starting to get the hang of it, though a couple of this last batch still had holes in the bottoms.  I've learned that the cones taste better if you let them get more browned, too.  We've made some waffle bowls, too, by sandwiching the hot waffles between a couple of small ramekins with rounded bottoms.  

If you'd like to try these and lots of other great ice cream recipes, I definitely encourage you to get a copy of Jeni's Splendid Ice Creams at Home.  (No, this is not a sponsored post; I just really love this book.)  You can find the recipes for the chocolate ice creams and the raspberry sauce in the book.  Here's my version of her waffle cone recipe.  

Waffle Cone Batter

2 egg whites (60 grams)
60 grams (1/4 cup) heavy cream
100 grams (1/2 cup) granulated sugar
1/4 teaspoon salt
2 teaspoons vanilla
70 grams (5 tablespoons) melted unsalted butter
85 grams (2/3 cup) all-purpose flour

Whisk the egg whites and cream together in a medium bowl.  Whisk in the sugar, salt and vanilla.  Whisk in the melted butter, making sure that everything is thoroughly blended.  Finally, gently whisk in the flour, just until the batter is smooth.  

I let my batter rest (at room temperature) while my waffle iron was heating.  For my waffle iron, my #40 disher is just the right size to scoop the batter.  It took some trial and error to figure out exactly how long to cook the waffles.  And be prepared to burn your fingers a few times while you learn to roll them into cones.  

Monday, July 4, 2011

Say...cheese?


Happy Independence Day, everyone!  

This is a day to be thankful for all the freedoms that we enjoy as Americans.  I'm also thankful to have working air-conditioning here in central Texas, where it's supposed to be over 100º for the next week.  I came home from work on Friday to find that the temperature in my house was over 80ºF.  Turns out that after almost 10 years (can we really have been in this house for almost 10 years?!), the air-conditioner condenser unit had had enough.  Why do things like this always seem to happen going into a holiday weekend?  Which leads me to the next thing I'm thankful for--a wonderful heating & a/c guy who was willing to come out on a Saturday to figure out what was wrong and fix it.  Otherwise, I'd probably be spending my holiday weekend in a hotel. =)  I haven't appreciated air-conditioning so much in a long time.  (J says it got into the high 80s in the house while I was at work on Saturday, before the a/c was fixed.)

I felt like a big wimp, complaining so much about the lack of air-conditioning.  After all, we didn't have a/c when I was growing up.  It was fairly hot and humid in Pennsylvania in the summer, and I can remember plenty of nights when we would lay in bed at night with all the windows open, just hoping for some breeze.  But as several people pointed out to me, it may have been hot then, but we didn't have high temperatures over 100º for days on end.  The ways we try to beat the heat are still the same, though--fans, minimal cooking, and lots of frozen treats!  I admit it, I let my girls eat popsicles for breakfast on Saturday morning. =)


Today, though, I've got more ice cream for you.  My Ice Cream Week is running over the week-long time frame by a bit (and there's at least one more post to come), but you can never have too much ice cream, right? =)  Today's flavor happens to fit the patriotic theme for the day--red and white in the ice cream, though I had to find a blue dish for it to complete the theme.  (You could probably add blueberries; I just don't like them.)

When I first got my copy of Jeni's book, I read all the way through it.  Then I went back and started a list of the flavors that I wanted to make.  It didn't take me long to fill a page in my notebook.  Some of the choices were obvious ones, like the Salty Caramel and Darkest Chocolate in the World.  The Roasted Strawberry Buttermilk one was high on the list as well, since I had a ton of strawberries in the fridge.  Brianna asked me to make the Milkiest Chocolate in the World, since she wanted to try it when we were in Columbus, but they were out of it.  What surprised me was the recipe that ended up next on my list.   Young Gouda Ice Cream with Vodka-Plumped Cranberries.  Cheese in ice cream?  I really like Gouda--and cranberries--so I figured, why not? 


The verdict?  I admit, I wasn't quite sure what to expect from adding cheese to ice cream.  I did figure that the creaminess of the Gouda would work out okay.  What I ended up with was something that reminds me a lot of cheesecake.  I guess that shouldn't be that surprising.  It's really good, but really rich.  The tart cranberries are a nice contrast to the richness and creaminess of the ice cream.  Now I'm eager to experiment with some of the other unusual recipes in the book.  

If you'd like to give this one a try for yourself, I recommend that you get your hands on a copy of Jeni's Splendid Ice Creams at Home.  To get started, you can find the recipe for Jeni's Vanilla Bean ice cream here at Food & Wine.  To make the gouda version, omit the vanilla bean.  Increase the salt to 1/4 teaspoon and the corn syrup to 2 tablespoons.  After whisking the milk mixture into the cream cheese, whisk in half a cup (about 2 ounces, or 60 grams) of young Gouda or another creamy cheese.  Proceed with chilling the mixture and churning it.  Dried cranberries are plumped in simple syrup with a couple tablespoons of vodka added.  They're layered in with the ice cream as it's packed into a freezer container.

Stay tuned for my next Ice Cream Week post, on ice cream cones!


Friday, July 1, 2011

Pop goes the strawberry


I mentioned a while back that my dad was very cool and got me a Sur la Table gift card for my birthday back in February.  It was an ends-in-a-zero birthday, so the gift card amount was pretty nice. =)  I spent a little of it, but have been carrying the card around in my wallet for quite a while, not knowing what else to buy.  My bakeware collection is pretty extensive already, and I hadn't come up with anything else that I just had to have.  

We've been making lots of ice cream because it's ridiculously hot every day here.  The girls were also bugging me to make popsicles, and the June Bon Appetit issue has lots of cool frozen treats (not ice cream) that I want to make.  I have an inexpensive little popsicle mold, but it doesn't hold very much.  I was debating getting a new one when I ran across something in the back of a recent Cook's Illustrated magazine--a review of the Zoku Quick Pop Maker.  I quickly decide that this was what to spend the rest of my gift card on!  Normally, I might not have bought something like this, since it seems a bit expensive just to make popsicles.  But birthdays and gift cards are for things you wouldn't necessarily buy for yourself, right? =)


Like the canister for my ice cream maker, the pop maker has to be frozen ahead of time--about 24 hours ahead, to make sure it's completely frozen.  I managed to make what I hope is a permanent spot for it in my freezer.  Once the unit is frozen, you insert the sticks, pour in your popsicle mixture (2 ounces per pop) and wait 8-10 minutes.  Voila!  The first time we just tried it with some strawberry yogurt thinned with a little milk to make it pourable.  I had a little trouble getting those out--not sure if I left them in too long, if the mixture wasn't right, or if it was just because it was the first batch.  Since then, I haven't had any trouble.  For the second round, we just used some orange and grape juice (not together!).  It's so cool that you can go from wanting to make an ice pop to eating one in ten minutes!

For the latest round, I was inspired by one of the ice cream flavors I made recently.  It was for Roasted Strawberry-Buttermilk Ice Cream from my latest cookbook.  (Yes, I'm obsessed. How could you tell?)  It calls for roasting sliced strawberries in the oven (with sugar) and making a purée which is then added to the ice cream base.  I made the ice cream, and found that it had a mild strawberry flavor.  I wanted to increase the amount of strawberry, so when I put the freshly churned ice cream into a freezer container, I layered in some of the extra purée.  That wasn't the best idea, since the purée ends up kind of icy--though it's an interesting contrast to the creamy texture of the ice cream.  But as I was eating it, I thought that it would be great as a popsicle.  So I made a double batch of the purée, chilled it thoroughly, and pulled out the Zoku.  Since the girls weren't home when I made these, I put the finished pops in small ziploc bags and stored them in the freezer.


The verdict?  Definitely a hit with the kiddos.  Okay, with Brianna at least, since Gillian fell asleep in the car on the way home and hasn't tried one yet. =)  It's hard to go wrong with strawberries and sugar.  The purée also has some acid--in the form of lemon or lime juice--to perk it up.  I'm sure we'll be making more popsicles with the purée, as well as coming up with other fun things to put in the Zoku.  I've found a couple of lists to get us started, from Bon Appetit and Fine Cooking.  If you'd like to try my strawberry ones, here's what I ended up doing.  And stay tuned for more from Ice Cream Week!  (which may end up being more than a week, at the rate I'm going)

Roasted Strawberry Purée

680 grams (24 ounces) fresh strawberries, hulled and cut into thick slices
140 grams (2/3 cup) granulated sugar
juice of 2 limes (or lemons, if you prefer)

Preheat your oven to 375ºF.  Place the strawberries in a 13"x9" glass baking dish.  Sprinkle the sugar over the berries and gently mix the two together.  Roast the strawberries for about ten minutes, until they are just tender.  Transfer the strawberries and syrup to a tall, narrow container and add the lime juice.  Purée with an immersion blender until smooth.  Chill thoroughly before adding to ice cream base or making popsicles.  

I made this double batch because I wanted a lot of purée to play around with.  You can also halve the ingredients and roast the strawberries in an 8" square baking dish.  You can also purée the mixture in a food processor or blender; I just didn't want to wash mine.

Note: This post was not sponsored in any way.  I just happen to like the Zoku and wanted to tell you about my experiences with it.


Tuesday, June 28, 2011

Quite a mouthful


I've been making ice cream for a long time.  I got my first ice cream maker shortly after college, and it served me well for a long time.  But it finally died, and I got a new one about three years ago.  I've actually used that one a lot more, in part because it came with two freezer canisters.  One has a permanent spot in my freezer.  Whenever I take it out, I replace it with the other one.  Well, this weekend I went a little crazy and crammed both canisters into the freezer so I could make more than one flavor on the same day, in anticipation of my Ice Cream Week plan.  

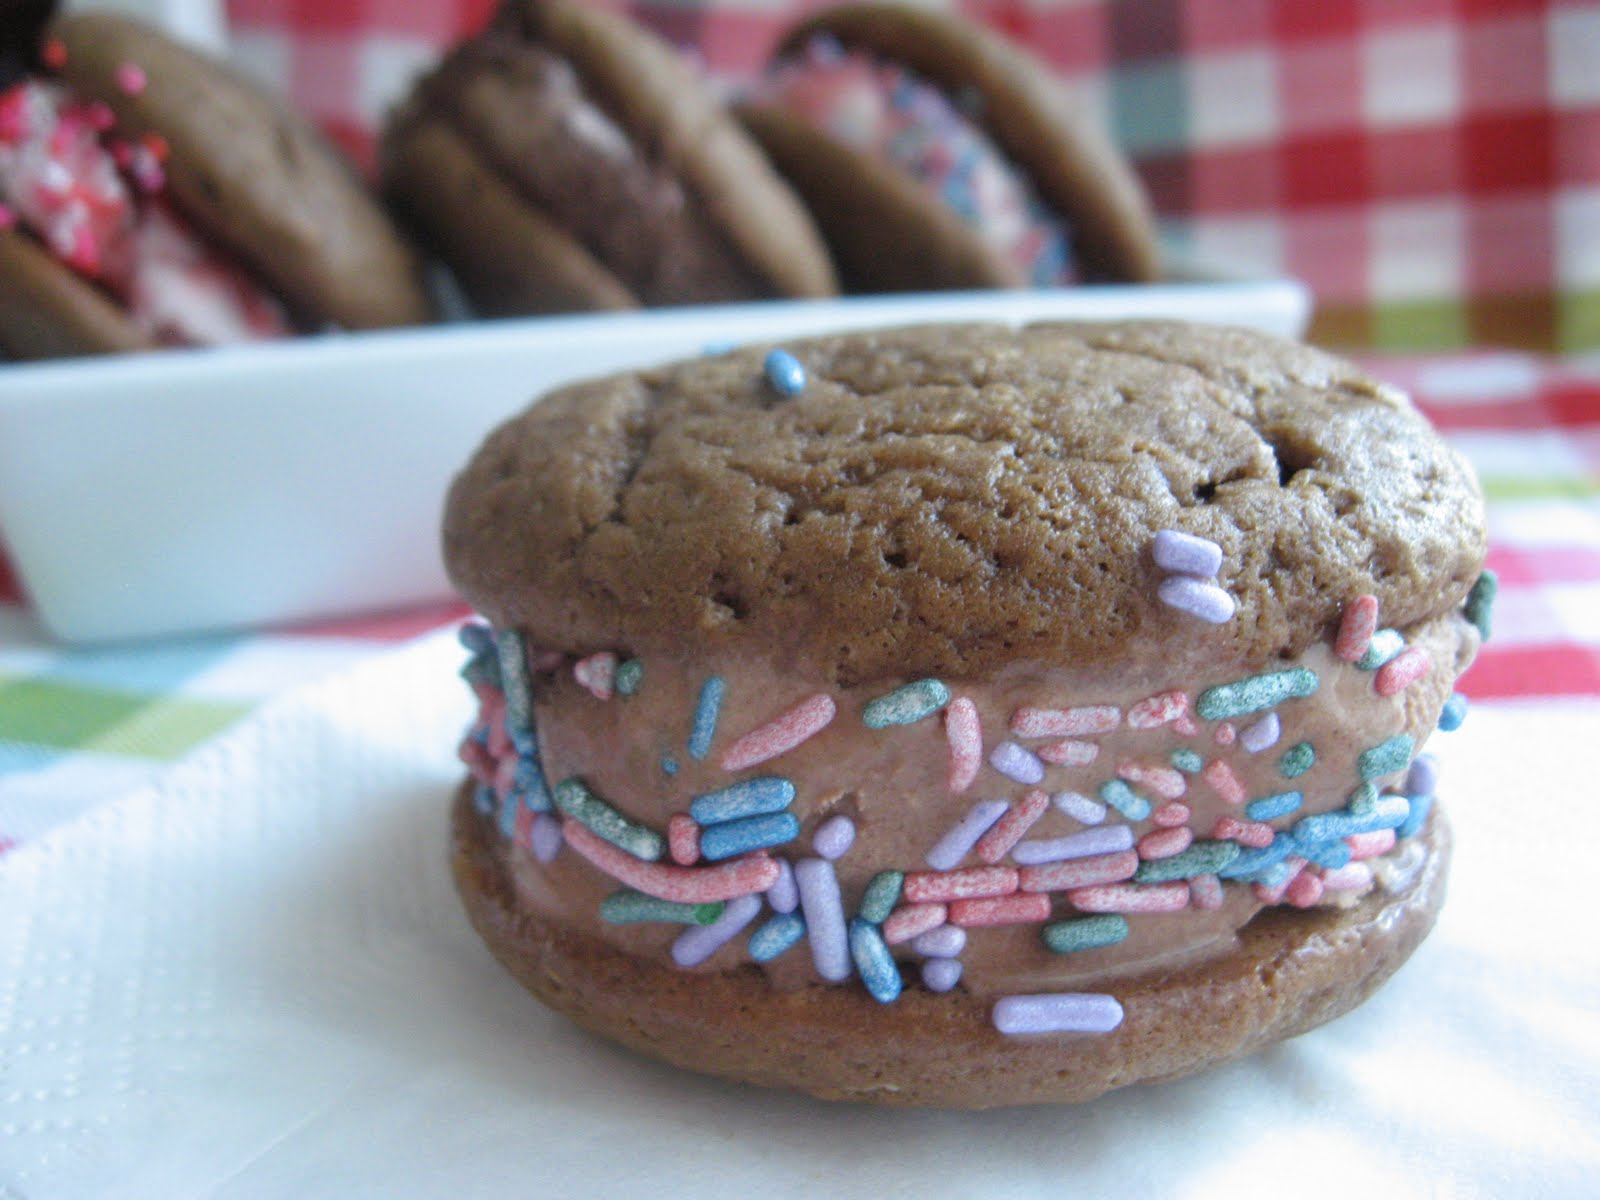
This week's Tuesdays with Dorie recipe fit nicely with my plan.  Spike of spike.does.stuff picked Sour Cream Chocolate Cake Cookies for us to make this week.  How's that for a long recipe name? =)  I wasn't originally sure if I was going to make these, but then I read the P&Q.  Several people mentioned using the cookies to make ice cream sandwiches.  Perfect!  Amazingly enough, with all the ice cream and cookies that I've put on this blog, I've never actually put the two together.  It's about time. =)


I can understand why the cookies turn out cake-like, because you end up making more of a batter than a dough.  You cream butter with regular and brown sugar, then add vanilla and melted chocolate.  Next in are a couple eggs.  Then you alternate adding dry ingredients (flour, salt, baking soda, cocoa powder--no spices in mine) with sour cream.  I used my #40 disher to scoop out the cookies, and ended up with 45.  I baked them for 12 minutes.  Once the cookies were cool, I paired them up and froze a bunch of them before making the sandwiches.  

As for the ice cream flavors, I made The Darkest Chocolate Ice Cream in the World (another impressive title) from my new cookbook.  (Some are also filled with Roasted Strawberry Buttermilk Ice Cream, but that's another post.)    For the chocolate ice cream, you first make a chocolate syrup, using coffee, cocoa powder, sugar and bittersweet chocolate.  I'm used to chocolate recipes calling for coffee or espresso powder to enhance the chocolate flavor.  We don't usually have coffee on hand, though.  Rather than turn to instant espresso powder the way I usually do, I tried something new.  I've read on several blogs about Starbucks VIA instant coffee.  So I picked some up at the grocery store.  Since I needed half a cup of coffee, I used half the packet in half a cup of water.  It worked well, but the finished syrup tasted strongly of coffee, more than I wanted it to.  I'll definitely use the VIA powder again, just less of it.  For the chocolate, I used one of my favorites, Scharffen Berger 62%.  (I would have used 70%, but didn't have any.)  I used Scharffen Berger for the cocoa powder as well.  


The verdict?  The ice cream sandwiches were a big hit with the girls.  The cookies worked great, since they don't get super hard, even when frozen.  Since I had a lot of cookies, I also sandwiched some with chocolate-hazelnut spread and took them to a friend as a treat.  They were quite well received.  

If you'd like to try the dark chocolate ice cream, you can find the recipe here.  For the cookie recipe to make these yummy sandwiches, head over to Spike's blog.  To see what everyone else did with this week's recipe, check out the Links.  And don't forget to check back for more of Ice Cream Week!


Sunday, June 26, 2011

Ice Cream Week!


I have to admit, I'm a picky eater.  I've definitely gotten better about it as I've gotten older, but there are still a lot of things that I don't like to eat.  This is a big contrast to my husband Jamie, who eats just about anything.  Fortunately, one of the few things that he won't eat is very high on my list as well.  Coconut.  Neither of us can stand it.  I don't like the flavor or the texture.  And I'm sensitive enough to it to be able to pick it out even when it's not obvious to others.  Yuck. =)  If my children ever learn to like coconut, it won't be because they got it at home, because I don't let it in the house.  Almond Joys that come home in trick-or-treat bags?  I immediately take them to work.  I break open filled chocolates before eating them because I don't want to risk biting into a coconut one.  I once had one of my employees request German Chocolate Cake for his birthday.  Now I try to honor all requests, so I did make it, but I took the leftover coconut to work along with the cake so it wouldn't be in the house any longer.  


So why all this talk of coconut hatred?  Well, I got a new cookbook about a week ago, Jeni's Splendid Ice Creams at Home.  When we were on vacation in Ohio recently, we had a chance to go to one of the Jeni's shops.  The ice cream was fabulous, and I was excited to learn that she was about to release a cookbook.  I ordered it as soon as we got home.  There are lots of wonderful flavor combinations in the book, but I was also excited to read about some of the stuff in the back of it--various mix-ins and sauces.  The one that immediately caught my eye was the Chocolate Bombe Shell.  Basically, it's homemade Magic Shell!  I mentioned this to a couple people at work and was disturbed to find that they had no idea what I was talking about.  It's not that the flavor of Magic Shell is that great, but the texture is so cool.  And now I can make it at home with my favorite bittersweet chocolate.  There was only one problem--the ingredient that makes it magic is coconut oil.  No!

But then I read further and learned that there are a couple types of coconut oil out there.  Virgin, or unrefined, coconut oil does taste like coconut.  Blech.  But the refined version isn't supposed to taste or smell like it.  I admit, I remained skeptical, but I went to Whole Foods and found a jar of refined coconut oil.  I was excited when I got it home and found that it actually didn't seem to have anything to do with coconut--no smell or taste of it!  


Of course, I also needed some ice cream to put it on.  The first Jeni's flavor I tried was vanilla bean.  I actually found the recipe online before my book got here.  The one pictured here, though, is one of Jeni's signature flavors, Salty Caramel.  I never used to make or eat a lot of caramel things, but then I discovered how much better caramel is with salt added.  Mmmm.

The basic approach in these recipes is to use cornstarch for thickening, rather than egg yolks.  I don't have anything against egg custard ice creams, but it's nice not to have to worry about "orphaned" egg whites.  Jeni also uses corn syrup and cream cheese in most of her recipes to make the texture similar to what she creates in her commercial kitchen.  I highly encourage you to get a copy of the book, but you can also find the basic technique online, since Jeni did an article a while back for Food & Wine.  The main difference for the Salty Caramel recipe is that the sugar in the recipe is first heated to make a dry caramel.  Then the cream, milk and corn syrup (2 tablespoons, rather than 1 1/2) are added and the recipe proceeds as usual.  Half a teaspoon of salt is added to the cream cheese before the liquids are whisked in, and the recipe uses 2 teaspoons of vanilla rather than a vanilla bean.


The verdict?  The chocolate shell is just amazing.  I can't believe how easy it is to make.  And it's been very tasty on a variety of ice cream flavors, including the Salty Caramel.  I've made several caramel ice creams, and I think this one may be my favorite.  Jamie liked it a lot as well.  The girls didn't try this ice cream flavor, but they both liked the chocolate shell.  We'll definitely be making both again.  And I can't wait to try more flavors from my new cookbook.  I've decided that this is going to be Ice Cream Week here in Di's Kitchen, so watch for more to come.  I'm not going to publish the Salty Caramel ice cream recipe here, but you can find Jeni's Vanilla Bean one here to get you started.

Chocolate Bombe Shell 
(adapted from Jeni's)

170 grams (6 ounces) bittersweet chocolate (I used El Rey, a mix of 58% and 70%), chopped
30 grams (2-3 tablespoons) refined coconut oil

Place the chocolate in a medium microwave-safe bowl.  Microwave on 50% power for 2 minutes, then stir until the chocolate is fully melted.  Add the coconut oil and stir until smooth.