Showing posts with label salt. Show all posts

Sunday, December 2, 2012

December decompression


December has barely started, and I'm already stressed.  I have too much that I want to do, and no idea how I'm going to find time to do it all.  Thank goodness I have vacation time later in the month, though that adds to the stress a bit, since I have so much to do at work before then.  But somehow or other, it will all get done--probably with the aid of not enough sleep and lots of caffeine.

Since I don't drink coffee, the caffeine comes from Coke or tea.  I bring a big mug of tea from home in the morning, but sometimes I want more during the day.  A walk to Starbucks gives me the chance to get out of the branch for a bit and decompress.  Unfortunately, our weather right now isn't always conducive to hot drinks, so I'm still drinking a lot of ice tea.  However, I've also discovered that you can get them to make a Gingerbread Latte with tea rather than espresso, and it's quite tasty.  (Ask for an Awake Tea Latte with gingerbread syrup.)

And sometimes I forego the caffeine in favor of chocolate.  During the fall, the seasonal hot chocolate drink is Salted Caramel.  I'm not sure if it's actually still available in the shops, but I've discovered that I can buy boxes of Starbucks hot chocolate in various flavors at Target.  For the salted caramel one, the caramel flavor seems to come from little chips of some sort.  That gave me the idea to add butterscotch chips and some extra salt to my homemade hot chocolate to see if I could duplicate the flavor.  I'm pretty happy with how it turned out, so I can make it whenever I want.


Salted Caramel Hot Chocolate

45 grams (about 1/4 cup) chocolate chips
15 grams (about 1 tablespoon) butterscotch chips (I used Guittard)
60 grams (1/4 cup) boiling water
225 grams (1 cup) milk
1/8 - 1/4 tsp kosher salt
1 - 2 teaspoons granulated sugar
whipped cream or marshmallows (optional)

Place the chocolate chips and butterscotch chips in a small saucepan and pour the boiling water over them.  Let sit for about 5 minutes, until the chips melt.  Whisk the mixture until smooth.  Place the saucepan over medium low heat and bring to a simmer, whisking occasionally.  Whisk in the milk, and bring the mixture to a simmer again.  Whisk in kosher salt and sugar to taste.  (The amount of sugar needed will depend on the sweetness of the chocolate chips used.)  Pour into mugs and top with whipped cream or marshmallows if desired.  Makes 2 servings.

Wednesday, May 30, 2012

Good things come in small packages


I have no idea how it can possibly be the end of May and the end of the school year.  Brianna's last day was last Thursday.  Being a worrier, I don't think she was completely convinced that she had been promoted to 4th grade until she saw it in writing on her report card.  Then last night we had Gillian's graduation from pre-K.  (She'll still be at the daycare for the summer, but they had the ceremony at the end of the traditional school year so that no one would miss out because of vacations, etc.)  It wasn't a very long program, since 4 and 5-year-olds don't have very long attention spans, but it was certainly entertaining.

One of the things I like to do at various times including the end of the year is make little gifts for the teachers.  I don't usually do anything big, but I try to make sure that it's something special.  For Teacher Appreciation Week in early May, I made World Peace Cookies.  What teachers wouldn't welcome a little more peace in their lives? =)  Since I went with chocolate for that occasion, I wanted something different for the end of the year thank-yous.  Something...vanilla.  


Over the past couple of weeks Central Market did a focus on France, with lots of interesting French products and ingredients.  I picked up some salted butter, so I had to find something to make with it.  Naturally, I turned to Dorie.  I remembered seeing a cookie recipe of hers in a recent issue of one of my cooking magazines.  I had to do a bit of searching through the stack by my computer, but I found it.  Vanilla Bean Sablés--French butter cookies.

The recipe calls for unsalted butter and sea salt, so I used my salted butter and skipped the additional salt.  Rather than two vanilla beans, I used one and some of my vanilla sugar.  I love rubbing the vanilla seeds into the sugar--it always makes my fingers smell good.  (And after I scraped the seeds from the pod, I stuck the pieces into my container of vanilla sugar to make more!)  The rest of the ingredient list is simple, just some powdered sugar, flour, and an egg yolk.  The dough mixes up quickly in a stand mixer, and gets formed into a couple of logs.  Once the dough is chilled, it's rolled in coarse sparkling sugar, then sliced and baked.  I did skip the step of brushing the dough logs with egg wash before coating with sugar; I just pressed the sugar into the dough.  The cookies bake for about 20 minutes, and you can smell when they're done.  


The verdict?  I totally love these cookies.  The flavors of butter and vanilla play so well together, especially when the bottoms of the cookies turn such a lovely golden brown.  The cookies have a great texture, short and crumbly and with the contrast of crunchy sparkling sugar on the edges.  They're great paired with a mug of tea.  I hope the teachers enjoyed them as much as I did.  

If you'd like to try these cookies for yourself, you can find the recipe in the April/May issue of Fine Cooking, or here online.  

Ready for kindergarten!

Monday, May 21, 2012

One of those days (Cooking the Books)


I've been having one of those days.  Except that it's not the usual one of those days.  It started with me getting up at 5 because I was scheduled to work all day today.  That schedule usually means that I have to drop the girls at school and daycare before I go to work at 8:15 or so.  But things didn't go as planned.  Brianna was still complaining of a really sore throat when I went to wake her up.  She'd been telling me the same thing for most of the weekend.  I checked, and it was red.  But it didn't look that bad, and since she hadn't been running a fever I figured that she was suffering from a virus and not strep.  I could tell she wasn't quite herself, though, since she napped for about 3 hours on Sunday afternoon.  

So I had the always fun parenting dilemma...  B didn't seem that sick, but sending her to school probably wasn't a good idea.  At the same time, I was worried about leaving my coworkers shorthanded.  Jamie had already left for work, and it was doubtful that he'd be able to come home early to stay with B.  I just love it when the parenting guilt wars with the work guilt--nothing like having an unexpected day off that you can't really enjoy because you feel like you're supposed to be somewhere else.  I did get to take a nap, but it wasn't a very good one.  I ended up feeling sort of restless and out-of-sorts all day.  I did get some reading time in, but couldn't really settle on anything.  And writing was right out.  I've been trying to get this post done for my Cooking the Books event for two days, and just haven't been able to figure out what to write, which is why you're getting my sad story.  =)


Maybe some dessert would make me feel better.  We had Brianna's favorite soup for dinner, this chicken chowder from Cook's Country.  Naturally, since B loves it, Gillian hates it.  (I decided not to fight that battle tonight, and just made G a sandwich for dinner.)  I like it just fine, and soup is nice because it generally leaves room for dessert.  This particular one was inspired by the new book J got me for Mother's Day--Alice Medrich's new Sinfully Easy Delicious Desserts.  The idea is that you can make lots of great desserts from simple, tasty components.  What I came up with first was sort of a mini ice cream tart/sundae.  

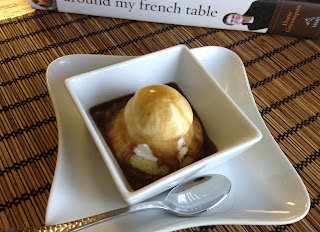
The base was a simple butter cookie.  Central Market has an event going on called Passport France, and they've had a lot of great French products and ingredients available.  I bought some Breton salted butter, and turned to Dorie's Around My French Table to figure out what to do with it.  Naturally, she didn't let me down, and I found a recipe for Sablé Breton.  I didn't want to do a full-size tart, but there was a Bonne Idée for making slice and bake cookies with a variation on the dough, so I went with those.  I didn't add any salt, since my butter was nicely salty, with noticeable crunchy crystals in it.  I did roll the log of dough in a combination of sparkling sugar and a bit of fleur de sel before slicing it up for baking.

Besides the great butter, I also picked up a package of dark muscovado sugar on my shopping trip.  My new Medrich book has several caramel-type sauces in it.  One is a simple mixture of muscovado sugar, cream, a bit of salt, and a splash of rum.  It was really easy to make.  For the final component of my dessert, I wanted something that would provide a contrast to the richness of the cookie and sauce.  I found what I was looking for in one of my earlier Medrich books, Pure Dessert--sour cream ice cream.  It's a non-custard ice cream, which really allows the sour cream flavor to shine through.  The technique for making it is similar to the one in my Jeni's ice cream book, and I tweaked the procedure just slightly to make it even closer (I added a bit of corn syrup to the milk/sugar mixture, and boiled it for several minutes before adding the cornstarch in a slurry).  


For the final dessert, I started with a cookie, topped it with a scoop of ice cream, and drizzled warm tropical sugar sauce over the top.  The verdict?  Yum!  All of the components are really tasty, and work well together.  There's a great contrast of sweet and salty, cold and warm, soft and chewy/crisp.  The cookies are also great with a cup of tea.  My favorite part was the ice cream.  We also ate some of it topped with fresh strawberries--the cold tartness of the ice cream is a great foil for fruit.  I can't wait to try it with peaches, too.

I definitely encourage you to check out all of the books that I mentioned.  Your local library might even have them!  To get you started, you can find the ice cream recipe here.  This is my contribution to our spring Cooking the Books blog event; you can find links to the other contributors in this main post.  If you'd like to join in, submissions are welcome anytime this week.  If you'd like to be notified of future events, send me an email at diskitchennotebook at gmail dot com and I'll add you to the list!  


Sunday, May 6, 2012

Let's do the twist


Sunday is family dinner night around here.  It's the only night that we always eat together.  We occasionally pull it off on a weeknight, but way more often than not, I feed the girls early and then J & I eat later.  Early is relative, of course.  The parent who picks the girls up from school/daycare gets home with them around 6:30 or so.  The other parent doesn't get home until after 7:30.

Since that doesn't leave me with much time or energy for cooking during the week, Sunday is also my day for meals that are more involved, or that just take more time.  A lot of times, it's something that makes lots of leftovers that I can eat for lunch during the week.  Tonight's spaghetti and meatballs is a good example of that.  I try to save the things I know the girls won't eat for me & J to have during the week (as long as they're relatively quick to make).  I want B&G to try new things (and they're really pretty good about that), but I get tired of hearing about how unhappy they are with some of my menu choices.


Last weekend, I tried something new that I was pretty sure they'd enjoy.  A few days earlier, my friend Tracey had a great new dish on her blog.  That's not unusual, since Tracey posts all sorts of good things. =)  But this was one that I wanted to make right away--Pretzel Dogs!  I regularly make my own dough for mini pigs-in-blankets, but it never occurred to me to wrap them in soft pretzel dough.  In fact, I realized that I've never made pretzels at all.  I've been meaning to, but just haven't gotten around to it.  

The great thing about this dough is that it doesn't take long at all to make.  The dough is straightforward to mix up (I used my dough whisk for the initial mixing) and can be kneaded in your stand mixer.  I did some machine kneading, then finished by hand.  The dough is really nice to work with, and it needs less than an hour to rise.  Then you portion out the dough, roll it into ropes, and wrap them around hot dogs that have been cut in half.  I only did five hot dogs (so 10 pieces), using 60 grams of dough for each piece.  I formed the remaining dough into 4 rolls (similar to hamburger buns).  The pretzel dogs are boiled in a baking soda solution for about 30 seconds each.  I boiled the rolls as well, but had to flip them over halfway through the time, since they don't roll the way the hot dogs do.  Finally, the dough is brushed with egg wash, sprinkled with salt (I even had actual pretzel salt!), and baked for about 15 minutes.


The verdict?  These were fantastic!  I definitely think they've earned a place in our regular menu rotation.  Jamie ate his with mustard, which sounds appropriate for pretzels as well as hot dogs.  The rest of us don't really like mustard, so we used ketchup.  But what I really want to try with them next is cheese sauce...  

I'm excited to try my hand at other pretzels as well.  I can't believe it's taken me this long to make them.  If you'd like to try these pretzel dogs for yourself, you can find the recipe on Tracey's blog.  My friend Abby made them, too; I love her cinnamon sugar bites for dessert.  I'm also submitting these Pretzel Dogs to Yeastspotting; be sure to check out all the other delicious yeasted creations.


Sunday, February 12, 2012

Heart of darkness


I didn't have Valentine's Day in mind when I made these brownies.  I just really wanted some chocolate.  The heart shape came about because brown squares aren't terribly photogenic. =)  I feel a little like a copycat, posting these Sweet and Salty Brownies relatively soon after my friend Tracey did. I admit, she was the immediate inspiration, but I've actually made them about 4 times in the past year.   Unfortunately, until this most recent batch, I didn't manage to take any pictures of them so I could actually post about them.  We were too busy eating them. =)  The brownies come from a cookbook that I picked up after Christmas last year--Baked Explorations.  This was actually was the first recipe that I made from the book.  (And I really need to delve into it more than I have so far.)  The recipe makes a 13"x9" pan, and since the brownies are really rich, I always cut them small, so there are plenty to share.  


To make the brownies, the first thing you do is make a salted caramel sauce.  I've mentioned before that I became a much bigger caramel fan after I discovered what a difference it makes to add salt to it.  With a full teaspoon of fleur de sel as well as some sour cream, this particular caramel sauce has a complexity to it that I really enjoy.  The next step is to make brownie batter.  I like mine bittersweet, so I used some 70% El Rey for the chocolate.  The recipe also calls for dark cocoa powder, like Valrhona.  I prefer natural cocoa; since there isn't any leavening that would be affected, I went with my preference and used Scharffen Berger cocoa powder.  Once the brownie batter is made, you spread half of it in your prepared pan--I line my Pyrex pan with non-stick foil rather than parchment.  Next you drizzle some of the caramel over the batter, and spread it to form a thin layer.  Finally, you top it with the remaining brownie batter, then stick the pan in a 350º oven.  (My brownies took 30 minutes to bake.)  Once they come out of the oven, you sprinkle the top with a mix of fleur de sel and coarse sugar; I used turbinado sugar for mine.  


The verdict?  Well, as I mentioned above, these brownies are very rich, and very delicious.  I love salt with chocolate as well as with caramel.  I also prefer fudgy brownies (as opposed to cakey ones), and these are definitely in my favorite category.  Everyone here loved them, as did my coworkers.  They've also been a hit at the daycare when I've taken them there in the past.  

If you'd like to try these for yourself, you can find the recipe in Baked Explorations.  You can also find it all over the web, but I encourage you to check out the cookbook (maybe your local library has it!) since there are lots of other great recipes in it.  Hopefully I can manage to make and blog about some more of them soon. =)


Friday, January 13, 2012

Don't fear the caramel


It seems like it's been quite a while since I made anything with caramel.  It's not that I was consciously avoiding it, but I realized that the last time I attempted it was when I had my difficulties with the microwave caramel sauce back in October.  (I'm happy to report that my hand is all better--you can barely tell where I burned it.)  I decided to revert to my old way of making it on the stovetop, and definitely won't go months without making it next time.  So what exactly prompted me to start caramelizing sugar again?  A cake.  And what prompted me to make the cake?  A new pan!  It's a Christmas present of sorts--I spent some of my Christmas money (thanks, K&L!) on a very cute little 6-cup Bundt pan.  For the record, it's possible that my collection is getting a bit out of control, though Mary still has me beat. 

The new 6-cup pan is in the back, between the Heritage pan (left) and Kugelhopf pan (right)

Speaking of Mary, I have her to thank for the cake inspiration.  Back in November when she was celebrating National Bundt Day with her latest round of 30 bundts in 30 days, Mary also did a giveaway.  She invited everyone to bake and post a cake on National Bundt Day, and then drew a name to receive a copy of Cake Simple, a book full of bundt cakes.  I was the winner!  The book is from Christie Matheson--if the name is familiar, it may be because she also worked with Joanne Chang on the Flour Bakery cookbook.  

Since I was eager to use my new pan, I started by looking through the recipes that called for a 6-cup pan.  (There are also recipes for 10 or 12 cup pans, as well as a chapter on minis.)  The one that immediately caught my eye was the recipe for the Salted Caramel Bundt.  First you make a caramel syrup, which is used in the cake and in the glaze.  The cake itself is made with the creaming method, and comes together pretty quickly.  There's almost too much batter for the pan, but it worked out okay.  My cake took about 45 minutes to bake. 


The verdict?  This was pretty tasty!  The cake is really moist.  I didn't really care for the texture of the glaze, so I may change that up a bit next time (no cream, I think), but it did add to the caramel flavor.  As I was making the cake, I thought that the method (using the caramel syrup in the batter) seemed really familiar.  Then I realized it was because I've made the cake before in a different form--this Caramel Cake with Browned Butter Frosting.  

I'm sure I'll be sharing more recipes from this book in the future, but for now, here's the recipe for the Salted Caramel Bundt.

Salted Caramel Syrup
(adapted from Cake Simple by Christie Matheson)

1/4 cup (60 grams) + 1/2 cup (120 grams) water
1 cup (200 grams) granulated sugar
1 teaspoon light corn syrup
1/8 teaspoon fleur de sel or other sea salt

Put the quarter cup of water, the sugar, and the corn syrup in a small saucepan with high sides and mix until combined.  Bring the mixture to a boil, then cover the pan with a lid for about 2 minutes to allow steam to clean the sides of the pan.  Remove the lid and cook the mixture, watching carefully, until the sugar turns a dark amber color.  Swirl the pan so that the sugar will color evenly.  Remove the pan from the heat and carefully add the remaining half cup of water--the mixture will bubble up furiously, so stand back.  Put the pan back over medium heat and whisk to dissolve any hard bits of caramel that may have formed.  Whisk in the salt, remove the pan from the heat, and let the syrup cool to room temperature before using in the cake or glaze.

Salted Caramel Bundt Cake
(adapted from Cake Simple by Christie Matheson)

2 cups (240 grams) all-purpose flour
1/2 teaspoon baking powder
1/2 teaspoon table salt
10 tablespoons (about 140 grams) unsalted butter, slightly softened
1 1/4 cups (250 grams) granulated sugar
1/2 teaspoon vanilla extract
2 large eggs, at room temperature
1/3 cup (about 90 grams) salted caramel syrup
1 cup (240 grams) whole milk, at room temperature

Preheat the oven to 350ºF.  Grease and flour the inside of a 6-cup Bundt pan or spray it with baking spray (I use Pam for Baking).  

Whisk the flour, baking powder and salt in a small bowl until combined.

Using a stand mixer with the paddle attachment, cream the butter and sugar together on medium speed until light and fluffy, 2-3 minutes.  Beat in the eggs, one at a time, then add the vanilla.  With the mixer on low, slowly add the caramel syrup and beat until incorporated.  Add the flour mixture alternately with the milk (flour, milk, flour, milk, flour), beating just until the flour is incorporated.

Pour the batter into the prepared pan and smooth the top.  Bake the cake for 45 to 55 minutes, until a toothpick inserted midway between the outside of the pan and the center post comes out clean.  Let the cake cool in the pan on a rack for 15 minutes, then invert the cake onto a rack and let it cool completely.  

Caramel Glaze
(adapted from Cake Simple by Christie Matheson)

2 tablespoons (30 grams) unsalted butter, softened
1 cup (115 grams) powdered sugar
1/2 teaspoon vanilla extract
2 tablespoons caramel syrup
large pinch of sea salt
1 tablespoon heavy cream

Whisk all of the ingredients together in a small bowl until the mixture is smooth and pourable.  Add additional cream to thin the glaze if necessary (I actually thinned mine with more caramel syrup, too).  Drizzle over the cooled cake.  


Tuesday, September 20, 2011

No respect, I tell ya


Salt and pepper often don't get the respect that they deserve.  How many times have you run across a so-called "5-ingredient recipe" only to discover that it's really more than that, because they don't count salt and pepper and water as ingredients?  Water is actually the one that bugs me most.  Sure, I understand not counting the water that you use to cook pasta, for instance.  But it drives me crazy to read the ingredient list for a recipe, then get down in the directions and discover that you need to add a specific amount of water.  If you need a specific amount, list it as an ingredient!  I've run into the same thing with salt--the ingredients may list a type of salt, but not a specific amount.  Yes, I know you're supposed to read through the whole recipe before you start, but even with doing that, sometimes I get distracted partway through...


Okay, done ranting. =)  Now on to a baked good that does give salt and pepper a starring role, even in the recipe title.  For this week's Tuesdays with Dorie, Tia of Buttercream Barbie picked the Salt and Pepper Cocoa Shortbreads for us to make.  The nice thing about these cookies is that the dough is easy to mix up.  I do recommend that you assemble all your ingredients ahead of time (mise en place) so you don't forget any... like the egg yolk.  I realized as I was putting my logs of cookie dough in the fridge to chill that I had totally forgotten the egg yolk.  (That's a bit ironic, since I started making the dough because I was looking for a way to use up egg yolks.)  However, I've made plenty of shortbread recipes that don't have any egg in them, so I decided to just go with it. 

After chilling the dough for a few hours, I cut it into thick slices with my serrated knife.  I baked the cookies for about 15 minutes, I think.  It's hard to say for sure, since I continued with my forgetfulness and didn't set a timer at first.  Fortunately, I've baked enough cookies to be able to go by how they looked and smelled to figure out when they were done.  


The verdict?  These turned out to be quite good, despite the forgotten egg yolk.  Like a lot of shortbread, I found that these were actually better the second day than the first.  I probably should have used a little more pepper, since I couldn't really taste it.  The fleur de sel definitely came through, though.  I really enjoy the little bursts of saltiness with the chocolate.  Everyone else seemed to enjoy these as well.

If you'd like to give this recipe a try for yourself, head over to Tia's blog.  And to see what everyone else thought of the shortbread, check out this week's Links.


Sunday, June 26, 2011

Ice Cream Week!


I have to admit, I'm a picky eater.  I've definitely gotten better about it as I've gotten older, but there are still a lot of things that I don't like to eat.  This is a big contrast to my husband Jamie, who eats just about anything.  Fortunately, one of the few things that he won't eat is very high on my list as well.  Coconut.  Neither of us can stand it.  I don't like the flavor or the texture.  And I'm sensitive enough to it to be able to pick it out even when it's not obvious to others.  Yuck. =)  If my children ever learn to like coconut, it won't be because they got it at home, because I don't let it in the house.  Almond Joys that come home in trick-or-treat bags?  I immediately take them to work.  I break open filled chocolates before eating them because I don't want to risk biting into a coconut one.  I once had one of my employees request German Chocolate Cake for his birthday.  Now I try to honor all requests, so I did make it, but I took the leftover coconut to work along with the cake so it wouldn't be in the house any longer.  


So why all this talk of coconut hatred?  Well, I got a new cookbook about a week ago, Jeni's Splendid Ice Creams at Home.  When we were on vacation in Ohio recently, we had a chance to go to one of the Jeni's shops.  The ice cream was fabulous, and I was excited to learn that she was about to release a cookbook.  I ordered it as soon as we got home.  There are lots of wonderful flavor combinations in the book, but I was also excited to read about some of the stuff in the back of it--various mix-ins and sauces.  The one that immediately caught my eye was the Chocolate Bombe Shell.  Basically, it's homemade Magic Shell!  I mentioned this to a couple people at work and was disturbed to find that they had no idea what I was talking about.  It's not that the flavor of Magic Shell is that great, but the texture is so cool.  And now I can make it at home with my favorite bittersweet chocolate.  There was only one problem--the ingredient that makes it magic is coconut oil.  No!

But then I read further and learned that there are a couple types of coconut oil out there.  Virgin, or unrefined, coconut oil does taste like coconut.  Blech.  But the refined version isn't supposed to taste or smell like it.  I admit, I remained skeptical, but I went to Whole Foods and found a jar of refined coconut oil.  I was excited when I got it home and found that it actually didn't seem to have anything to do with coconut--no smell or taste of it!  


Of course, I also needed some ice cream to put it on.  The first Jeni's flavor I tried was vanilla bean.  I actually found the recipe online before my book got here.  The one pictured here, though, is one of Jeni's signature flavors, Salty Caramel.  I never used to make or eat a lot of caramel things, but then I discovered how much better caramel is with salt added.  Mmmm.

The basic approach in these recipes is to use cornstarch for thickening, rather than egg yolks.  I don't have anything against egg custard ice creams, but it's nice not to have to worry about "orphaned" egg whites.  Jeni also uses corn syrup and cream cheese in most of her recipes to make the texture similar to what she creates in her commercial kitchen.  I highly encourage you to get a copy of the book, but you can also find the basic technique online, since Jeni did an article a while back for Food & Wine.  The main difference for the Salty Caramel recipe is that the sugar in the recipe is first heated to make a dry caramel.  Then the cream, milk and corn syrup (2 tablespoons, rather than 1 1/2) are added and the recipe proceeds as usual.  Half a teaspoon of salt is added to the cream cheese before the liquids are whisked in, and the recipe uses 2 teaspoons of vanilla rather than a vanilla bean.


The verdict?  The chocolate shell is just amazing.  I can't believe how easy it is to make.  And it's been very tasty on a variety of ice cream flavors, including the Salty Caramel.  I've made several caramel ice creams, and I think this one may be my favorite.  Jamie liked it a lot as well.  The girls didn't try this ice cream flavor, but they both liked the chocolate shell.  We'll definitely be making both again.  And I can't wait to try more flavors from my new cookbook.  I've decided that this is going to be Ice Cream Week here in Di's Kitchen, so watch for more to come.  I'm not going to publish the Salty Caramel ice cream recipe here, but you can find Jeni's Vanilla Bean one here to get you started.

Chocolate Bombe Shell 
(adapted from Jeni's)

170 grams (6 ounces) bittersweet chocolate (I used El Rey, a mix of 58% and 70%), chopped
30 grams (2-3 tablespoons) refined coconut oil

Place the chocolate in a medium microwave-safe bowl.  Microwave on 50% power for 2 minutes, then stir until the chocolate is fully melted.  Add the coconut oil and stir until smooth.  


Tuesday, March 23, 2010

A la peanut butter sandwiches!


The first time I tried dulce de leche was when we made the Snickery Squares for TWD.  And to be honest, I really didn't like it all that much.  While I do like caramel flavors, it was just too sweet for my tastes.  Maybe it was just the kind I bought, but I wasn't excited to try it again any time soon.  So I wasn't quite sure what to think when I saw that Jodie had picked Dulce de Leche Duos for this week's Tuesdays with Dorie recipe.  They are sandwich cookies that have dulce de leche used both in the dough and for the filling.  Hmm.

I decided to give them a try despite my misgivings.  First thing was to come up with some dulce de leche (which I'm going to abbreviate DDL from now on =)  ).  Since I had a hard time finding it the last time, I was quite happy to see Julie's Tricks for Treats post with some ideas on how to make your own.  While the idea of making it in my crockpot was appealing, I decided to go with David Lebovitz's oven method.  Part of what swayed me was the fact that he says to add a bit of sea salt to the sweetened condensed milk before putting it in the oven.  I love salt added to caramel, so I figured it might be a good addition to the DDL.  That idea was further reinforced by the fact that I recently watched this Good Eats episode about adding salt to desserts.

The verdict?  Oh. My. Goodness.  I may not have liked DDL before, but I certainly do now!!  With the added salt, the stuff is fantastic.  It was all I could do not to just sit there and eat it with a spoon.  But I made it for the cookies, so into the cookies it would go.  =)  So next up, cookie dough.


The cookie dough is pretty straightforward to make.  You cream butter with granulated sugar, brown sugar, and the DDL.  Then you beat in eggs.  (And maybe vanilla? I can't remember right now.)  Then you mix in flour, baking soda and salt.  I did add a bit more salt than the recipe called for.  The cookies are simple drop cookies (no chilling or rolling or anything like that).  I used my #100 disher and was quite happy with the size of the cookies that I got.  However, I probably should have cut the recipe in a half, since I got a few more cookies than the recipe was supposed to yield.  It said 30 sandwiches, but I got enough individual cookies to make 45 sandwiches.  Oh, well, more to give away. =)  Next up, the filling.

Dorie recommends filling the cookies with more of the DDL.  Only problem with that was that I'd used up almost all of my DDL in the dough.  I should have done more than one can, I guess.  Actually, at the time I made it, I only had the one can.  But I picked up another one when I was grocery shopping, and decided to go ahead make more DDL.  I figured it wouldn't go to waste.  Once I was done making more, I used it to make a couple sandwich cookies.  Hmm.  I thought at first the DDL was thick enough, but after the cookies sat for a few minutes, it started to drip out the sides.  And while the taste was nice, the combination of cookie and filling was a bit sweet for my taste.  Then I was inspired--peanut butter!  By itself, it might be a bit much, but what if I mixed it with some of the DDL?  I played around with the amounts of peanut butter and DDL to see what I liked best.  You can certainly try your own mixture, but I found that I liked mixing 100g of peanut butter with 125g of dulce de leche, which gave me enough filling for about 20 cookies.


The final verdict?  Wow.  These cookies were awesome!  I took a bunch to work on Monday and got the most enthusiastic response I've had in a while.  They absolutely loved them.  I was told that I could give the Girl Scouts a run for their money.  And when I offered to take the leftovers home when I left for the day (to remove temptation), I was informed that I should just put the cookies down and move away. =P  They were a big hit at my house, as well, so I think it's safe to say that I'll be making them again.

If you'd like to try them for yourself, you can find the recipe at Jodie's blog.  And be sure to check out the TWD blogroll to see what everyone else thought of these!