Showing posts with label Bagel Chronicles. Show all posts

Sunday, June 14, 2009

Bagels big and small


We love bagels around here.  I've been eating them (frequently, if possible) since I was a kid.  I grew up in the northeast--Pennsylvania, mostly--but both my parents are from New York.  So you know they taught us what good bagels are.  =)  (And for the record, my mom preferred bialys.)  I've bought bagels everywhere I've lived, and some have been better than others.  Here in Texas it's pretty hard to find good ones.  Even from bagels shops, most of the bagels you get just seem like bagel-shaped bread.  And the grocery store ones generally aren't even worth trying.  So it's probably no surprise that one of the first things I challenged myself to make after starting this blog was bagels.  

My initial attempt was the Daring Bakers recipe from June 2007.  (A great pick from Jenny.)  I couldn't believe it--I actually made bagels!  And they were good! =)  Since then, I've made that same recipe quite a few times, tweaking it to my liking.  I've tried various toppings, made cinnamon raisin bagels, and even made minis.  I've tried the bagel dough in Artisan Bread in Five Minutes a Day, too.  They were okay, but hard to shape because the dough is very wet.  I actually like that dough better just made into a regular loaf. =)  I've thought about making the bagels in Desserts by the Yard or The Bread Baker's Apprentice, but was put off by the overnight retard.  


Well, one of my big reasons for joining the BBA Challenge was to make bread recipes that I probably wouldn't otherwise.  In the case of the bagels, who knows when I might have finally gotten around to trying a different recipe.  My first attempt at this one was about three weeks ago.  The first hurdle was ingredients.  The recipe calls for high gluten flour and malt powder or syrup.  I didn't have any luck finding HG flour locally and didn't want to order any right now, so I went with regular King Arthur bread flour.  I was actually successful finding malt syrup at Central Market.  

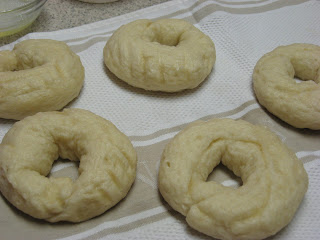
Mixing the dough was straightforward.  I did let my sponge go too long, though.  I got sidetracked doing other stuff and it probably sat on the counter 3 to 4 hours instead of 2.  But at that point it was late and I wasn't about to start over, so I used it.  I put the sponge and the rest of the ingredients in my stand mixer to get things started.  It quickly became apparent that the dough was very stiff, so I figured I should finish the kneading by hand.  Once the dough was kneaded, I moved on to shaping.  I wanted both big and small sizes, since Brianna and Gillian like little bagels.  I ended up with 8 four-ounce ones and 9 two-ounce ones.  In the past, I've usually made my bagels by forming ropes and joining the ends.  For this batch, though, I went with the punch-a-hole-in-the-middle method.  Once the bagels were all formed, I put them on my parchment-lined pans to rise a bit.  But again, it was late, and I lost track of time and let them go too long.  Not much I could do, so into the fridge they went.  That was fun--trying to figure out how to fit two half-sheet pans into my fridge...

The next morning, I put a big pot of water on.  Once it was boiling, I added baking soda.  That's something I haven't tried before--my usual recipe uses brown sugar in the water.  For the little bagels, I boiled them a minute on each side.  For the big ones, I did 90 seconds on the first side, then a minute on the second.  After the first batch of bagels was boiled, I put them back on the pan and put them in the oven.  (I topped a couple with kosher salt and left the rest plain.)  I baked them for 5 minutes, then rotated the pan and turned the oven down as directed.  I then ended up baking them for 8 minutes longer (not just 5).  I was tempted to leave them in a bit longer so they'd get more brown, but took them out anyway.  Then I boiled and baked the second batch.  By that time, the first ones were cool enough to eat.

Some of the minis from the flat first batch

The verdict?  I can't believe I waited this long to try this recipe.  I really loved the taste and texture, and can't wait to play around with other flavors.  Everyone else loved them, too.  Except for trying to fit the pans into my fridge, the process worked really well, too.  The only thing I was unhappy with was that my bagels ended up kind of flat.  I figure there were a number of reasons for that--letting the sponge go too long, over-proofing before the retard, the shaping method...  I wasn't sure what the exact cause was, but I decided that I had to try again. =)


The following weekend, I made them again with a few changes.  I added some vital wheat gluten to my bread flour (1/2 teaspoon per cup of flour).  I did the whole process by hand--that was quite the workout!  I watched the timing much more carefully.  And I went back to my tried-and-true method of making ropes of dough and sticking the ends together.  Something worked, and my bagels were much more rounded the second time.  And still delicious! 

For the recipe, get yourself a copy of the book!  And to check out everyone else's bagels, check out the BBA Challenge blogroll.  Next up, brioche!


Wednesday, March 4, 2009

In the bag


We're a brown-bag lunch sort of family. Okay, technically mine and Jamie's are blue, and Brianna's is pink. =) I've pretty much always taken my lunch to school or work, since I was little. Early on, my mom would make my lunch. That apparently lasted until I started to complain about what was in it (I don't like PB&J sandwiches), at which point I was told that if I didn't like it I could do it myself. =) Nowadays I take lunch to work most of the time because I know I'll like what I have, and it definitely saves money.

It was a bit of a shock this past fall when I realized that I would need to do something for Brianna's lunch when she started kindergarten. Up until that point, she got fed at day care (as Gillian still does). I had a feeling she wouldn't be that interested in buying lunch at school--she can be kind of picky. I asked her, and she wanted to bring lunch from home. And she has, every day but one so far--when I went and ate Thanksgiving lunch with her at school. (Mmm, cafeteria turkey and mashed potatoes. =) )


Brianna's lunch is usually a mix of different small things to eat, since I'm never sure how hungry she's going to be at lunch time. Today's, for example, included: a small yogurt drink, a small juicebox, a handful of blackberries, a small bag of Cheezits (probably for afternoon snack), and a little bagel with garlic cream cheese. The fruit varies (applesauce, blueberries, grapes, even cherry tomatoes). The snack varies (pretzels, goldfish). And the bready bit varies. Sometimes it's an actual sandwich. Sometimes it's bread with the meat and cheese on the side. Sometimes it's a wrap (tortilla in place of bread). This weekend, though, Brianna asked if she could have bagels in her lunch this week.


In the past, I've bought mini bagels at the grocery store. They're convenient and not that expensive. But frankly, they have about as much taste as cardboard. So in keeping with my BYOB goal, I decided to make my own mini bagels this past weekend. I've made big ones before, so I just had to adjust my shaping and timing a bit. I thought about trying a recipe that I saw on Baker's Banter, but I'm used to boiling rather than steaming the bagels before baking them. I'm sure I'll try their method eventually.   I usually form my bagels by making ropes of dough and joining the ends. But this time I tried the poke a hole in the middle approach shown in the article. It worked quite well with the smaller (about 2-ounce) pieces of dough. After shaping, I boiled the bagels for about 90 seconds on each side. I topped a handful of them with salt and left the rest plain--the salt ones need to be eaten right away or the salt dissolves and makes the bagels soggy on top. I baked them for about 5 minutes less than I do the big ones.

The verdict? Quite tasty, as expected. These are the perfect size for Brianna and Gillian. We ate some for breakfast on Sunday. I sliced the rest in half and put them in the freezer for B's lunches. Every day so far this week, she's actually eaten everything in her lunch. =)


If you want to BYOB, here's the recipe.  And I'm also submitting this to Yeastspotting.  

Mini Bagels

1 cup (5 ounces) white whole wheat flour (King Arthur)
2 1/2 cups (12.5 ounces) bread flour (King Arthur)
1 1/2 teaspoons table salt
3 tablespoons granulated sugar
1 1/2 tablespoons instant yeast
1 1/2 cups (12 ounces) room temperature water (I used bottled since my tap water is extremely hard)

canola oil (for dough bucket)

2 quarts water
2 tablespoons packed light brown sugar

toppings, if desired

Place the flours, salt, sugar and yeast in the bowl of a standing mixer.  Mix with the paddle on low speed until the dry ingredients are well blended.  Add the water and continue to mix with the paddle until a shaggy ball of dough forms.  Switch to the dough hook.  Knead the dough on low speed (between 2 and 4) about 7 minutes.  The dough will be much smoother, but will still be tacky.  Transfer the dough to a rising container that has been greased with canola oil.  Let the dough rise at room temperature until doubled in size (about 1 1/2 hours, I think).

Preheat the oven to 400 degrees F.  Place the two quarts of water in a wide pot and bring it to a boil.  When it boils, add the brown sugar and turn the heat down so the water just simmers.  

Meanwhile, remove the dough from the container and portion it into 15 equal pieces (2 ounces by weight).  Form each piece of dough into a smooth ball (like you're making rolls) and allow it to rest for a few minutes.  Poke a hole in the center of each dough ball with your finger and thumb and then twirl the bagel on your finger to widen the hole.  (see great pictures here--just scroll down)

Add the bagels to the water 3 or 4 at a time.  Simmer them for 90 seconds on each side, then remove them from the water and place them on a clean lint-free kitchen towel to drain.  After a few minutes, transfer them to a large baking sheet (13 x 18) lined with parchment paper.  Once all the bagels are on the baking sheet, place the pan in the oven (I usually put it directly on top of my baking stone).  Bake for about 20 minutes, then flip the bagels over and bake for about 5 minutes longer so that both sides brown well.  Let cool until just warm before slicing.


Sunday, March 2, 2008

Bagel Chronicles meets Master Baker


So a few weeks ago, I read that Nikki of Crazy Delicious decided to start a new blogging event, Master Baker.  For the inaugural challenge, she chose cinnamon as the theme ingredient.  I thought about participating, but nothing that I thought of making really sounded appealing. And with the deadline looming, I figured there was no way I'd come up with a good idea in time.

After taking a break from my bagel making adventures for the past couple weekends, I figured it was time for another go at it.  Sunday morning is my best time for something like this, since Jamie is home to help wrangle the kids.  I was trying to decide what new variation to try this time, and then it hit me.  Cinnamon raisin bagels!  

I did a bit of looking at various recipes online, trying to determine how much cinnamon to add. The recipes varied widely--anywhere from 1 teaspoon to 1 1/2 tablespoons for 4-5 cups of flour. I started by adding 1 teaspoon to the flour in my mixer bowl, but decided to up it to 1 1/2 teaspoons.  I also decided to increase the flour from 3 1/2 cups up to 4 cups, in yet another attempt to make dough that would actually sink when I put it in the simmering water.  (No, it still didn't work.  I had one that started to sink for a minute but then it popped back up to the top.)  I went for 3/4 cup (4 ounces) of raisins.  I used a fresh box so they would be moist, but since I had boiling water left over from making tea, I poured some over the raisins and let them plump for a couple minutes.  I added the raisins to the mixer bowl for the last minute of kneading.  Next time I think I'll add them sooner so that they'll be a bit more evenly distributed.  I transferred the dough to a bucket to rise, and spent a few minutes distracting Gillian while Jamie and Brianna played Go Fish.  =)


Once the dough was risen enough, I dumped it out onto the counter to divide it up into my usual 8 bagels.  I knew that the raisins would increase the weight, but I didn't take into account the extra flour.  I probably should have made 9 or 10 bagels this time.  As it was, I ended up with somewhat enormous mutant bagels.  Mutant because I also didn't take into account how much harder it would be to shape rings with raisins poking out all over the place.  Maybe I should have stuck with the lesser amount of flour--I think it would have been easier to deal with the raisins in a wetter dough.  And that was when I realize that the raisins weren't exactly evenly distributed.  Oh, well.  Live and learn.  After boiling the first two bagels, I cut the time down to 2 1/2 minutes per side instead of 3 in an attempt to keep the bagels from getting quite so big (they expand a lot while they're simmering).  Then I just barely managed to squeeze all eight of them onto my baking sheet.


They turned out great!  Jamie thought that the amount of cinnamon was just right.  And the extra flour turned out to be good--the bagel texture was a bit chewier than my last couple batches.  And then there's the fact that the house smelled fantastic while the bagels were baking!

Cinnamon Raisin Bagels
(adapted from the DB June 2007 challenge, found here)

1 gallon water
1/4 cup packed light brown sugar

1 1/2 cups (12 oz) water (I used bottled since my tap water is extremely hard)
3 tbsp granulated sugar
1 1/2 tbsp instant yeast
4 cups (20 oz) bread flour (King Arthur), divided
1 1/2 tsp table salt
1 1/2 tsp cinnamon
3/4 cup (4 oz) raisins
boiling water (optional)

canola oil

The dough rises quickly, so I started off by adding the gallon of water to my biggest pot and putting it on the stove to bring it to a boil. Once the water started boiling, I added the brown sugar and just turned it down to a simmer. I also started preheating the oven to 400 degrees F, and I oiled my dough-rising bucket with a bit of canola oil. I pulled out a large baking sheet and lined it with parchment paper. If your raisins are dry (or you just want to), you can plump them up a bit. I placed them in a small heat-proof bowl and covered them with boiling water. I let them soak for a minute or two (you can leave them for longer if you think they need it), then drained them on paper towels.

I put the 1 1/2 cups of water in a 2-cup Pyrex measuring cup and microwaved it for one minute to heat the water. I stirred in the sugar and yeast and set it aside for a couple of minutes. Meanwhile, I put 1 1/2 cups (7.5 oz) of bread flour in the bowl for my mixer and added the salt and cinnamon. I used the paddle attachment and set the mixer to stir to combine the two, and then added the liquid. Once things were blended, I started to add the other 2 1/2 cups (12.5 oz) of flour a spoonful or two at a time. Once the dough started to come together, I stopped the mixer and switched to the dough hook. I kneaded the dough for 4 minutes with the speed set to about 2. Then I added the raisins and kneaded for another minute. I used a rubber spatula to scrape the dough into my prepped bucket and turned the dough around a bit to coat it with oil.

Once the dough doubled in size, I turned it out onto a lightly-floured counter. I used my dough scraper to cut it into 8 equal pieces (4.5 to 5 oz each). I rolled each piece into a long rope, joined the ends together and placed it on the parchment-lined pan to rise a bit. I had to work a bit harder to stick the ends together, since the dough was drier. Some of the raisins tried to escape, but I just poked them back in.

Once I had 4 or 5 pieces formed into bagel shapes, I put the first couple into the water. I ended up going with 2 1/2 minutes on each side and then transferred them to a kitchen towel on the counter to rest. The others went into the water in two batches of three each. Once all of the bagels were boiled, I put them back on the parchment-lined baking sheet.

Into the oven they went. I baked them for 25 minutes, then flipped them over and put them back in for another 10 minutes. The cinnamon makes the whole house smell incredibly good toward the end of the baking time. The really hard part is waiting for them to cool enough to eat.

Sunday, February 10, 2008

Bagels so good you'll cry


It's been a long week.  When I was talking to my mom last Sunday, I jinxed myself.  For the past month or so, somebody around here has been under the weather--colds and/or allergies.  I mentioned to her that I thought we were finally all pretty much well.  Famous last words... Brianna got sick on Monday and was home from daycare Tuesday through Thursday.  By the end of the day on Friday, Gillian had the same thing and has been sick all weekend.  Brianna's feeling much better, but still isn't quite herself--definitely more sensitive than usual.  And that's saying something, since she's been quite challenging to deal with lately--it's tough being five.

After last week's success with the bagels, I wanted to try them again, and the kiddos were being pretty cooperative this morning.  I knew that Jamie (my husband) would be happy with more experimentation--during the week he was looking for more recipes for me to try for other flavors that he likes (most notably egg bagels, which will undoubtedly be a future installment of the Bagel Chronicles).  Things were definitely easier the second time around, and I tweaked things a bit in the process, including using my stand mixer rather than mixing and kneading by hand.

The original recipe can be found here, as I mentioned in my last bagel post.  Here's pretty much what I did:

1 gallon water
1/4 cup packed light brown sugar

1 1/2 cups (12 oz) water (I used bottled since my tap water is extremely hard)
3 tbsp granulated sugar
1 1/2 tbsp instant yeast
3 1/2 cups (17.5 oz) bread flour (King Arthur), divided
1 1/2 tsp table salt (the original recipe was only 1 tsp)
canola oil

1 egg white
1 tbsp cold water
assorted toppings

The dough rises quickly, so I started off by adding the gallon of water to my biggest pot and putting it on the stove to bring it to a boil.  Once the water started boiling, I added the brown sugar and just turned it down to a simmer.  I also started preheating the oven to 400 degrees F, and I oiled my dough-rising bucket with a bit of canola oil.  I pulled out a large baking sheet and lined it with parchment paper.

I put the 1 1/2 cups of water in a 2-cup Pyrex measuring cup and microwaved it for one minute to heat the water.  I stirred in the sugar and yeast and set it aside for a couple of minutes.  Meanwhile, I put 1 1/2 cups (7.5 oz) of bread flour in the bowl for my mixer and added the salt.  I used the paddle attachment and set the mixer to stir to combine the two, and then added the liquid.  Once things were blended, I started to add the other 2 cups (10 oz) of flour a spoonful or two at a time.  Once the dough started to come together, I stopped the mixer and switched to the dough hook.  I kneaded the dough for 5 minutes with the speed set to about 3.  I used a rubber spatula to scrape the dough into my prepped bucket and turned the dough around a bit to coat it with oil.  

Once the dough doubled in size, I turned it out onto a lightly-floured counter.  I used my dough scraper to cut it into 8 equal pieces (about 4 oz each).  I rolled each piece into a long rope, joined the ends together and placed it on the parchment-lined pan to rise a bit.  


Once I had 5 or 6 pieces formed into bagel shapes, I put the first couple into the water.  They stayed in for 3 minutes on each side and then got transferred to a kitchen towel on the counter to rest.  The rest went into the water in two batches of three each.  Once all of the bagels were boiled, I put them back on the parchment-lined baking sheet.  I whisked the egg white and water together and brushed it on the tops of the bagels.  Then I added toppings.  I made sure to make three salt bagels this week, since Brianna complained about not getting one last week.  I did three sesame, and branched out a bit and did one garlic and one onion this week.  For the onion and garlic toppings, I rehydrated dried minced garlic and onion with a bit of boiling water.  It worked pretty well.  


Into the oven they went.  I baked them for 25 minutes, then flipped them over and put them back in for another 10 minutes.  The onion and garlic made the kitchen smell great!  It was really hard to wait for the bagels to cool enough to cut well.  Finally, they were ready.  I got Brianna's bagel ready for her.  I thought she'd be excited, since I made a point of making her a salt bagel and I put her favorite garlic cream cheese on it.  Instead, I got nothing but tears and complaints.  She didn't want that particular bagel, she wanted a different one.  I didn't put the cream cheese on the right way.  She didn't like the way I cut it.  *sigh*  Some days I just can't win.  Eventually the crying stopped, and she did eat part of it.  


Sunday, February 3, 2008

I dare to make bagels...


I love good bagels, and they're hard to come by here in the heart of Texas.  They're something I've thought about making, but I just haven't gotten around to trying them.  Several of my cookbooks have recipes (The Bread Bible and Desserts by the Yard are a couple), but I was looking for something that could be done in a couple of hours.  

As I've been reading various blogs, I've run across numerous references to the Daring Bakers. Many of the things they've challenged themselves to make are things I've been wanting to try, like croissants.  And one of the things that they've already done (in June 2007) is bagels.  

The challenge I chose to duplicate can be found here, at All Things Edible.  I made half a batch (8 bagels).  One of the things that I really like about the Daring Bakers is that they really help each other out, and give good feedback on how the monthly recipe worked (or didn't). Thanks to reading the article several times, I knew that the dough would rise fast, so I made sure to start my water simmering early.  As I read on a number of blogs, my bagels didn't sink at all--they floated immediately.  I started with two bagels in the water, but for the second and third rounds did three at a time, which just barely fit in the pot:


I'll have to work on the timing a bit more next time, since the bagels that were still waiting their turn for a dunk in the water definitely rose more than the earlier ones.  The boiled bagels had an interesting texture, firm but a bit sticky on the outside.  For shaping, I made ropes and joined the ends.  The first couple that I did I didn't join quite well enough, and they tried to come apart in the water.

I went for several different toppings.  I left three plain as a control, and did three sesame.  For the other two, I went with my favorite topping, salt.  We don't get to eat salt bagels very often, since they get soggy on top very quickly.  On the whole, I was happy with these for a first try.  When I make them again, I think I'll up the salt in the dough a bit--the bagels seemed a bit sweet to me.  I would also like to try substituting whole wheat flour for some of the bread flour.  And my shaping should improve with practice.  One thing's for sure--I think these have already spoiled me--I'm not sure I can go back to the ones we've been getting at Central Market.  Those aren't bad, but how can you beat fresh from the oven taste?