Pages

Tuesday, November 30, 2010

The devil went down to Georgia


I really wish Mother Nature would make up her mind what season it is here in central Texas.  Saturday morning when I got up, it was in the mid-20s.  Today it was about 75ºF.  Tomorrow night it'll be below freezing again.  I'm so ready to be done with the temps in the 70s for a while.  The calendar almost says December, and I want it to feel at least a little like Christmas is approaching.  So I'm doing what I can to get into the right frame of mind.  I have some pretty snowflake earrings, and a string of Christmas lights necklace.  (Both get lots of comments from my customers at work.)  And I started pulling out the wrapping paper to use as backgrounds for my blog photos. =)

This week's Tuesdays with Dorie recipe is a little seasonally confused, too.  Tania of Love Big, Bake Often (who currently lives in Savannah) picked Devilish Shortcakes for us to make.  I typically consider shortcakes to be a summer dessert, and wouldn't think to make them at the end of November.  But these aren't typical shortcakes--they're chocolate!  And since I love chocolate with berries (especially raspberries), this recipe sounded like a winner regardless of what the calendar says.


Shortcakes are basically biscuits, and not all that hard to make.  You mix together dry ingredients (including cocoa powder for these chocolate ones), rub in butter, add wet ingredients & gently mix.  I added about 1/3 cup (70g) of mini chocolate chips before I added the wet ingredients.  I only made half the recipe, and formed my shortcakes using my #16 (1/4 cup) disher.  I got eight, and baked them for about 15 minutes.

For serving, I went with some organic raspberries that I picked up at Central Market.  I thought I was going to have to go with frozen berries, but these looked really good (and while they were a bit more expensive than frozen, they weren't totally outrageous).  I mixed the berries with some raspberry fruit butter that I thinned with a little water and a couple splashes of framboise.  And to boost the chocolate flavor, I made a quick sauce by melting together some chocolate and cream, and adding some vanilla and dark rum.  Naturally, there also had to be some whipped cream.


The verdict?  To be honest, after reading the comments on the P&Q from Nancy and Caitlin, I was a bit worried.  By themselves, the shortcakes seemed somewhat dry and not very sweet, even with the added chocolate chips.  But put together with the saucy raspberries and with an extra hit of chocolate, this was a very tasty dessert.

If you'd like to give these shortcakes a try for yourself, you can find the recipe on Tania's blog.  And to see what everyone else thought of this week's pick, check out the Links.


Thursday, November 25, 2010

Thankful


It's been a while since Brianna lost another tooth.  But that changed when I picked her up from daycare (because she didn't have school) on Wednesday.  She had a tooth that was just barely hanging on.  As has often been the case, I ended up having to pull it the rest of the way out for her, because it was bothering her so much.  It didn't take much.  As we were driving home, B mentioned that she wanted to write a note to the tooth fairy to put under her pillow along with the tooth.  Once we got home, she got to work on it.  She drew pictures of turkeys (see below), and wrote "Gobble! Gobble! Gobble! What are you thankful for? Write bellow (sic) two things."  Hey, nobody told me that this tooth fairy thing was going to involve essay questions...

Thank goodness Brianna has always been a sound sleeper.  It definitely makes the whole tooth fairy thing a lot easier.  Teeth are one thing--they're small, and B puts hers in a little pouch that's pretty easy to find, even under a pillow in the dark.  Turns out it's a lot more nerve-wracking to try to remove an 8½x11 sheet of paper from under the pillow of a sleeping child.  The tooth fairy folded it up after writing her answers, making the return a lot less harrowing. =)


After some consultation with others online, I came up with some answers for the tooth fairy. (You can see them here.)  As for me, I'm thankful for creative kids with active imaginations.  And I'm thankful that I'm not the turkey in the picture above. (In case you can't quite tell, that's a turkey on a table, and a turkey on a spit, and a live turkey in between, looking scared.)  Oh, and I'm very thankful for pie.

I'm running a bit late for this week's Tuesdays with Dorie, but that was kind of on purpose.  This week is a rewind week, meaning that we are free to pick whatever past recipe we'd like to make this week.  Things were a bit crazy last month when Janell of Mortensen Family Memoirs picked the Caramel Pumpkin Pie, and I didn't have time to make it.  So I figured Thanksgiving would be the perfect time to try it out.  Jamie loves pumpkin pie, but I don't make it very often since I don't like it.  (It's the custardy texture that turns me off; I love most other pumpkin baked goods.)  


I had some of Dorie's pie dough stashed in the freezer (from when I made apple pie last month), so I pulled it out last night and put it in the fridge to thaw.  This morning, I rolled it out, put it in a pie pan, and blind-baked it.  (I have a bunch of black beans that I reserve for use as pie weights.)  The edges of the crust started to get rather browned when I was doing the initial bake, so I made sure to shield them with foil when I baked the filling.  The filling starts with making caramel using the dry method, meaning that you just put sugar in a pan and start heating it.  It quickly starts to melt and caramelize.  I didn't want the filling to be bitter, so I was careful not to let the caramel get too dark.  Cream, butter and rum are added to make a caramel sauce.  

I changed the mixing order for the rest of the filling, first mixing the spices (cinnamon, ginger & a bit of allspice) with the sugar to make sure they were evenly dispersed.  I whisked the eggs in separate bowl, added the sugar mixture, then added the pumpkin and vanilla.  Finally the caramel sauce went in.  I baked my pie for a total of 48 minutes, at which point the edges were starting to puff up and the center was just set.  As the pie cooked, the filling settled to an even layer.  It had plenty of time to cool to room temperature before we sampled it.


The verdict?  I'm pretty sure I'll never be a big fan of pumpkin pie.  That being said, I did have a small taste of this one, and the flavor was very nice.  The rum and caramel flavors were lovely with the pumpkin, and I liked the combination of spices as well.  Jamie really liked the pie, and so did Brianna.  Gillian did try some, but decided she'd rather eat apple pie.  I'm with her. =)

If you'd like to try this recipe for yourself, you can find the recipe on Janell's blog.  To see what everyone else made for this rewind week, check out the Links!


Monday, November 15, 2010

I like big bundts, too


For the past year (not counting our summer hiatus), I've been part of a fun activity with a bunch of other bloggers/bakers.  Each month, we bake and send each other treats.  It's kind of like Secret Santa, but with baked goods, so it ended up with the name Secret Baker.  I've participated every month so far, but was actually thinking of sitting this one out.  Then I got an email from this month's organizer, Kayte.  She said that the theme for the month was Bundt Cakes, and the targeted shipping date was November 15th.  Now as an avid reader of The Food Librarian, I'm well aware that November 15th is National Bundt Cake Day.  So how could I resist? =)  (As it turned out, Kayte didn't know about the significance of the theme and date until I mentioned it.)

Mary, the Food Librarian, is crazy for bundt cakes.  (And I mean that in the best possible way.)  Last year, she posted 30 bundts in 30 days, leading up to the grand finale on National Bundt Cake Day.  And despite vowing never to do it again, she decided to repeat this impressive feat this year.  She welcomed everyone to join her in celebrating today by making bundt cakes of our own.  After she was sweet enough to make a cake that I suggested to her, I knew that I absolutely had to join in.  


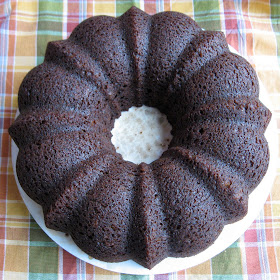
For my Secret Baker recipient, I knew I wanted something with fall flavors.  But I didn't want to try something brand new, since I wouldn't be able to sample the finished product.  (It would be awfully tacky to send a bundt cake with a piece missing.)  I turned to one of my favorite magazines, Fine Cooking, and checked some of the recipes that I have bookmarked online.  I settled on the Espresso Gingerbread Cake.  I've made it before, and it's delicious.  The espresso works well with the dark molasses and spices in the cake.  I thought about buying a new bundt pan, since I've really been wanting this one.  But I'm trying to be good, and well, Christmas is coming. =)  So I went with my Classic Bundt pan.  It makes a very pretty cake.  


The batter is pretty straightforward to make, using the creaming method.  The liquid comes from brewed coffee or espresso, but I don't usually have those on hand, so I used water with some additional espresso powder added.  Espresso powder also gets included in the dry ingredients, along with ginger, cinnamon, nutmeg and cloves.  The batter filled my bundt pan about halfway, and the cake took 40 minutes to bake.  I wasn't sure about adding a glaze since I'd be wrapping and shipping the cake, so I ended up brushing it with syrup instead.  I made the syrup by mixing 100g of turbinado sugar with 50g of water in a Pyrex measuring cup.  I heated the mixture in the microwave for a minute, and whisked to dissolve most of the sugar.  Then I added half a tablespoon of dark rum and a big pinch of kosher salt to the syrup.  I brushed the bottom of the cake with the syrup while it cooled in the pan for a few minutes before I turned it out of the pan (onto a cardboard cake round).  Then I brushed the syrup all over the rest of the cake.  I only ended up using about two-thirds of it.

The only other time I've shipped a bundt cake, it had a similar syrup, and I think that helped it stay moist during its travel.  Once the cake was completely cool, I wrapped it (cardboard and all) in several layers of plastic wrap.  Then I wrapped it in heavy duty foil.  Then it will go into a box with lots of crumpled newspaper for padding and be sent on its way.


The verdict?  Well, that's hard to say right now.  I'll come back and let you know once the recipient gets it, later this week.  Update: I heard from Tracey, and she really liked the cake. Yay! And it got there in excellent condition. 

In the meantime, head over to Mary's blog to see all the great cakes she's baked in the past month.  She'll probably have a recap of them today.  And in a week or two, she'll have a lot of the other great bundt cakes that are being posted around the web today.  If you'd like to try the one I made, you can find the recipe here.  Here's a peek at the rest of my bundt pan collection, as well. (On the left, my two mini bundt pans; they hold three cups each.  On the right, my fancy Kugelhopf pan.)  Happy National Bundt Cake Day!

Friday, November 12, 2010

Playing catch-up


How much menu planning do you do?  We shop once a week--okay, technically twice, since we shop at both HEB and Central Market each weekend--so I plan meals a week at a time.  I try to plan a mix of things, since I know there will be nights when I get home late and won't want to cook anything complicated or time-consuming.  Some meals will be eaten as a family, and some will be done in two seatings (feed the girls to get them to bed, then J & I eat later).  The nights we shop (generally Friday and Saturday) are a free-for-all.  We all eat different things, depending on what jumps into the cart.  Jamie often eats sushi, since he's the only one who likes it.  Salads are popular as well.  One night during the week, we often eat homemade pizza.  And I try to plan something for Sunday or Monday that will have lots of leftovers so that I have something to eat for lunch for the week.  Sunday is also my day for making those more complicated or time-consuming things. =)  

That would include some of the French Fridays with Dorie recipes.  One of the recipes for November is Roast Chicken for Les Paresseux, aka Lazy People. =)  I managed to make this one last Sunday.  When I was growing up, we almost always had Sunday dinner, and we'd often have a roast of some sort.  We don't do that very often these days, but it's nice when I have the time and energy to make something more involved.  We had the chicken with mashed potatoes and roasted green beans.  I actually stole the potatoes from the Hachis Parmentier recipe.  I did make that one a couple weeks ago, and while I didn't like it that much with the sausage, the potatoes on top were fantastic.  (Jamie really liked it, though, and happily ate the leftovers.)   


This particular recipe didn't provide me with much in the way of lunch (I tend to go with things like casseroles, spaghetti, soup, etc. for that), but the leftovers did come in handy.  I had leftover potatoes and most of a bunch of rosemary, and I saved the half of the garlic head that was roasted outside the chicken.  So I was all set for my next bread recipe in the BBA Challenge, Potato Rosemary Bread!


The last bread I posted for the BBA Challenge was the Pane Siciliano back in July.  I skipped over the Panettone for now, but plan to make that in December.  I made the Pizza Napoletana for Daring Bakers a couple years ago.  I did make the Poolish Baguettes and Portuguese Sweet Bread back in August, but didn't get as far as posting about them.  I liked the Poolish Baguettes better than the French Bread baguettes that I made, mainly because I think the addition of whole wheat flour added flavor to the bread.  The Portuguese Sweet Bread made excellent french toast, but was a bit light in texture for regular toast.  Both were good, and I'm glad that I tried them.  But I was quite excited that the next bread was a decidedly savory one.  

The Potato Rosemary Bread starts with some biga for a preferment.  The full biga recipe in the book makes 18 ounces, but I only needed 7 ounces.  Fortunately the math gets a lot easier when you convert to metric, since 7 ounces is 200 grams.  So I ended up using 120 grams of bread flour, 80 grams of water, and about 1/8 teaspoon of instant yeast.  The biga needed to ferment at room temperature for a few hours, then went into the fridge for the night. 

You're supposed to take the biga out of the fridge about an hour before you want to make the final dough, but that timing didn't work for me on Thursday.  Since I was working with a cold preferment, I compensated by using warm water instead of room temperature.  I also warmed up the mashed potatoes (in the microwave) so they wouldn't make the dough too cold.  I mixed the biga with the water, then added the potatoes and some olive oil.  Next in were the flavorings of chopped rosemary and black pepper.  Finally, I mixed in the bread flour, salt and instant yeast.  I mixed the dough by hand initially, using my dough whisk.  Then I used my stand mixer with the dough hook to develop the dough.  Once the dough was close to ready, I took it out of the mixer, added the roasted garlic, and finished kneading by hand.  Then it went into my 2-quart dough bucket to rise.  Once the dough was doubled, I portioned it into 60 gram pieces and formed them into round rolls.  (I ended up with 17.)  I baked them for a total of 20 minutes, and the house smelled fantastic by the time they were done.


The verdict?  This bread is fantastic!  Everyone here loved the rolls.  I will definitely be making this recipe again--maybe even this weekend, since I still have some leftover mashed potatoes.  The rolls are great, but I'd like to try a larger loaf as well.  

If you'd like to try the chicken recipe, I highly recommend that you get your hands on a copy of Around My French Table.  For tips from some of the other members of the group, read the P&Q as well.  For the bread, check out Peter Reinhart's book, The Bread Baker's Apprentice.  There are many, many wonderful breads in this book.  Next up, Pugliese.

I'm submitting these rolls to Yeastspotting.


Tuesday, November 9, 2010

Lingering over dessert


So how many of you stock up on stuff to make sure you don't run out of a favorite ingredient?  I'm not talking about things like flour and sugar, though I keep those well-stocked.  I'm talking about the 4 or 5 jars of raspberry fruit butter in my pantry.  And the extra couple bottles of golden syrup.  The four cans of pumpkin.  (Is that enough? Maybe I need to buy some more.)  Combined with the staples I keep on hand, it's amazing what I can whip up at a moment's notice.   I should clarify--I'm just talking about baking.  For instance, I once had no problem making a pumpkin ginger pound cake at the last minute for an occasion at work, but the same night had trouble coming up with something that I could actually cook for dinner. =)  

Last December, I added cranberries to the list of ingredients that I hoard.  It was the end of the season, and I was able to pick up a bunch of bags of them for a good price.  I picked through them (since a few were clearly past their prime), bagged them up, and stashed them in the back of my freezer.  So I had no problem making the cranberry upside-down cake for Tuesdays with Dorie a couple months ago.  And I was all set for the recipe that my blogging friend Jessica picked for this week.  She chose a recipe that I didn't even realize was in the book, Not-Just-for-Thanksgiving Cranberry Shortbread Cake.  


I think it takes longer to say the name than to actually make this dessert. =)  That worked out for me, since I had to work last weekend and didn't have much time to bake.  I made the filling Sunday night, so it would have time to cool.  It was basically like making cranberry sauce.  The filling mixture consists of cranberries and sugar, along with zest, juice and chopped segments from an orange.  These are all boiled together into a thick jam.  I let it cool overnight, and finished making the cake Monday night.

The cooled filling is sandwiched between a couple layers of what is more or less cookie dough--butter, sugar, vanilla, eggs, flour, salt and baking powder.  The recipe calls for a 9" round springform pan, but I changed that.  Dorie mentions in the recipe notes that a double batch can be baked in a 13"x9" pan, so I figured a single recipe would fit nicely in an 8" square pan.  (I used a Pyrex one.)  (I also saw that my blogging friend Pamela used a square pan successfully.)  For the bottom crust, I didn't roll out the dough, I simply pressed it into the pan.  I put the pan and the dough for the top layer in the fridge to chill while the oven was preheating.  When I was ready to bake, I spread the cranberry filling over the bottom crust.  Then I rolled out the second portion of dough between a couple of pieces of waxed paper and carefully laid it on top, tucking in the edges as necessary.  I sprinkled the top with sugar, and baked the whole thing for 35 minutes.


The verdict?  As many others have said, this recipe was surprisingly good!  Not because I expected it to be bad, more because I didn't really know what to expect.  The finished dessert reminds me of a couple other things I've made--Bakewell Tart and the Russian Grandmothers' Apple Pie-Cake (another long TWD recipe title).  I think there was a really nice contrast of tart and sweet between the filling and crust.  As for everyone else, well, Gillian loved it while Brianna did not.  No surprise there.  I took a bunch to work and it got rave reviews there as well.  I'll definitely be making this cake again; I can't wait to try some different fillings.

If you'd like to try this one yourself, you can find the recipe on Jessica's blog.  And to see what everyone else did, check out this week's Links.  


Sunday, November 7, 2010

That blessed arrangement, that dream within a dream


There's no question about it--my husband is much better at gift-giving than I am.  He clearly puts a lot of thought into it and comes up with lots of great things, many of which I wouldn't think of for myself.  He's directly responsible for my love of cooking magazines, for instance.  About 10 years ago, I had the flu.  The real deal--I was extremely miserable for most of a week.  To make me feel better, Jamie brought me an issue of Fine Cooking to read while I was stuck in bed feeling horrible.  I had cookbooks, and watched cooking shows on PBS, but I'd never actually read a cooking magazine.  All it took was that one issue, and I was hooked. =)  


He's continued to feed my baking and cooking obsession hobby.  He's responsible for quite a few of the cookbooks I've acquired in the past several years, especially since I started blogging.  For our anniversary a couple weeks ago, he got me another gift that I'll be able to use a lot.  He checked some lists of traditional anniversary gifts.  This was number eight for us (though we were together five years before we got married, as well).  There are a few variations, but one of the options for #8 is pottery.  So he went to a wonderful local gift shop and got me a couple of lovely pieces.  One is the gorgeous serving tray pictured in the photos in this post.  (I'm sure the other will make an appearance soon.)  I pretty much immediately wanted to bake something just so I could take photos. =)  I've been having a hard time writing bread posts lately, partly because I think after a while it's hard to come up with interesting pictures.  This was the perfect thing to get me going again.  (And yes, he did consider that I could use the dishes for blog photos.)


To start with, I chose a bread that I've been wanting to make again for a while.  The recipe is from one of my favorite bread books, Peter Reinhart's Artisan Breads Every Day.  The official name is Soft Rye Sandwich Bread.  I just refer to it as sourdough rye, since it does use a sourdough starter for the preferment.  The final dough is spiked with a bit of commercial yeast as well, which means the bread doesn't take forever for the final rise. =)  The great thing about a lot of the recipes in this book is that the doughs require minimal kneading, since they get a long, slow fermentation in the fridge which allows time for the gluten to develop on its own.  The dough can be held for several days, too, so you can bake when you have time.  

The rye flour is just in the perferment, so the rye flavor is fairly mild.  A bit of molasses in the dough adds some flavor and color.  You have the option to add some cocoa powder as well, to darken the color, but I skip it.  Caraway and orange oil are other optional flavorings, but I go for the plain version.  The dough can be baked in loaf pans, or as freeform loaves, which I prefer.  This time, I made the dough into two bâtards.  I dusted the tops with a bit of flour, which makes them easier to score and makes for a nice contrast after baking. 


The verdict?  I love this bread.  I've made it several times now, and it's always delicious.  I can happily eat it just with some butter, but it also makes terrific sandwiches--especially with ham. I think everyone else likes it, too, but this one was mainly for me. =) I love the slight tang from the sourdough and the fact that since I made the bread, I can leave out the caraway, which I don't like. Mmm.

If you'd like to try this bread for yourself, I highly recommend getting the book (or checking it out from your library, if you can).  I've made at least a dozen recipes from it so far, and have enjoyed them all.  

For more wonderful yeasted treats, be sure to check out Yeastspotting!


Tuesday, November 2, 2010

No trick to these treats


Well, Halloween is over, so hopefully my girls will settle down a little bit before they start getting all worked up about Christmas.  I can hope, right?  Even after 12 years in Texas, I'm still not really used to the fact that it's not really cold for Halloween.  I can remember, as a kid, trying to fit sweaters under my Halloween costume so I wouldn't freeze to death.  I think there's only been one year since Brianna started trick-or-treating that it was actually chilly enough that she needed a sweater or jacket.  We certainly didn't this year--it was probably about 75ºF out when we headed out just after dark.  We didn't stay out long, though, since I was still getting over the cold I've had for the past week.  Even so, both girls came home with quite a bit of candy.  J said it was a somewhat slow night for handing out candy, too, so we actually had some left over.  I picked all the Almond Joys out of the bag and took them to work (no need for coconut in this house!), but still have some good stuff to eat, without having to swipe candy from my children. =)  They're getting old enough where they might actually notice if all the peanut butter cups disappear without them eating any...

In the midst of all the Halloween excitement and sugar, I almost forgot about this week's Tuesdays with Dorie recipe.  Which would have been a shame, since it has the wonderful combination of chocolate and peanut butter.  Nicole of Bakeologie picked the Peanuttiest Blondies for us to make this week.  I actually didn't make a lot of changes for a change.  I did leave out the cinnamon, since I don't like it with chocolate.  And my girls don't like nuts in things, so I substituted peanut butter chips for the chopped peanuts.  I lowered my oven temp to 325ºF since I was using a dark pan, and ended up baking my blondies for 45 minutes.


The verdict?  Well, I took a bunch of these to work, and they were devoured in no time, so I think they were a hit. =)  I really like them, too, and so does J.  I just realized that B&G haven't tried them, since they've been so preoccupied with all the candy.  So I guess I'll just have to make them again. 

Nicole has the recipe on her blog.  And to see what everyone else thought of this week's recipe, check out the Links.  I leave you with a picture of my trick-or-treaters.  I'm convinced that Brianna still wants to dress up as a princess, but doesn't want to admit it because it's not cool for a second-grader to dress up as a princess...

Belle and her sister, the Bride of Darkness